In this post I will provide some details about the demo SSIS project. I will then focus on version control and deployment.
What DILM Is and Is Not
Data Integration Lifecycle Management (DILM) is not about data integration development.
DILM is about everything else:
- Configurations Management
- Version Management
- Deployment
- Execution
Although DILM is not about development, implementing DILM will impact the design of SSIS solutions.
The remainder of this post focuses on obtaining the solution, getting some pieces of DILM in place, and deploying the SSIS project to the SSIS Catalog.
The Setup
I’m using SQL Server Data Tools 2016 (Visual Studio 2015) on a virtual machine named vmSql16. The VM’s operating system is Windows Server 2016.
The Project
My SSIS project is named MedicalDataDemo. It contains two SSIS packages of relative complexity: ProviderGetFile.dtsx and ProviderStage.dtsx. ProviderGetFile will attempt to connect to the CMS website and download the latest National Provider Index (NPI) zip file, then it unzips the file. (Yes, it does all this in SSIS using a couple/three snappy design patterns.) The file name and file status are stored in a database named Medical. The ProviderStage package reads the name of the file and loads its contents to a table in the Medical database. There’s a 2016 version backup of the Medical database included in the project, which you can download the project from Azure DevOps here.
Version Control
If you download the project and open it in SSDT, you may get source control messages. I added the project to source control, then “unbound” it before zipping it and sending it to Dropbox. Hopefully that was enough and you won’t see those pesky source control prompts.
That said, please use source control. If you do not have access to version control, create a (free) account at visualstudio.com. I use visualstudio.com version control for internal work; I’ve been using it since it was in beta.
[sql]
“There are two types of developers, those who use source control and those who will.” – Andy, circa 2005 [/sql]
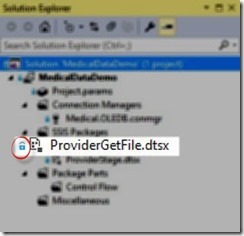
Once source control is set up, SSDT Solution Explorer will add indicators about the state of the solution (click to enlarge):
Deployment
The screenshot above shows me deploying MedicalDataDemo. Right-click the project name – MedicalDataDemo – and then click Deploy (click to enlarge):
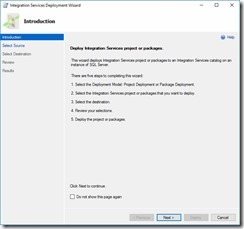
This opens the Integration Services Deployment Wizard (click to enlarge):
The first page of the Integration Services Deployment Wizard is an introduction. Click the Next button to open the next page in the process (click to enlarge):
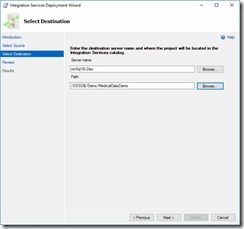
Note that the “Select Source” page is skipped. That’s intentional; the wizard knows you’re deploying from SSDT.
On this page you need to do some work. First, select a SQL Server instance that hosts an SSIS Catalog. If you’re scratching your head and asking, “What’s an SSIS Catalog?” that’s ok. Please see SSIS 2016 Administration: Create the SSIS Catalog for more information about setting up an SSIS Catalog.
Click the Next button to open the next page in the process (click to enlarge):
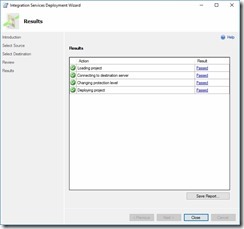
The Review page contains some helpful information. Did you know you can execute SSIS project deployments from the command line? You can, and the arguments portion of the command line are shown on the Review page of the Integration Services Deployment Wizard. Click the Deploy button to deploy the project and open the next page in the process (click to enlarge):
Once deployment is complete, the Integration Services Deployment Wizard should appear as shown above.
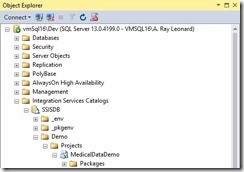
If you open SQL Server Management Studio (SSMS) and connect to the SQL Server instance to which you deployed the project, you can expand the Integration Services Catalogs node and drill down to the SSIS project you deployed:
The SSIS packages in our project are now ready for execution, but they will execute with the default values we configured at design time. Our next step is to set up some external configurations.
Conclusion
In this post we discussed the demo SSIS project, version control, and deployment. In the next installment, I will demonstrate how to use the SSIS Catalog to execute and monitor these packages.
:{>
—
You might like working with Enterprise Data & Analytics because we grok the SSIS Catalog.
—
Learn More:
SSIS Academy: Using the SSIS Catalog Day 1 – Create the Catalog and Deploy
Previous Posts in this Series:
An Example of Data Integration Lifecycle Management with SSIS, Part 0
Related Training:
SSIS Lifecycle Management (free recording, registration required)
IESSIS1: Immersion Event on Learning SQL Server Integration Services – April 2017, Chicago
IESSIS2: Immersion Event on Advanced Integration Services – May 2017, Chicago
From Zero to Biml – 19-22 Jun 2017, London



I am trying to complete An Example of Data Integration Lifecycle Management with SSIS Parts 1,2, and 3. However the link to the database Medical database seems to be broken. How can I obtain a copy of the database. I really need to understand the information in your example for a work project. Any assistance would be appreciated.
Thank you
Hi Stacy,
Apologies for the dead link. It has been corrected.
Hope this helps,
Andy