In Want to Learn SQL Server 2012? I wrote about obtaining a fully-featured version of SQL Server 2012 (Developer Edition).
This post represents one way to install SQL Server 2012 Developer Edition on a Hyper-V virtual machine running the Windows 2012 Server Standard Edition operating system. This is by no means exhaustive. My goal in writing this is to help you get a default instance of SQL Server 2012 up and running. I do not cover setting up the Hyper-V virtual machine. I begin after loading the SQL Server 2012 Developer Edition ISO file into the VM’s CD/DVD drive.
Navigate to the installation drive folder. Right-click setup.exe and click “Run as administrator” as shown in Figure 1:
This starts the SQL Server Installation Center. Click the Installation page from the list on the left side, and then click the top link (“New SQL Server stand-alone installation or add features to an existing installation”):
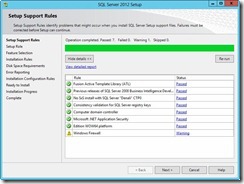
Setup conducts eight checks for things that could interfere with a successful installation of SQL Server:
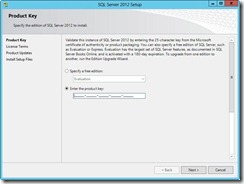
Next, enter the product key. If you are installing SQL Server 2012 Developer Edition, the value appears for you on the screen shown in Figure 4:
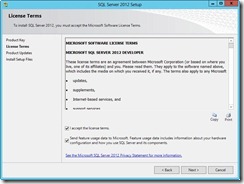
The next screen prompts you to accept the license terms. You can also opt to send anonymous feature usage data to Microsoft. I do this and recommend you do too. Why? Microsoft actually uses this data to qualify and prioritize future development efforts.
Setup checks for conditions that may interfere with the installation of setup support files:
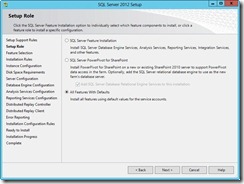
You next select the setup role in the installation process. I like the option “All Features With Defaults,” as shown in Figure 7:
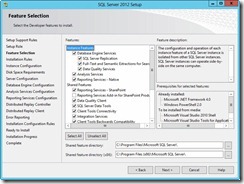
When you select the “All Features With Defaults” option, the next screen – Feature Selection – is prepopulated, as shown in Figure 8:
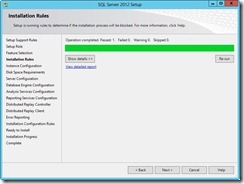
Setup next checks installation rules:
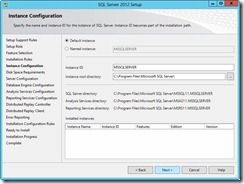
Figure 10 shows the next step in the process, SQL Server instance configuration:
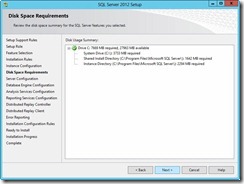
Disk space calculations are next…
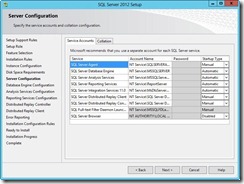
… followed by service account configuration:
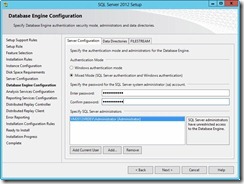
Database engine configuration includes Authentication Mode and SQL Server Administrators. You can accept the defaults if you want. I use Mixed Mode Authentication (combined with very strong passwords) for my installations. Clicking the Add Current User button adds me to the SQL Server administrators, as shown in Figure 13:
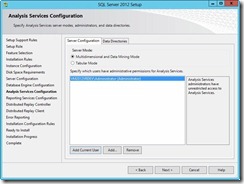
Analysis Services setup is next. Although Figure 14 does not show it, I mostly work with Tabular Model these days. As before, I click the Add Current User button to add this account to the Administrators:
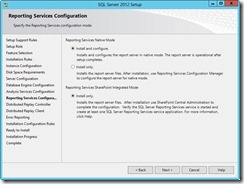
Accept the defaults for Reporting Services configuration as shown in Figure 15:
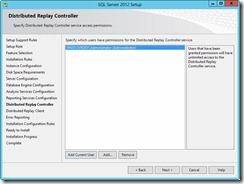
I haven’t used the Distributed Replay Client (DRC) yet, but it is on my list of SQL Server 2012 stuff to learn. I click the Add Current User button:
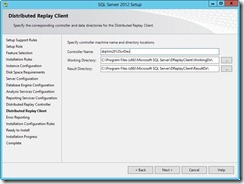
Give the DRC a name similar to the server name, as shown in Figure 17:
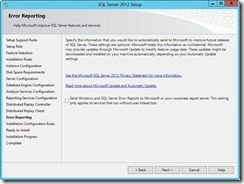
Select Error Reporting options as shown in Figure 18:
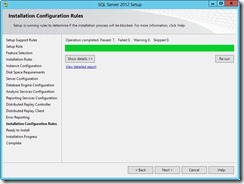
Installation configuration rules are checked for consistency and readiness, shown in Figure 19:
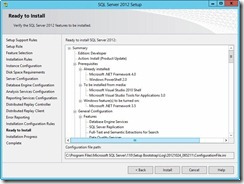
Figure 20 confirms the installation is ready to begin:
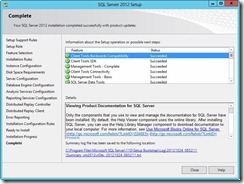
When the installation is complete, the Complete window displays as shown in Figure 21:
A bunch of new cool tiles appear on your Windows 2012 Server start page, as shown in Figure 22:
And you are done! Installation is complete and you are ready to begin exploring SQL Server 2012!
:{>


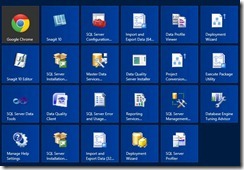
If nothing else the final shows why the "interface formerly known as Metro" doesn’t suit a server O/S.
Hey Andy,
Would love to hear your thoughts on the desktop tiles on servers. Thumbs up or down?
Hi Greg and Jim,
I don’t know yet about the Metro-style tiles. All I can say for now is "They are different." I haven’t yet formed an opinion about their usefulness, but I haven’t really had time, yet.
:{>
Having just done a production installation of SQL2012 on a Win2012 server, I can wholeheartedly concur with the annoyance of the Metro UI. It’s going to cause some pain for infrastructure folks for some time – we’re all going to need to get used to hitting the Windows logo key and typing what we’re looking for and hoping it appears.
Quick find over the weekend, right click tile, e.g. SSMS tile and select/click on bottom the "Open File location" and it will take you to what you would see "as shortcuts" in the old start>-programs-> etc…
Distributed Replay seems to be a tool that came out of the test group and was put into the product late in the game without a lot of thought or testing. The setup is incomplete and buggy, you need to spend hours debugging it until you understand that setup installs it wrong. It needs more work and is NOT ready for the mainstream.
I’ve got a few Windwows Server 2012 VMs and physical boxes around the place now. I reckon I’ve looked at the start screen maybe 5 times total – it just hasn’t been a big deal.
The only server where I’ve used it was a terminal server I set up on which I deliberately turned on desktop experience, etc 🙂
My habits may not be like other users, but I’ve always hit the Win key on the keyboard and just typed to get what I want. That, or I did Win+R and typed ssms, winword, devenv, cmd, http://www.*.com, etc to get what I wanted. Mousing around and pecking through the XP/Vista/7 start menu drives me nuts. I have organised a few tiles on the "metro" start screen for desktop apps and it’s working pretty well although it’s effort to get right.
You can also run "Classic Shell" – it’s free and brings back a version of the start menu. I run it on Win 7 and disable all of its classic shell stuff except for bringing back the display of the security zone in Internet Explorer – it’s nice to know if the site I’m looking at was correctly recognised as local intranet, internet or trusted.
My 2c 🙂
When I installed Sql Server 2012 on Server 2012 Standard (test VM), after checking .Net 4.5 was enabled, install failed – required NetFX 3 wsa missing, and setup rolled back.
Sergio Govoni posted the solution here: http://sqlblog.com/blogs/sergio_govoni/archive/2013/07/13/how-to-install-netfx3-on-windows-server-2012-required-by-sql-server-2012.aspx
Pity the dependency checker in Sql Server 2012 installer doesn’t pickup the missing dependency 😉
If you can help me…..
sql server 2008 r2 on Windows 7
Problem : Large number of Links report serious headaches
when trying to install
sql server 2008 r2
on Windows 7 ( say on a laptop )
almost NO good SQL Server book has this installation done on Windows 7
Book authors often do not indicate OS/platform they used for installation/screen shots
except one book ( SSRS 2008 by Jayaram Krishnaswamy isbn – 978-81-8404-781-3 / see pg 14 )
has it on Windows XP
Also, DBAs prefer clean slate ( machine ) to begin with
then installation success chance is very high
my Request now :
if you can indicate if
sql server 2008 r2 developer edition ( 32-bit OR 64-bit )
can be installed problem free
on Windows 7 professional (32/64 bit)
( it’s CLEAN new laptop I am going to use )
could not find any link W/O problem
Can you show screen shots of the report pages and or the errors please? it might be a combination of different issues.
Gracias NEXT….