
I started this series with the title “Azure DevOps, SSIS, and Git” in a post titled Azure DevOps, SSIS, and Git Part 0 – Getting Started. I am renaming it because “I do what I want!” Seriously, I renamed the series – changing “SSIS” to “Software Development” – because I’m going to write about more than just developing SSIS. And because…
SSIS is software development.
– Andy, circa 2006
Regarding the DevOps Mindset
In my humble opinion, DevOps is first a mindset. DevOps is a way of thinking that leaks into doing. DevOps is more cultural than technical.
Technology shifts are easy.
Cultural shifts are hard.
Applying DevOps
How do I begin applying DevOps, then? It starts with starting. Feel free to sing along at home. Peppered throughout this post you will find transparent notes from me describing my current understanding of how Azure Devlops, Git, and Visual Studio interact. I confess that – at the time of this writing – I continue to learn. If you read my post titled “You Do Not Know What You Are Doing” this should come as no surprise.
0. Create a Repo
I begin a new C# project. But then again, no. I start by browsing to dev.azure.com and creating a new project because when one uses Git in Azure DevOps, this is how one begins:
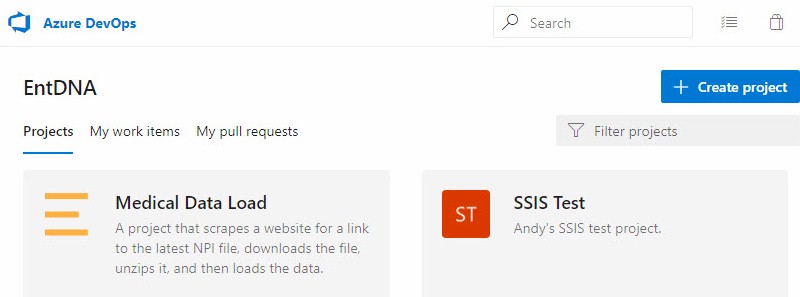
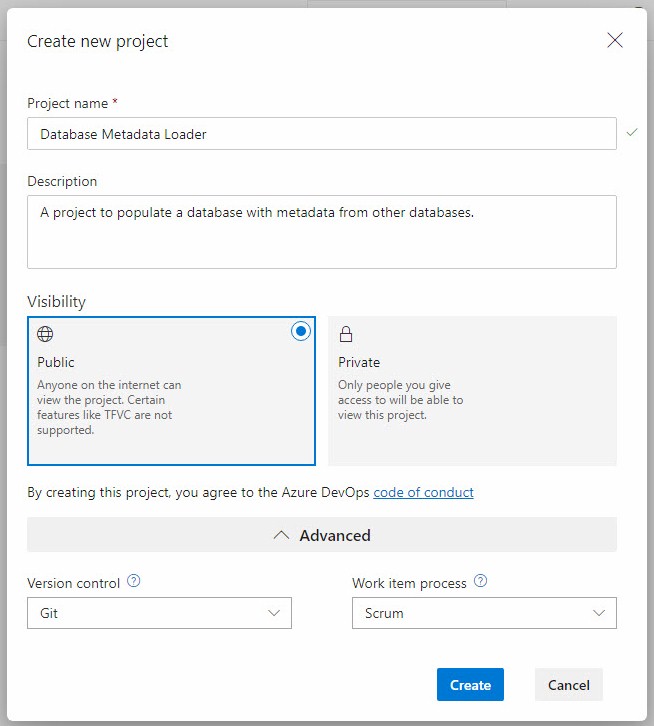
After signing in I create a new project by clicking the Create Project button. I am making this project public so you, Dear Reader, wlil be able to grab the code. I name this project Database Metadata Loader and provide an optional description. I select Public Visibility. I choose to use Git for Version Control and Scrum for the Work Item Process:
The Database Metadata Loader project is created:
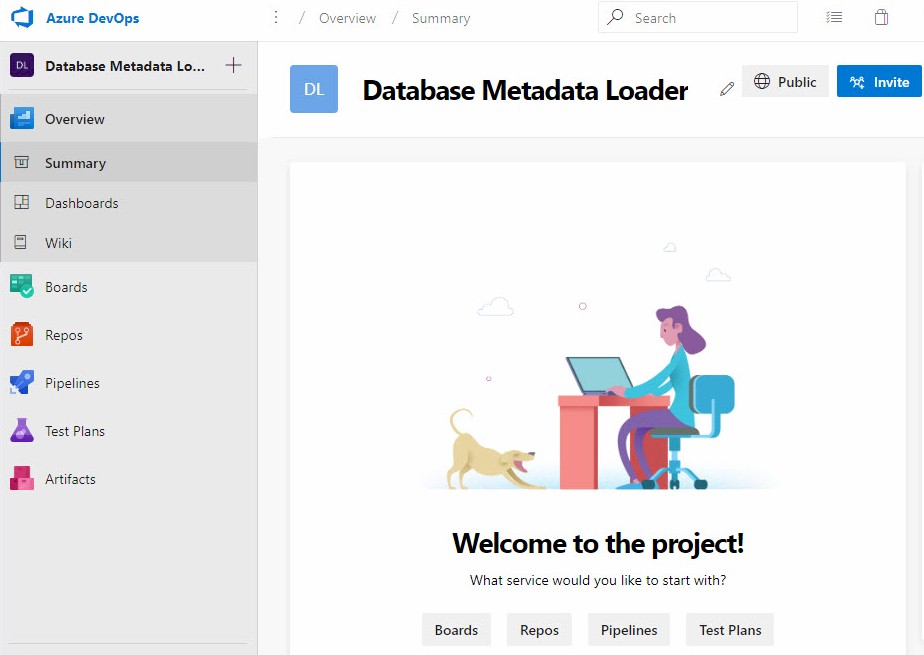
Once the Azure DevOps repository exists, it’s time to…
1. Connect Visual Studio to the Project
Open Visual Studio and connect to the new Azure DevOps project. This is so new to me that I return to my earlier post titled Azure DevOps, SSIS, and Git Part 0 – Getting Started – specifically the section titled “Connect to the Azure DevOps Project” – to remind myself how to do it.
I connect to the new project:
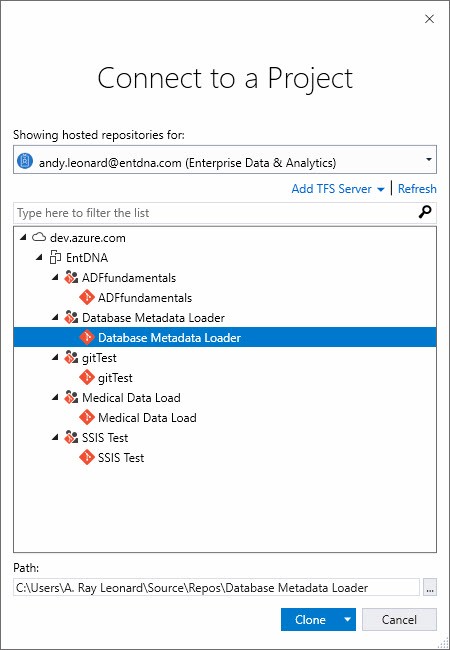
Learning from the last time around, I follow Visual Studio’s lead and click the Clone button. After the clone operation succeeds, Team Explorer presents the next step in the process, creating a new project “in this repository“:
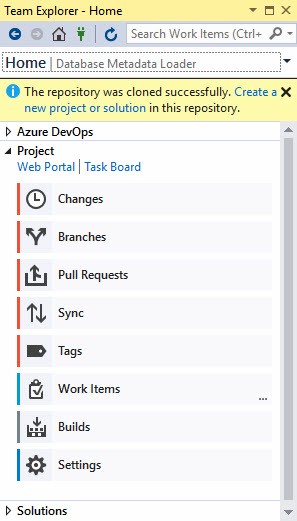
I find this step challenging after years of opening Visual Studio and immediately creating a new project. This feels… disjointed. I struggle through my CDO-driven (CDO is OCD with the letters in their proper sequence) discomfort because this is the way DevOps is done.
2. Create a New Project
Click the “Create a new project or solution” link in Team Explorer to open the Visual Studio New Project window:
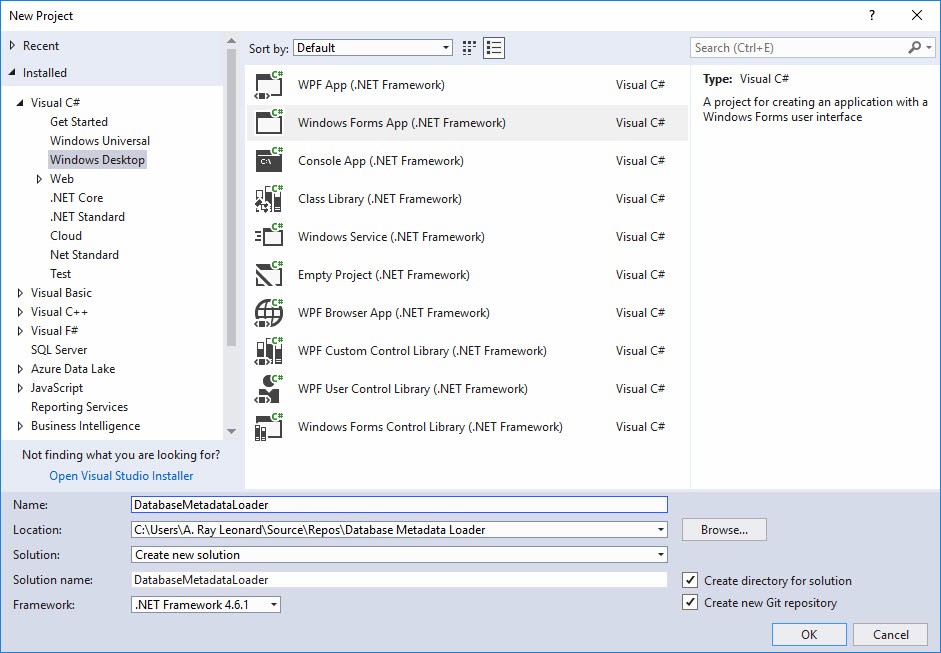
When I created this project I accepted most of the defaults, changing only the Project Name (to DatabaseMetadataLoader).
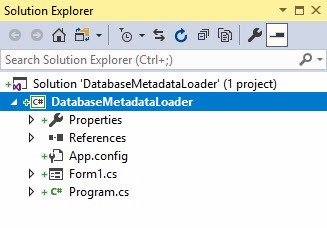
As before (in the section titled “Connect to the Azure DevOps Project in my post titled Azure DevOps, SSIS, and Git Part 0 – Getting Started), Solution Explorer indicates the project and artifacts have been added to Source Control via decoration with the green “+” sign:
3. Commit and Push
The next step is to commit and push from the Team Explorer Changes page. I enter a checkin comment which is required by default with git:
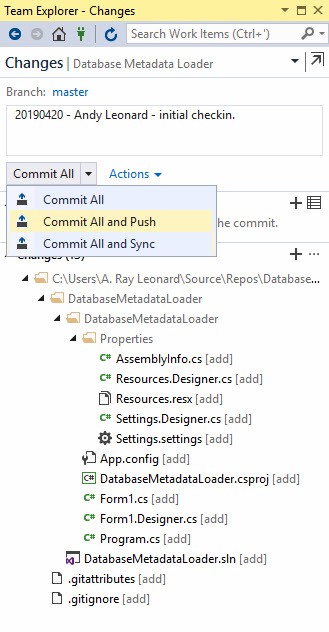
Commit adds the changes to the local repository. Push updates the changes to the repository:
I confess I do not yet have my mind around the differences between Commit and Push and Sync. I perform them in this order: Commit, Push (or Commit and Push) followed by…
4. Sync
Syncing is performed in the Team Explorer Synchronization window. Below is a before and after screenshot of the Synchronization window. In the screenshot on the left, I’ve executed a Push (after a Commit). In the screenshot on the right, I’ve executed a Sync.
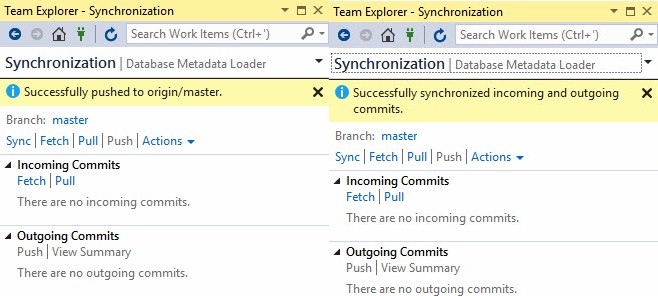
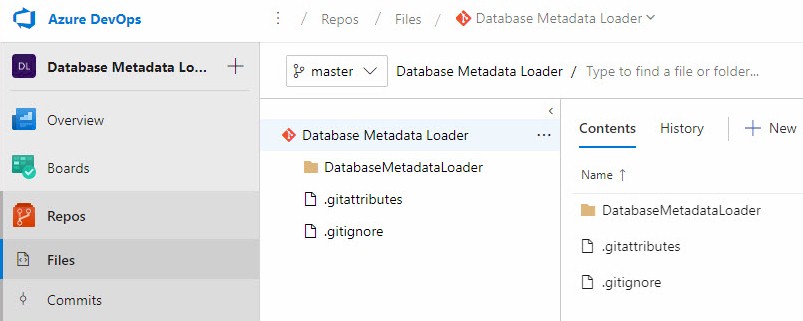
If I examine the Repos “folder” in Azure DevOps, my project files appear beneath Files:
I am stilll learning. I do not understand which Git actions correspond with which results when using Azure DevOps connected to a Visual Studio project. I will continue to learn. I believe the best way to learn is to invest time and effort working – even playing – with the technology one wishes to learn. Some of the best tools were once toys.
Conclusion
The code forDatabase Metadata Loader is publicly available. Depending on when you read this post, it may be in a different state of development.

Comments