
One way to keep confidential information confidential is to store confidential values in Azure Key Vault.
This post describes one way to provision an Azure Key Vault.
In addition to other values, I use key vault to store login usernames – as well as passwords – in key vault. Why? I don’t like storing half of the login information – the username – in plain text. In case I haven’t shared this with you, you should know I use a password generator to create usernames and passwords. In Azure, it’s common to use the same username and password in multiple locations, so when I change access credentials (You are regularly changing passwords, at least, right?), I can update both values in a central location.
One Way to Provision an Azure Key Vault
Navigate to the Azure Portal and connect to your account. If you do not have an Azure account, you may sign up at Azure.com.
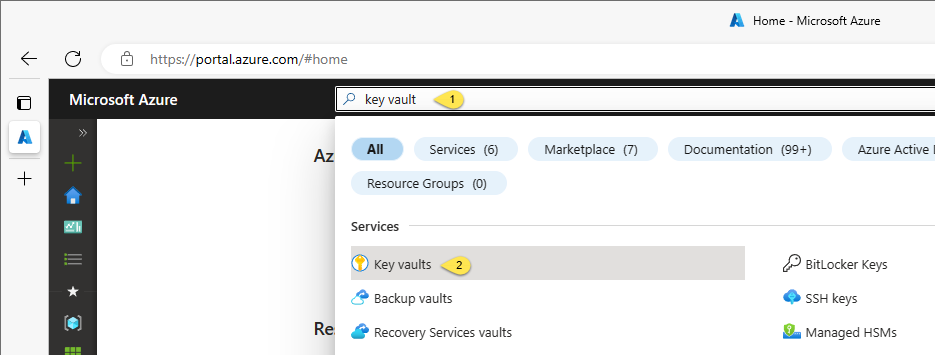
Once you connect, search for “key vault”, and then click on “Key vaults” as shown here:
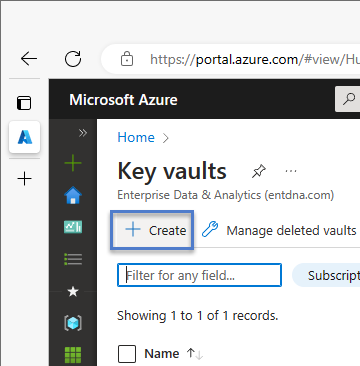
When the Key vaults blade displays, click the “+ Create” button to begin provisioning a new key vault:
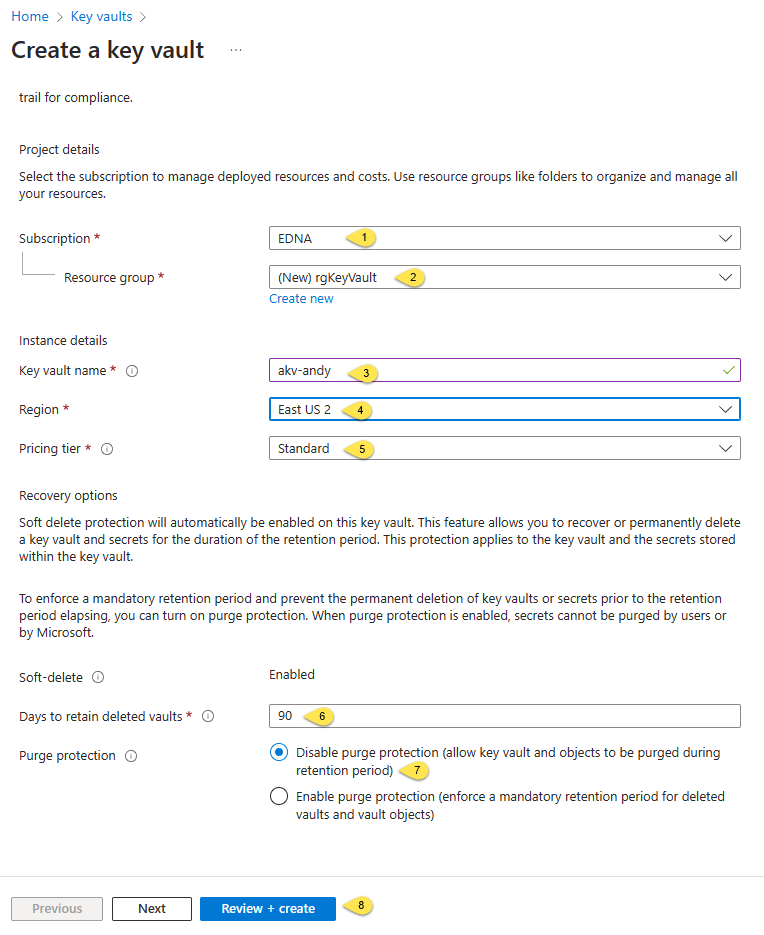
When the “Create a key vault” blade displays, select or enter properties:
- Select your subscription
- Select – or create a new – Resource group
- Enter a unique key vault name (the name you enter will be checked for uniqueness as you type)
- Select a region (I chose East US 2)
- Select a pricing tier (I chose Standard)
- Configure the “Days to retain deleted vaults” property (I stuck with the default – 90)
- Configure Purge protection (I again left the default setting selected)
- Click the “Review + create” button:
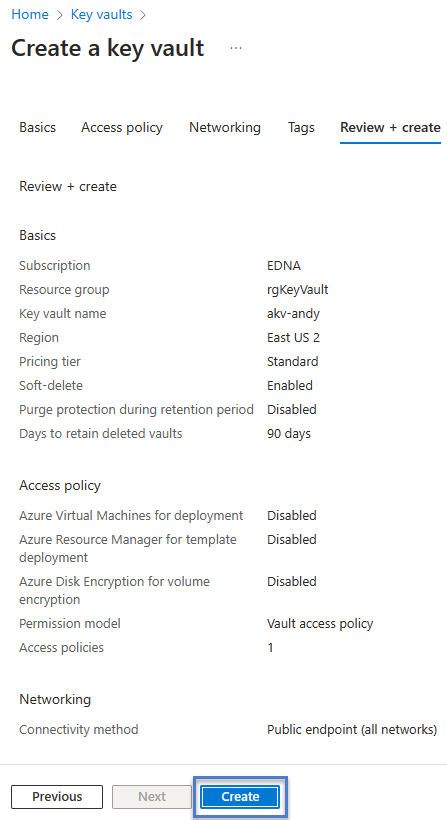
When the “Review + create” tab displays, review your configuration and then click the “Create” button:
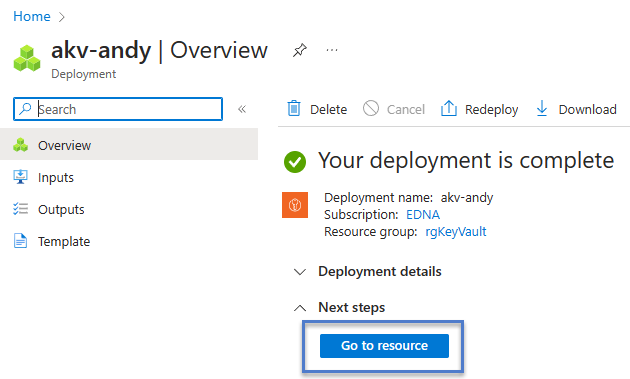
It usually takes a few minutes – ~5 minutes – to provision an Azure Key Vault. Once complete, the “Your deployment is complete” blade displays. Click the “Go to resource” button to proceed:
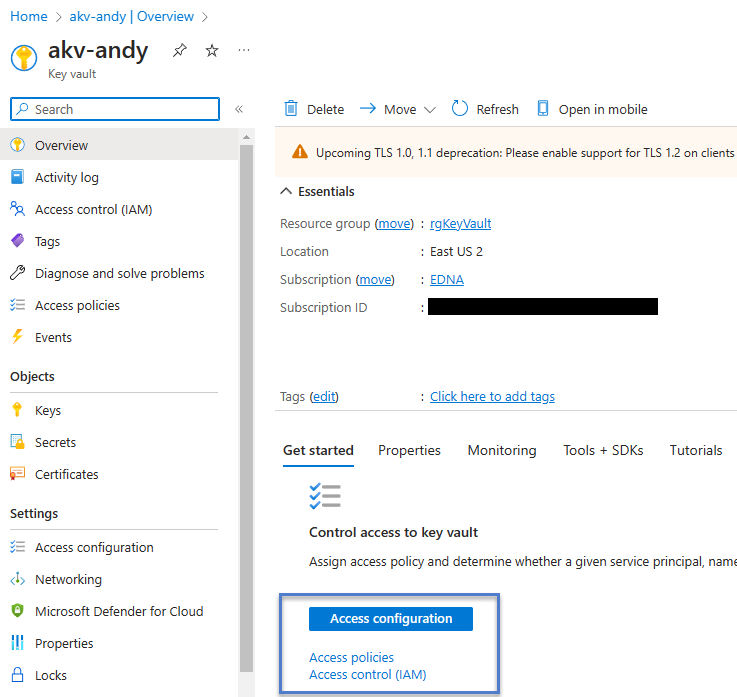
The Azure Key Vault Overview blade displays and includes a helpful collection of links related to “Access configuration”. I strongly recommend you click the “Access configuration” to proceed:
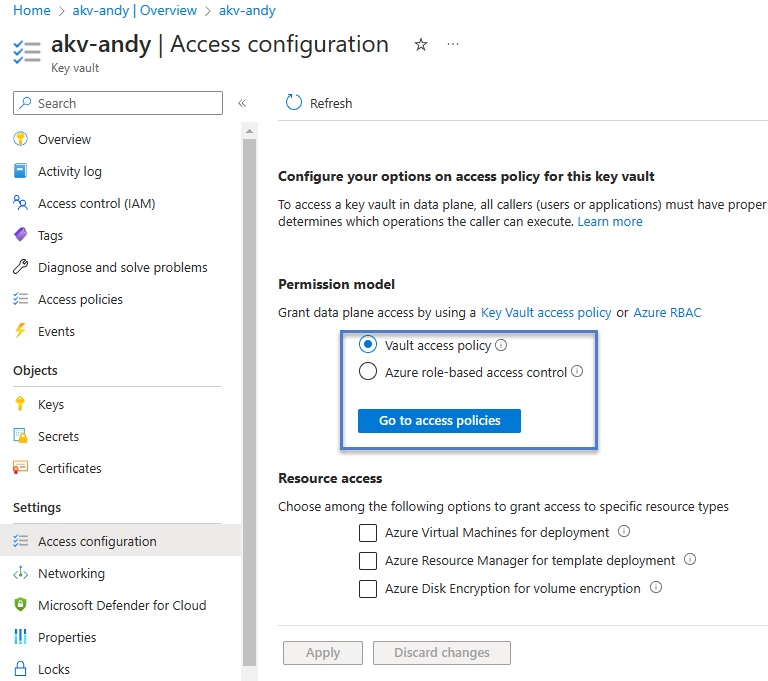
The Access configuration blade displays. The Permission model surfaces two choices:
- Vault access policy
- Azure role-based access control (sometime referred to as “Azure RBAC“)
Learn more about key vault permission models at the links provided (both here and on the key vault overview page in the portal).
I selected “Vault access policy” (again, the default) and then clicked the “Go to access policies” button:
When the “Access policies” blade displays, click the “Create” button to start creating a key vault access policy:
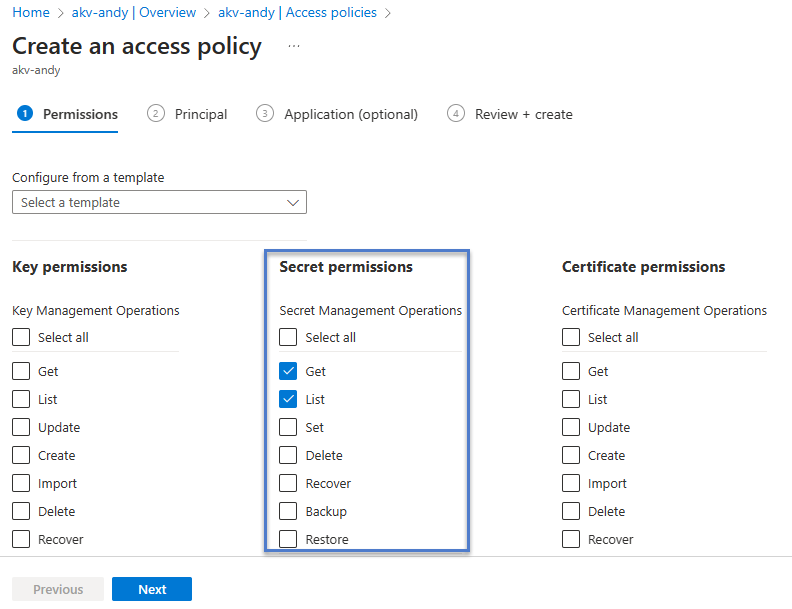
I chose to configure access to key vault secrets, granting the “Get” and “List” permissions to a “Principal” (which we will select in the next step) – and then click the “Next” button to proceed:
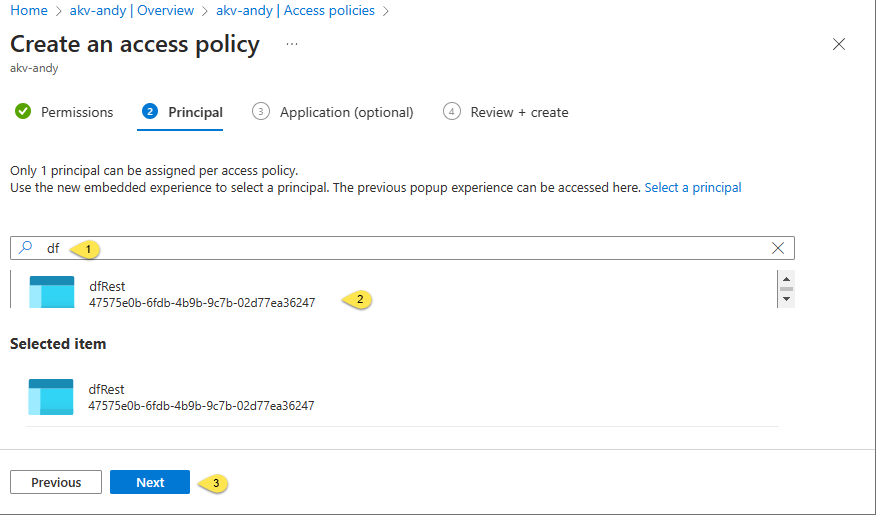
My goal is to grant the Azure Data Factory named “dfRest” the Get and List permissions, so I:
- Search for the service principle of dfRest using the search textbox on the “Principal” tab
- Click the dfRest service principle when it is returned from the search
- Click the “Next” button to proceed:
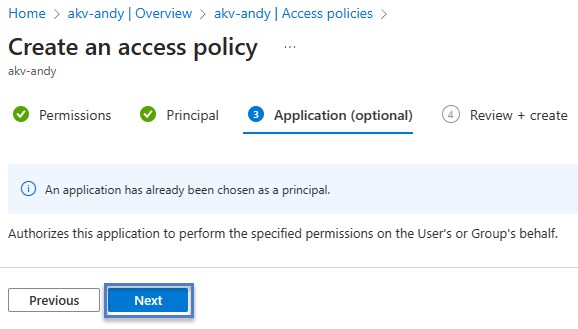
Since I already selected an Azure “application” (Azure considers Azure Data Factory an application), the “Application” tab surfaces a message indicating my selection is an application. I click the “Next” button to proceed:
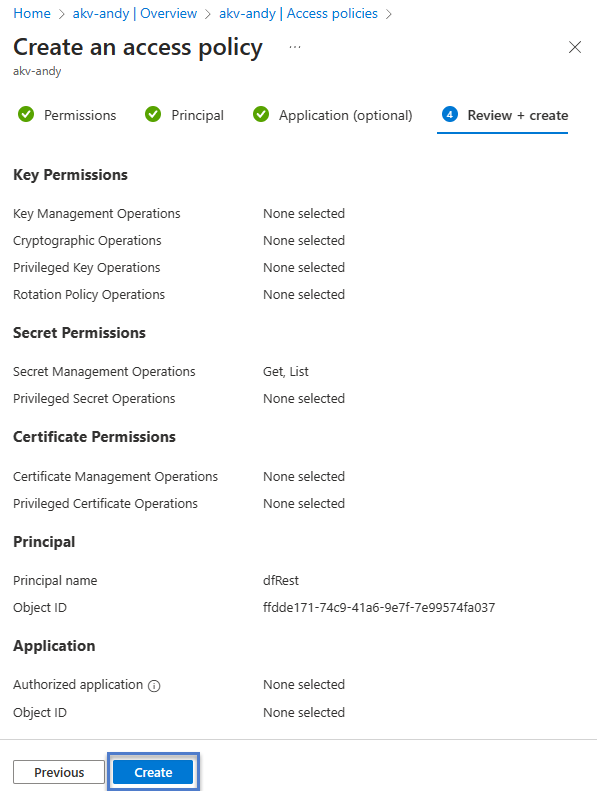
The last tab in the Access policy creation process is “Review + create”. Check your settings and, if you like them, click the “Create” button to create this key vault access policy:
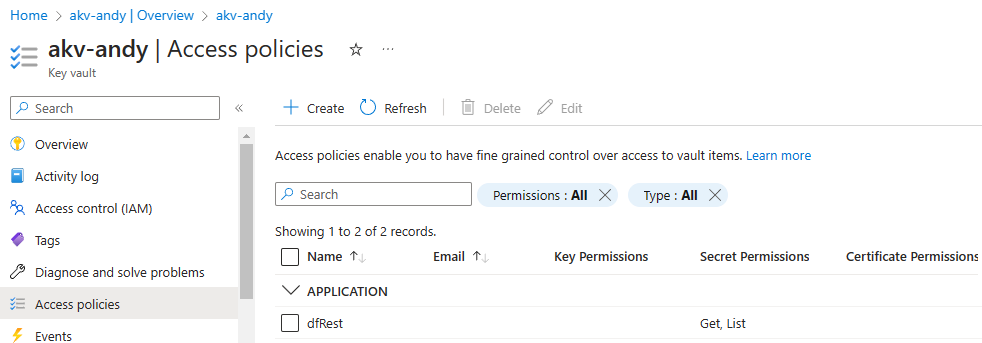
Once created, the new key vault access policy (it still has that new key vault access policy smell) displays in your “Access policies” blade.
Success!
Conclusion
Provisioning and configuring access to an Azure Key Vault are the first steps to storing confidential information in Azure. I hope you learned enough to set up your Azure Key Vault. In a future post, we’ll cover how to use key vault to interact with Azure Data Factory!
Peace.


One thought on “One Way to Provision an Azure Key Vault”