
The Microsoft Fabric Team released a new Invoke Pipeline Activity in September 2024. This post describes one way to implement a parent-child design pattern using the new activity. In this post, we will:
- Create a new workspace
- Build a child pipeline
- Build a parent pipeline
- Test
Create a New Workspace
Connect to Fabric Data Factory.
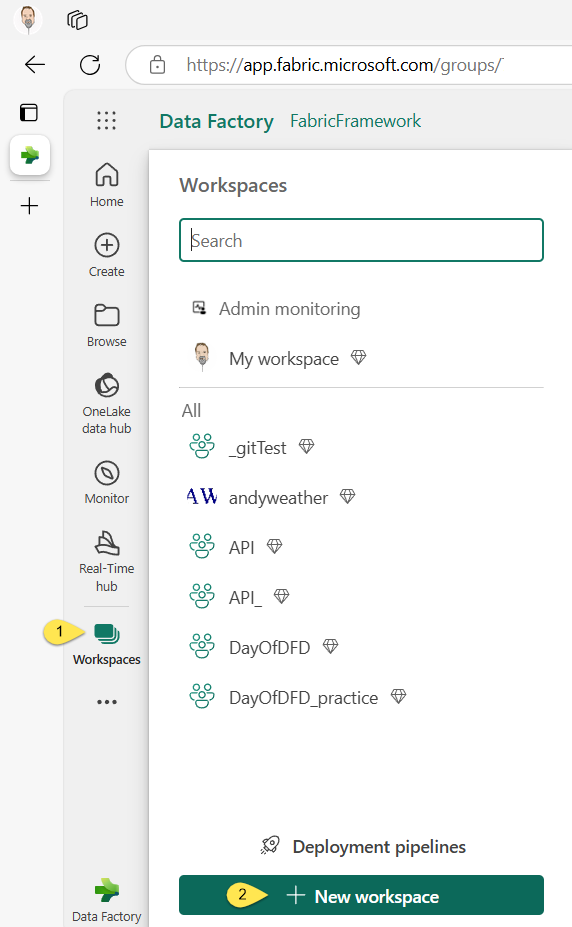
- On the left menu, click Workspaces
- When the Workspaces blade displays, click the “+ New workspace” button:
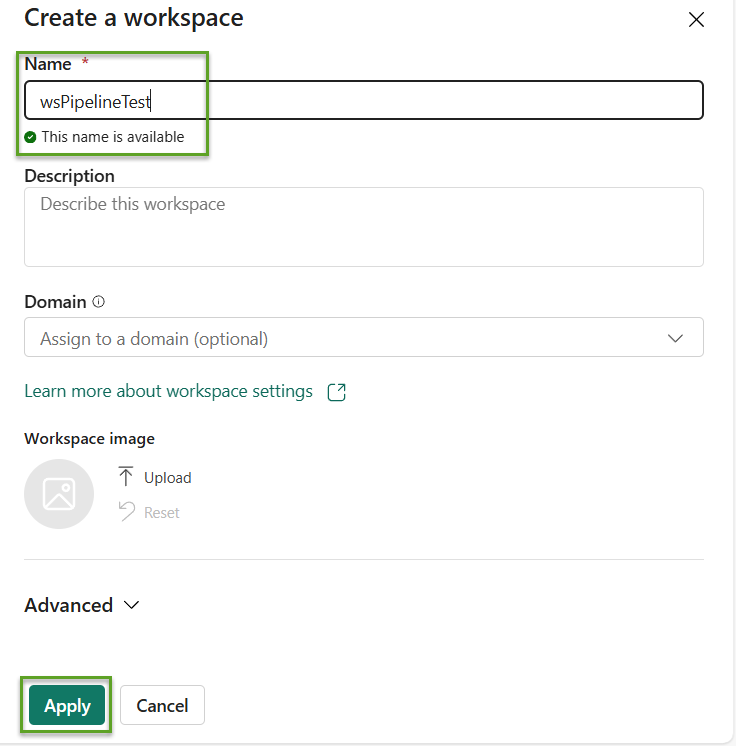
When the “Create a workspace” blade displays, enter the Name “wsPipelineTest” and then click the “Apply” button:
Build a Child Pipeline
When the workspace opens,
- Click the “+ New” dropdown”
- Click “Data pipeline”:

Name the new pipeline “child-1” and then click the “Create” button:

When the pipeline displays,
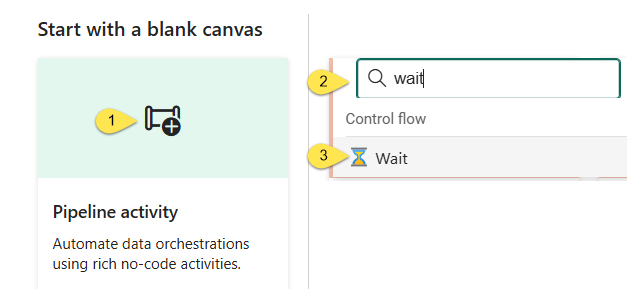
- Click “Start with a blank canvas”
- (Optionally) search for “wait”
- Select a Wait activity from the activity list”:
Accept the default settings for the Wait activity and save the new pipeline:

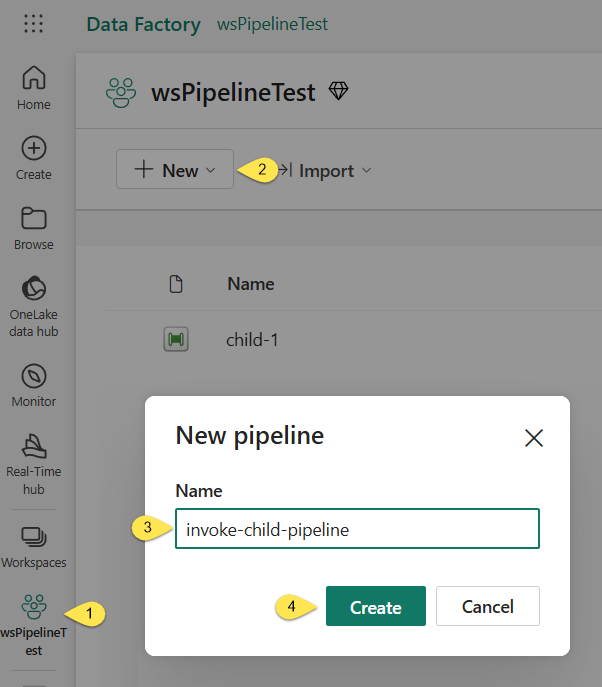
Build a Parent Pipeline
On the left menu,
- Click on wsPiplineTest
- Click the “+ New” dropdown and then click “Data pipeline” (not shown in the image below, but identical to the procedure for creating a new child data pipeline above)
- Name the new pipeline “invoke-child-pipeline”
- Click the “Create” button:
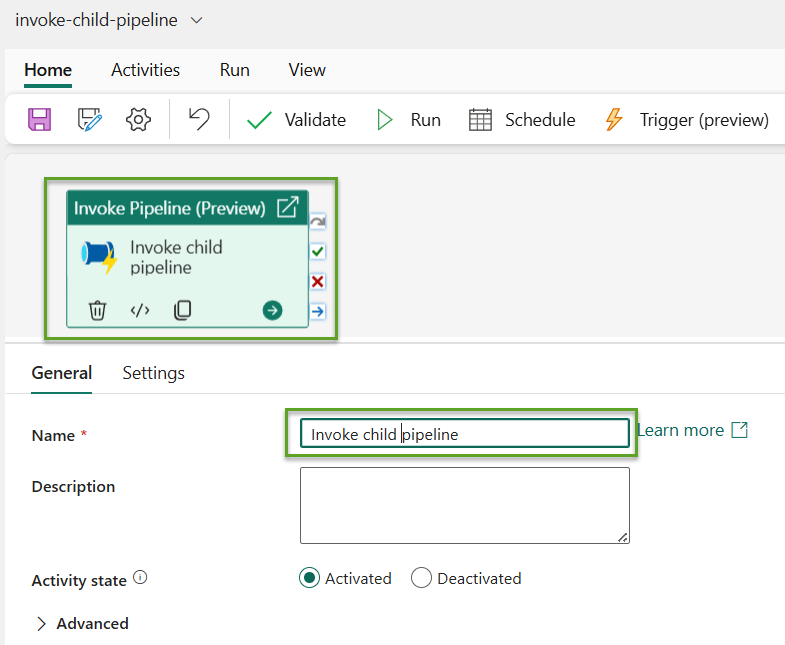
As when building the child pipeline, when the pipeline displays,
- Click “Start with a blank canvas”
- (Optionally) search for “invoke”
- Select an Invoke Pipeline (Preview) activity from the activity list”:

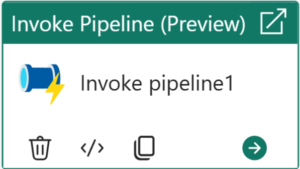
When the “invoke-child-pipeline” displays, select the “Invoke Pipeline (Preview)” activity and then edit the Name property to read “Invoke child pipeline”:
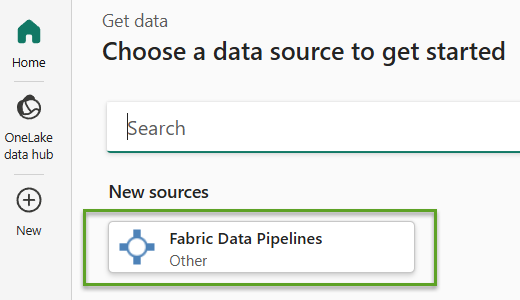
- Click the “Settings” tab
- Click the “Connections” dropdown
- Click “More” from the Connections dropdown list:

When the “Get data” dialog displays, click “Fabric Data Pipelines”:
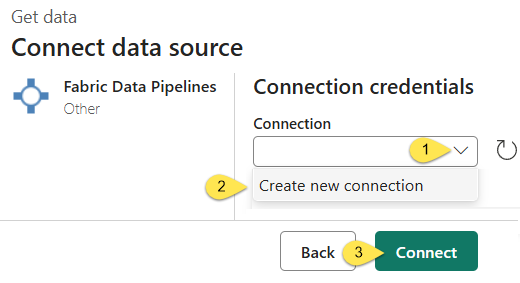
When the “Connection credentials” dialog displays,
- Click the “Connection” dropdown
- Click “Create new connection”
- Click the “Connect” button:
- Edit the “Connection name” property
- Select the “Authentication kind” property (the default option “Organizational account” is selected below)
- Click the “Sign in” button:

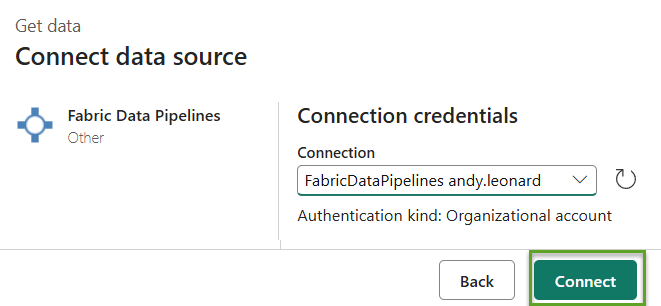
After signing in (not shown), the new Connection is configured. Click the “Connect” button to proceed:
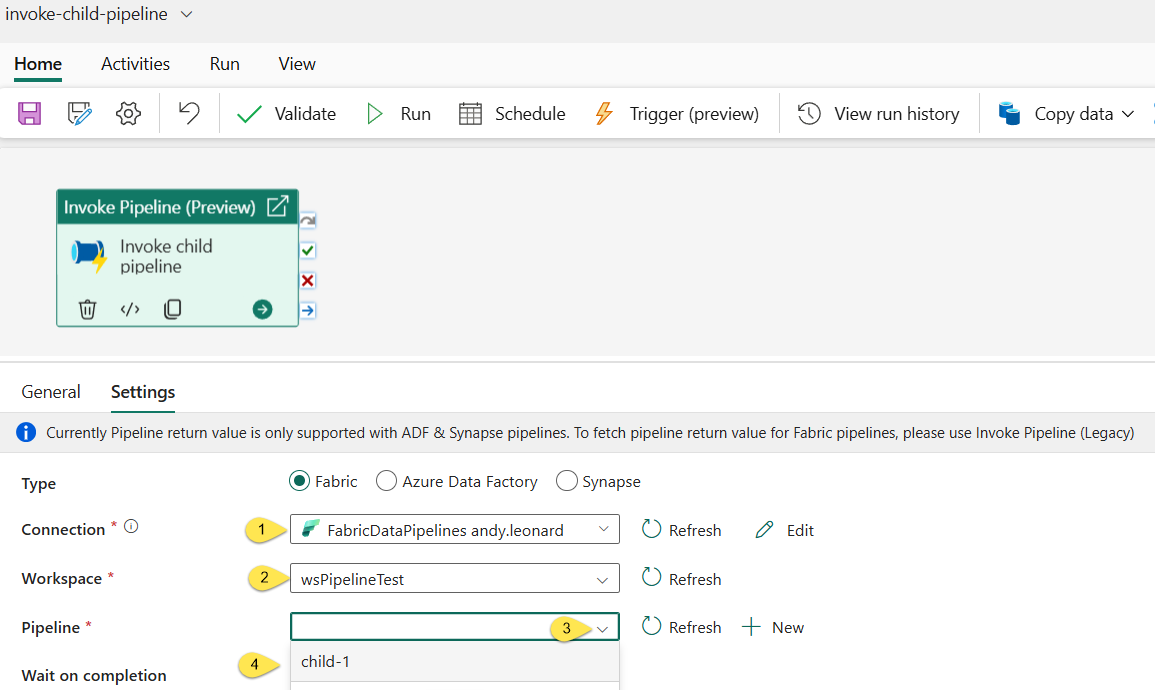
The pipeline is displayed once more.
- The new Connection is displayed in the “Connection” property
- The Workspace name is configure for the “Workspace” property
- Click the “Pipeline” dropdown
- Select the “child-1” pipeline:
Test
- Click the “Save” button
- Click the “Run” button:

If all goes as planned, the “invoke-child-pipeline” pipeline executes and succeeds.
Click the Output icon to open the Output properties:
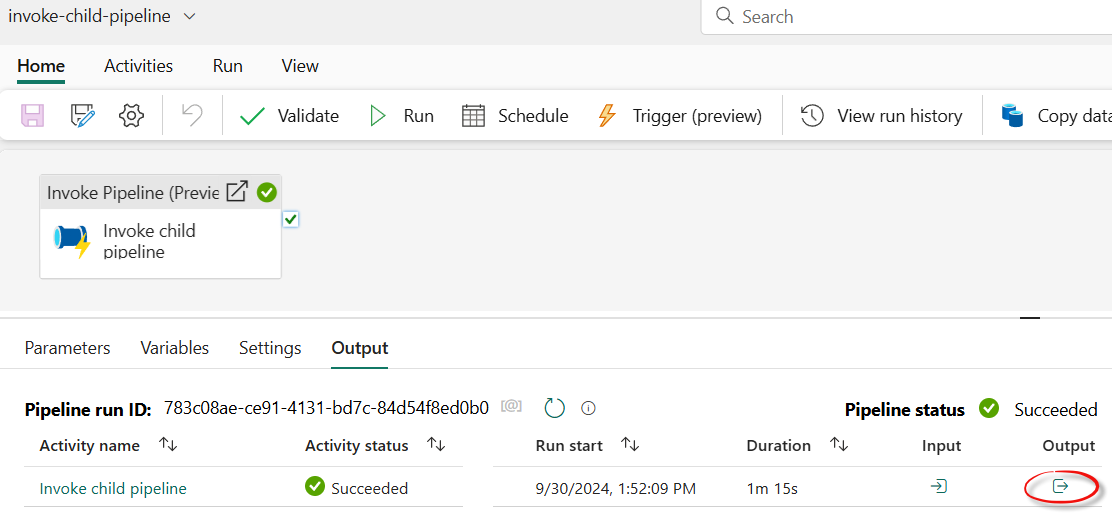
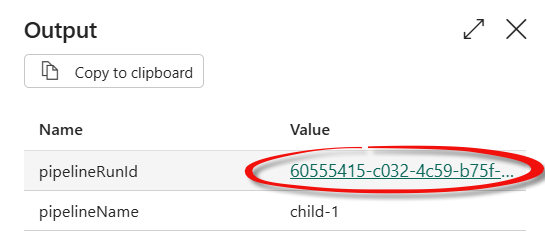
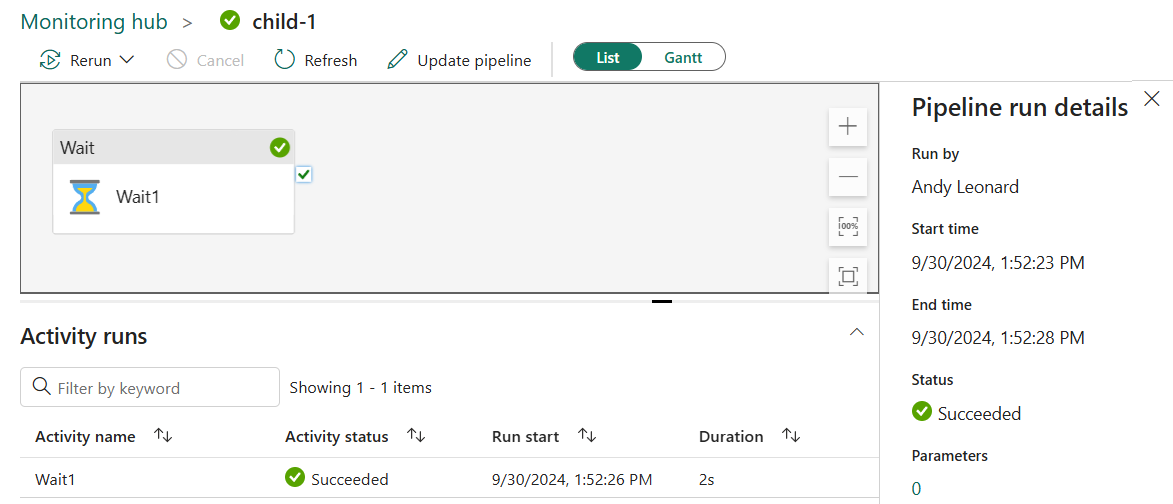
The Output properties display a link to the child pipeline Run Id. Click the link in the value of the “pipelineRunId” property to open the child-1 pipeline execution results in the Monitoring hub:
The Monitoring hub displays pipeline run details for the execution of the child pipeline:
Conclusion
To learn more from me about the new Invoke Pipeline (Preview) activity, register for Enterprise Data & Analytics Fabric training and subscribe to my newsletter:
Need Help?
Enterprise Data & Analytics delivers data engineering consulting and data engineering code reviews!. Let our experienced teams lead your enterprise data integration implementation. Contact us today!
One thought on “Fabric Data Factory Design Pattern – Basic Parent-Child”