
Introduction
I encounter flat file sources with variable-length rows on occasion. Here, I supply one SSIS Design Pattern for loading them.
What’s a Variable-Length Row Flat File?
Great question – let’s start with a definition. A variable-length row flat file is a text source of some flavor – comma-separated values (CSV), tab-delimited file (TDF), or even fixed-length, positional-, or ordinal-based (where the location of the data on the row defines its field). The major difference between a “normal” flat file and a variable-length row flat file is the number of columns is fixed in a normal flat file, and can change with each row in a variable-length flat file.
Let’s look at an example of a variable-length flat file:
RecordType,Name1,Value1,Name2,Value2,Name3,Value3
A,Multi One,11
B,Multi Two,22,Multi Two A,23
C,Multi Three,33,Multi Three A,34,Multi Three B,345
A,Multi Four,44
C,Multi Five,55,Multi Five A,56,Multi Five B,567
B,Multi Six,66,Multi Six A,67
There are seven potential columns: RecordType, Name1, Value1, Name2, Value2, Name3, and Value3. Not all rows contain seven values. In fact, the first row contains only 3 values”
A,Multi One,11
In this format, the RecordType is in the first column and this indicates how many columns of data to expect in the row. Rows of RecordType A contain three values, rows of RecordType B contain five values, and those of RecordType C contain seven values.
Reading Into a Data Flow
It’s typical to load data from a flat file into an SSIS data flow using a Flat File connection manager. Let’s walk through configuring a flat file connection manager for this file.
If you want to sing along, create a new SSIS project (I’m using SSIS 2005 because most of you are using SSIS 2005) named MultiLengthFiles. Add a Data Flow Task to the Control Flow and open the Data Flow editor (tab). Drag a Flat File Source adapter onto the Data Flow Task canvas and open its editor. Click the New button to create a new Flat File Connection Manager.
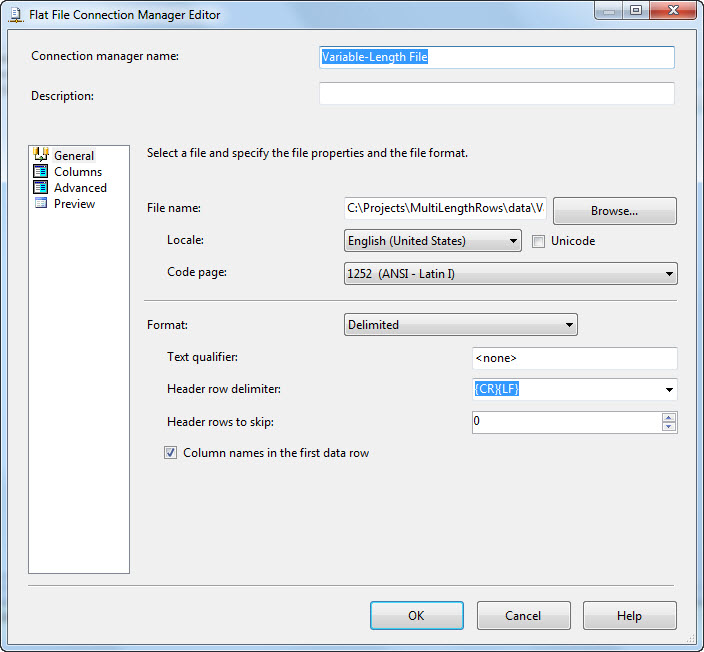
I named my Flat File Connection Manager “Variable-Length File”. I created a text file with the data from above and named it VarLenRows.csv. I saved it and browsed to that location for the File Name property. I also checked the “Column names in the first data row” checkbox.
So far, everything is awesome. Click the Columns page and then…
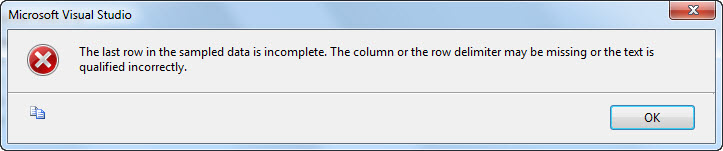
Bummer.
The Problem
SSIS is validating the flat file, checking the first couple hundred rows or so to make sure everything looks good. It’s finding a problem – not enough commas in the last comma-delimited row. Note: there are times when this validation will not detect this issue. Sometimes you will get a run-time error, other times you will figure it out when your data load skews (yuck). Remember Andy’s First Rule of Software Testing™: All software is tested – some intentionally.
One Solution
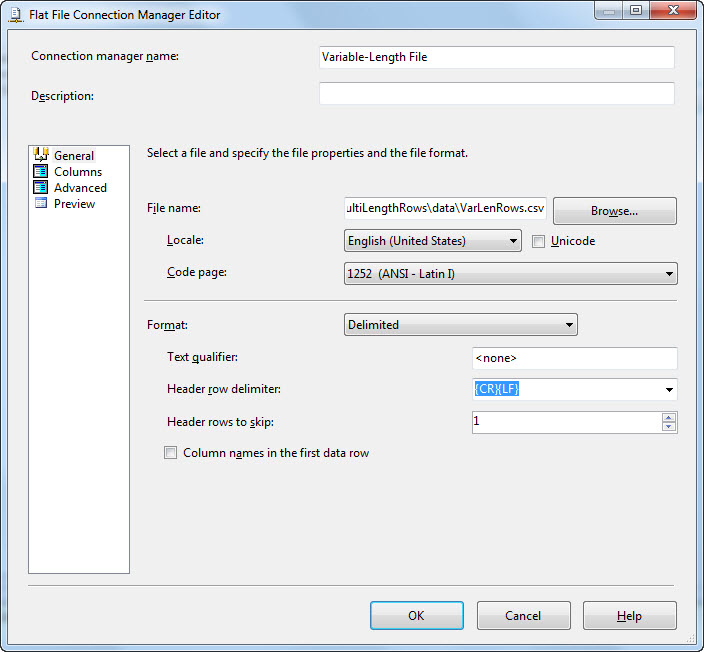
If you’re playing along, acknowledge the error dialog and return to the Flat File Connection Manager Editor. Click on the General page and uncheck the “Column names in the first data row” checkbox. Change the “Header rows to skip” property value to 1. This is a method for ignoring the column names row:
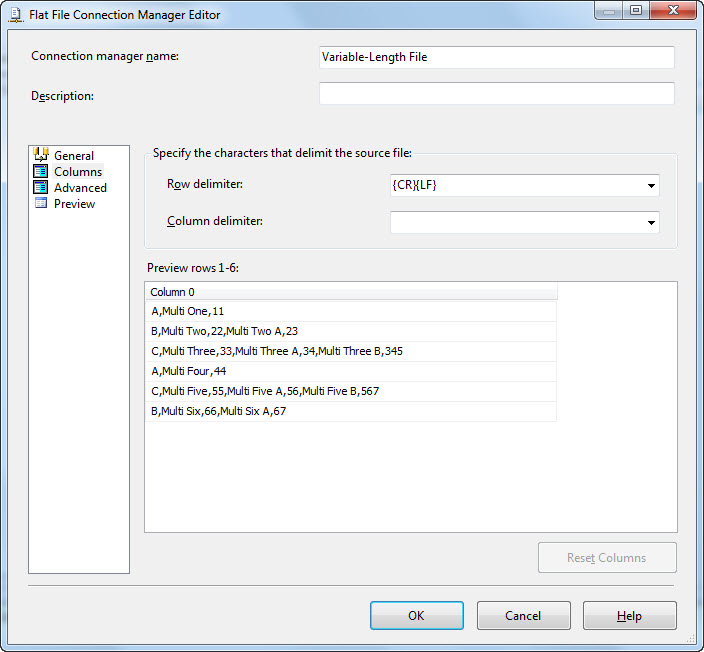
Return to the Columns page and (again) click OK on the error dialog to dismiss it. Click inside the Column Delimiter dropdown and delete the text (“Comma {,}”) there. Click the Refresh Link that appears above the Preview grid. This action tells the Connection Manager that we are not treating this source flat file as a comma-separated values (CSV) file:
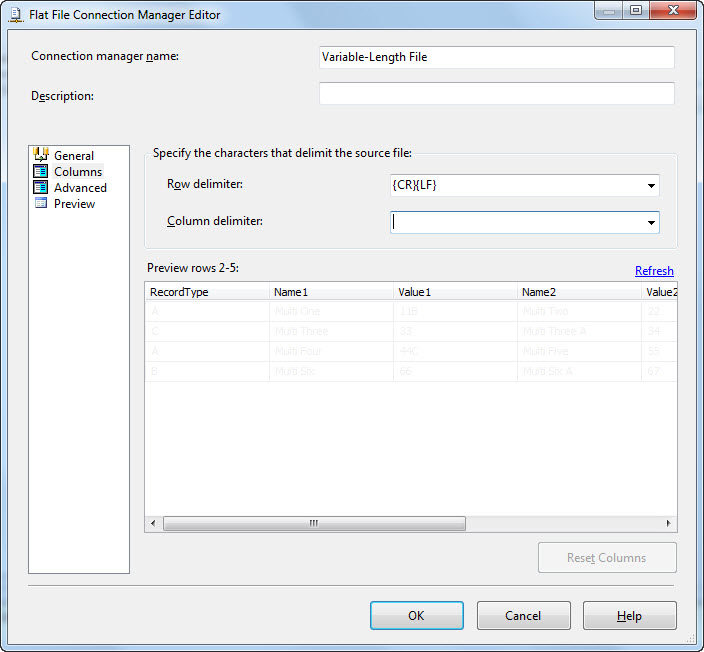
Then click the Reset Columns button. Your data should now all appear on one row. This is what we want:
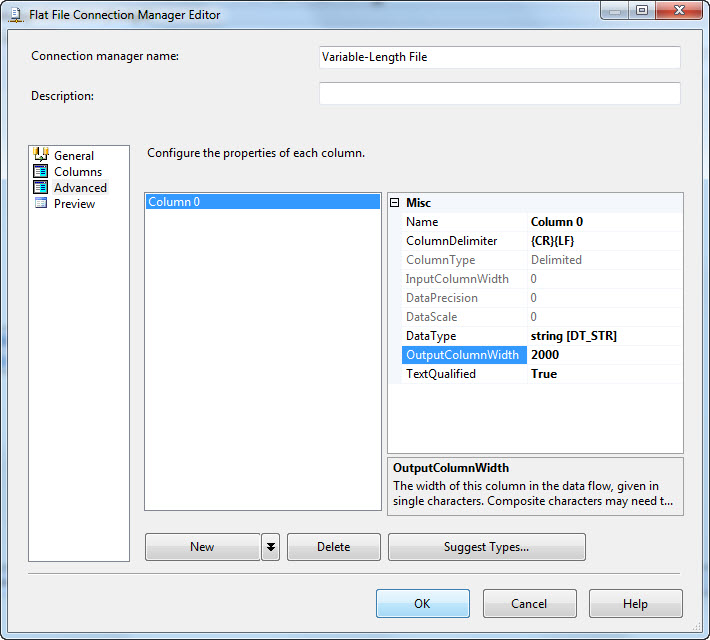
On the Advanced page, change the OutputColumnWidth property of Column 0 to 2000:
Click OK to close the Flat File Connection Manager Editor, then click OK again to close the Flat File Source Adapter Editor.
One Row to Rule Them All…
Now we have all the data coming in on a single row. I can hear you thinking “Great, Andy. Now what?” I’m glad you asked!
Now we need to dynamically parse the data as it flows through the Data Flow Task. There are a couple ways to approach this, but I like the Script Component.
A Scriptin’ We Will Go
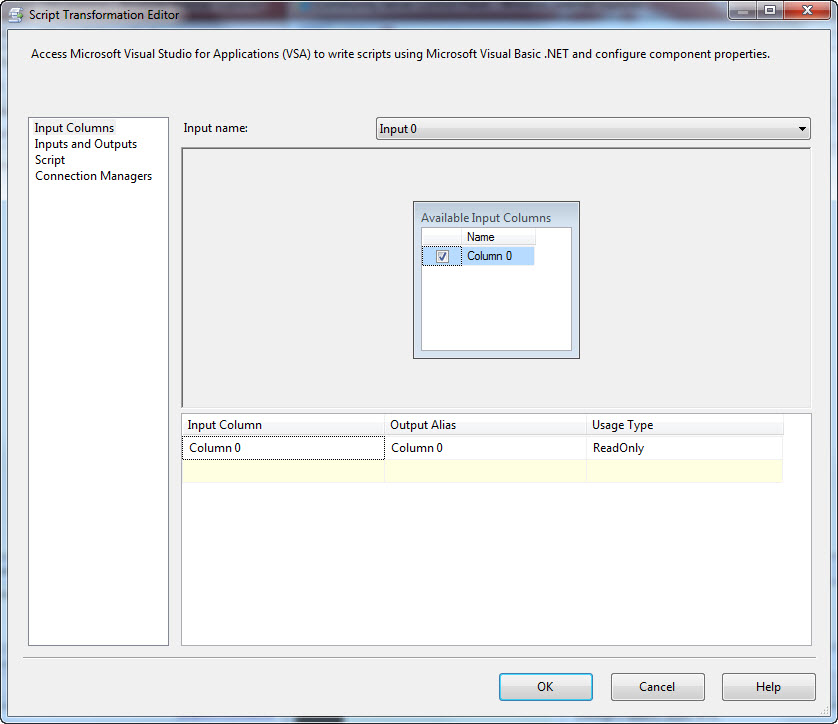
Drag a Script Component onto the Data Flow Task canvas and select a Transformation as the type of component. Connect a data flow path from the Flat File Source adapter to the Script Component and open the editor for the Script Component. On the Input Columns page, check the Column 0 checkbox:
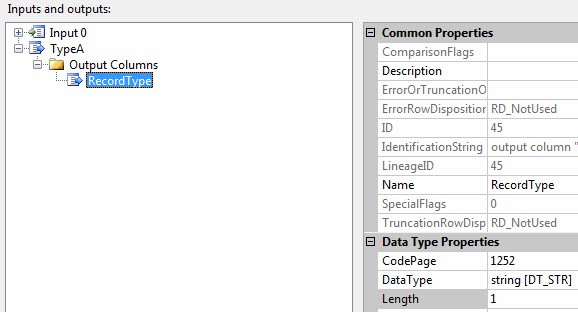
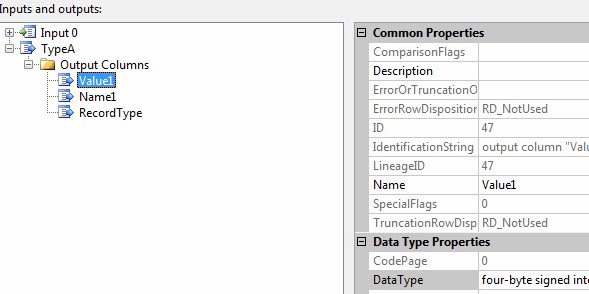
Click on the Inputs and Outputs page and select Output 0. Change the name property of the Output 0 output buffer to TypeA and expand the node. Click on Output Columns and click Add Column. Name the new Column RecordType, change it’s DataType property to “string [DT_STR]” and the Length property to 1. This configures the output buffer named TypeA to contain a column named RecordType of the String data type and expects the data to be no wider than a single character:
Repeat this process, creating the following columns in the TypeA output buffer:
Name – DataType – Length
Name1 – string – 25
Value1 – four-byte signed integer – 0
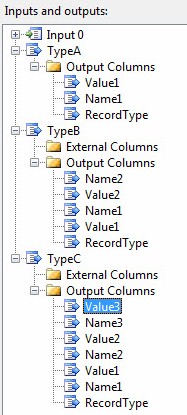
Click the Add Output button to create a new output buffer. Name this buffer TypeB and create the following columns:
Name – DataType – Length
RecordType – string – 1
Name1 – string – 25
Value1 – four-byte signed integer – 0
Name2 – string – 25
Value2 – four-byte signed integer – 0
Click the Add Output button once more to create a new output buffer. Name this buffer TypeC and create the following columns:
Name – DataType – Length
RecordType – string – 1
Name1 – string – 25
Value1 – four-byte signed integer – 0
Name2 – string – 25
Value2 – four-byte signed integer – 0
Name3 – string – 25
Value3 – four-byte signed integer – 0
Your Inputs and Outputs page should now appear similar to this:
There’s one other change to make – one we technically should have made earlier but we’ll make now. Click on the TypeA output buffer and change the SynchronousInputID property from “Input 0” to “None”. I won’t go into all that this means in this post.
Click the Script page and change the ScriptLanguage property to “Microsoft Visual Basic.” Click the Design Script button. Replace the script in the ProcessInputRow subroutine with the following:
Public Overrides Sub Input0_ProcessInputRow(ByVal Row As Input0Buffer)
Try
Dim vals() As String = Strings.Split(Row.Column0, “,”, , CompareMethod.Text)
Select Case vals(0)
Case “A”
With TypeABuffer
.AddRow
.Name1 = vals(1)
.Value1 = Convert.ToInt32(vals(2))
End With
Case “B”
With TypeBBuffer
.AddRow
.Name1 = vals(1)
.Value1 = Convert.ToInt32(vals(2))
.Name2 = vals(3)
.Value2 = Convert.ToInt32(vals(4))
End With
Case “C”
With TypeCBuffer
.AddRow
.Name1 = vals(1)
.Value1 = Convert.ToInt32(vals(2))
.Name2 = vals(3)
.Value2 = Convert.ToInt32(vals(4))
.Name3 = vals(5)
.Value3 = Convert.ToInt32(vals(6))
End With
End Select
Catch ex As Exception
‘ …handle exceptions gracefully here…
MsgBox(ex.Message)
End Try
End Sub
This script first splits the incoming row – remember, it’s all in a single column – into an array of string values.
The Try statement traps ugly errors
Close the Script editor window, and click OK to close the Script Component Editor.
Terminate the Streams
You can use several Data Flow components to terminate a data flow path. In a Production environment, this would likely be an OLE DB Destination adapter. In a development or test environment, you may want to terminate with a component that doesn’t require database connectivity or database object creation.
You can use the Trash Destination adapter. You can also use any component that doesn’t require configuration to execute and succeed in the Data Flow Task, such as a Derived Column or Multicast Transformation. Here, I will use multicasts to terminate the data flow path streams.
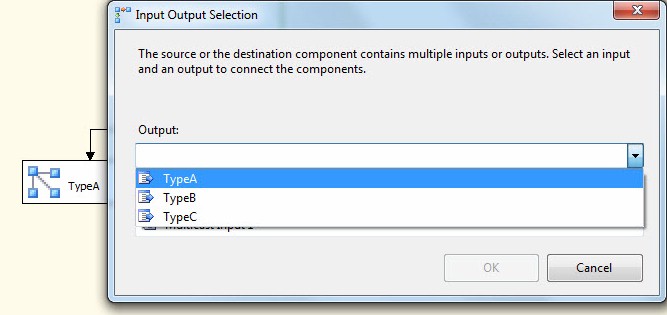
Drag three Multicast Transformations onto the Data Flow Task canvas. Rename them TypeA, TypeB, and TypeC. Connection an output from the Script Component to the TypeA multicast. When prompted, select the TypeA output buffer fro the Script Component:
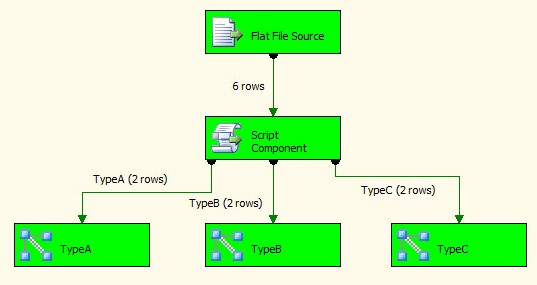
Repeat this process for TypeB and TypeC connections. When complete, your Data Flow could appear as shown:
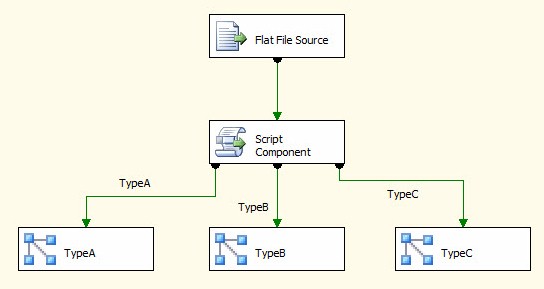
Let’s run it! Execution should succeed, and when it does it will look like this:
Conclusion
This isn’t the only way to address loading files of this format. It is one way, and it has the advantage of offering a lot of flexibility.
:{>
I’ve gotten quite a bit of feedback that the Delimited File Source on CodePlex is very good for this kind of thing, right out of the box. (http://ssisdfs.codeplex.com/)
Hi Andy,
I think that this can be said as a trick and not a design pattern. In my views design pattern should be able to solve a design issue in a generic manner irrespective of technical implementation. This soln works for this dataset, but what would be the case if the first column was a primary key ? So I feel that it’s a way to deal with this kind of issue, but can be classified as a design pattern. Just my opinion 🙂
–Siddharth
It would be easier using Cobol.
Nice article, do you have any other design patterns like these?
Could you please guide me?
I am trying to do something similar , but I do not have any delimiters in my source file.how do I handle the situation?
Awsome… Andy.
it helped me in a BIG way
my case is similar to that of "ssis", fixed length rows of different layouts.
I created multiple buffers, like Andy suggested and then in script component… used the substring (actually it is Mid()) to extract out the desired values.
This post helped but i used a slightly different approach. The connection setup was the same but I used a conditional split based on your different cases. i.e. in the split derive the column value using substring(column,1,1) == "A", "B", "C". Name the different outputs accordingly and build your inserts based on this.
hi andy,
the script u are written in this solution is vb, can you guide me c# code for the same
Used this to solve another problem on StackOverflow. Of one to many on a single flat file. Thanks for the input. This was the only helpful reference I could find.
http://stackoverflow.com/questions/10417062/one-to-many-csv-file-moved-to-sql-using-logic
Hi,
Can it be done like, Lets say Output should be to only 2 different destination.
One will have a fixed count of column and the other will have all the rest of the records.
In such a case can you give me some idea how can it be acheived in similar way ??
Andy, this was absolutely invaluable. Thank you so much for taking the time to post this.
Thank you for sharing. Very helpful!
Very helpful post.
I am using this along with what MtnJim suggested. Another advantage of using the script component within data flow for fixed width files is that it eliminates the need to manually enter each column name and length for the connection.