
 Maybe you’ve heard SSIS is available in the cloud. It is! But it’s not easy to get set up (at the time of this writing). I am here to help.
The correct name for “SSIS in the cloud” is: Azure-SSIS Integration Runtime in Azure Data Factory version 2. Azure Data Factory version 2 is sometimes abbreviated ADFv2 and SSIS in the Azure-SSIS Integration Runtime is often shortened and abbreviated IR. It’s not at all uncommon for Azure-SSIS Integration Runtime in Azure Data Factory version 2 to referenced by the acronym ADFv2 IR.
Configuring SSIS in the cloud requires these steps:
- Get an Azure account
- Configure an Azure SQL Database
- Create an Azure Data Factory
Get an Azure Account
Search for “Get Azure Free.” Click a link, set up a free Azure account.
Configure an Azure SQL Database (and server, and resource group)
The next step is to configure an Azure SQL Database and server and resource group. That sounds like a lot but it’s fairly straightforward. Just follow these steps:
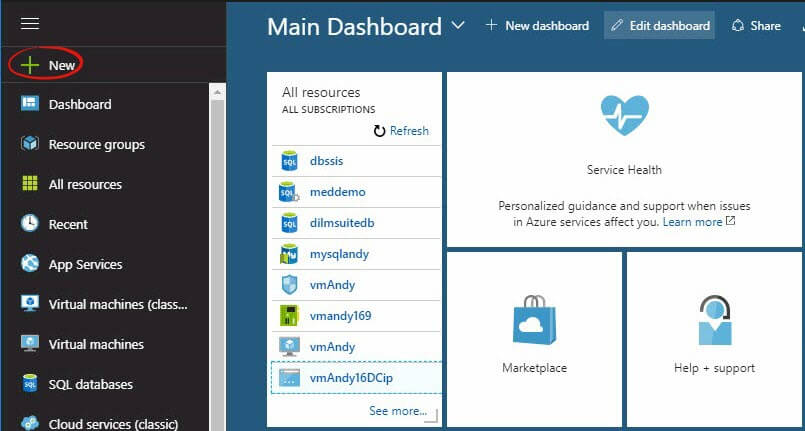
Connect to the Azure Portal and click the New button:
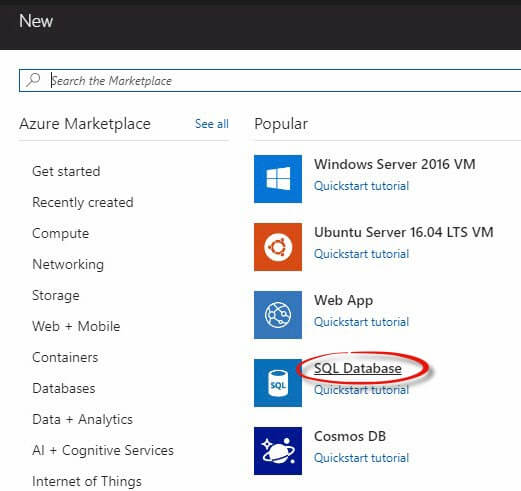
If you don’t see “SQL Database”, search for it and then click it:
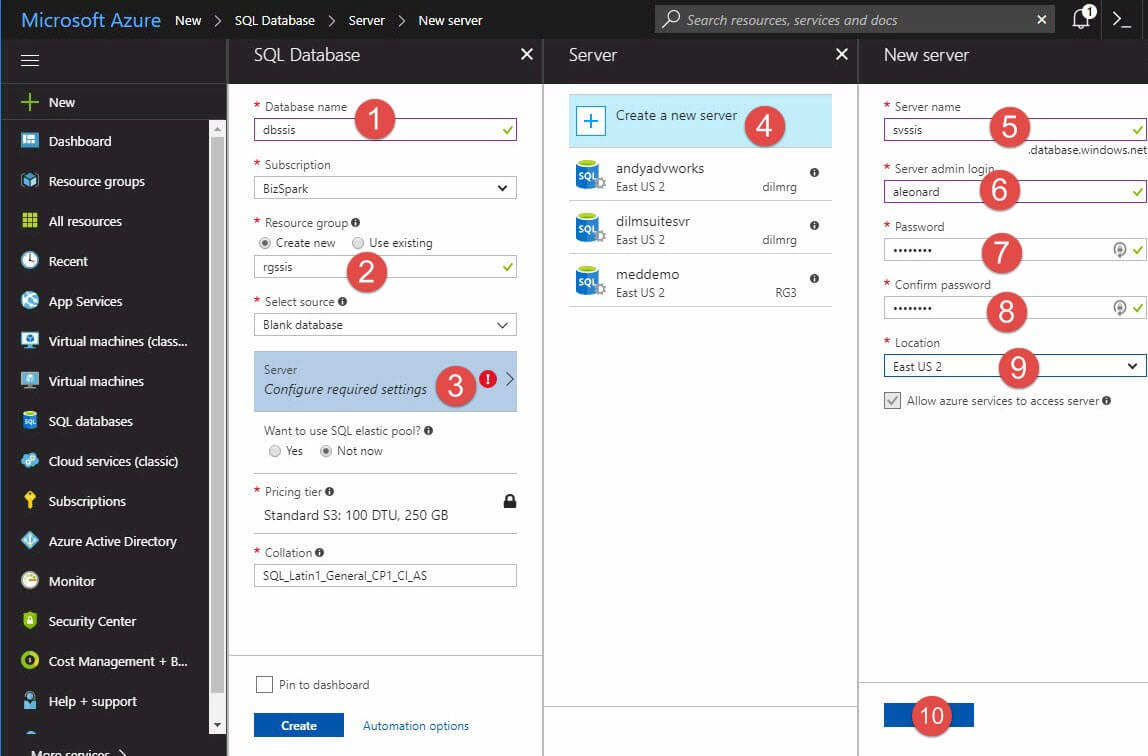
When the SQL Database blade appears, configure these items (with the settings I used in parentheses):
- Enter a database name for your Azure SQL database (dbssis)
- Create a new resource group (rgssis)
- Click the Server box to configure required server settings
- Click “Create a new server”
- Give your server a name (svssis)
- Supply an admin login (aleonard)
- Supply an admin login password ($uper$ecretP@$$w0rd)
- (Confirm the admin password)
- Select a location for your Azure server (East US 2)
- Click the Select button
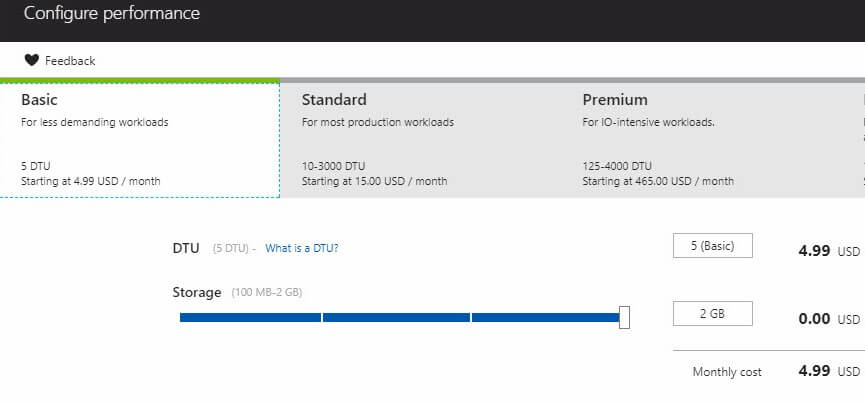
Click the Pricing tier box and configure your pricing. I went with Basic:
Click Apply and then click Create. Hum the Jeopardy theme while watching the cool graphic on the Azure portal:
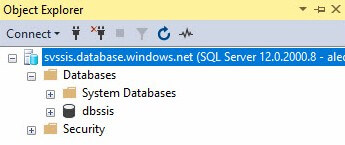
Once that’s complete, you should have an Azure SQL database configured similar to this:

Configure the Firewall or…
… just connect to the server using the latest version of SQL Server Management Studio (SSMS):
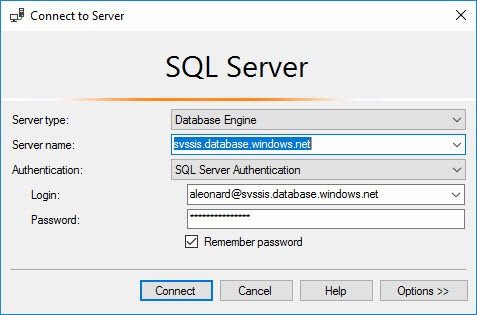
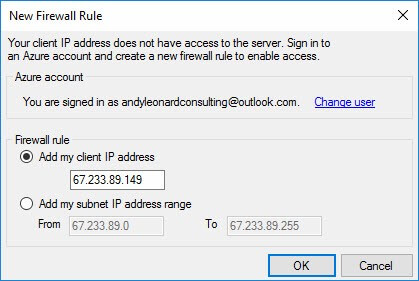
Why connect? SSMS will configure the firewall for you!
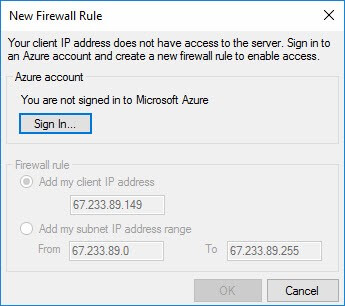
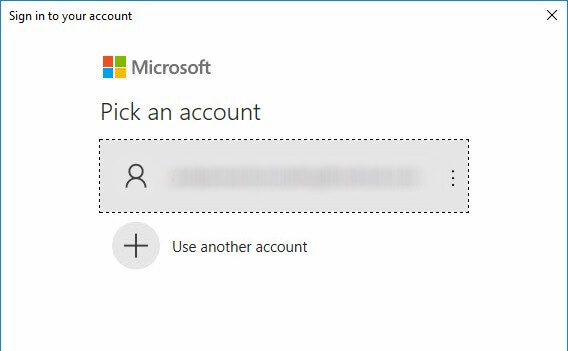
Click the Sign In button, and sign in:
Click the OK button to add a new Azure firewall rule that allows your IP to connect with the server:
This is almost cheating, it’s so easy!
Create an Azure Data Factory
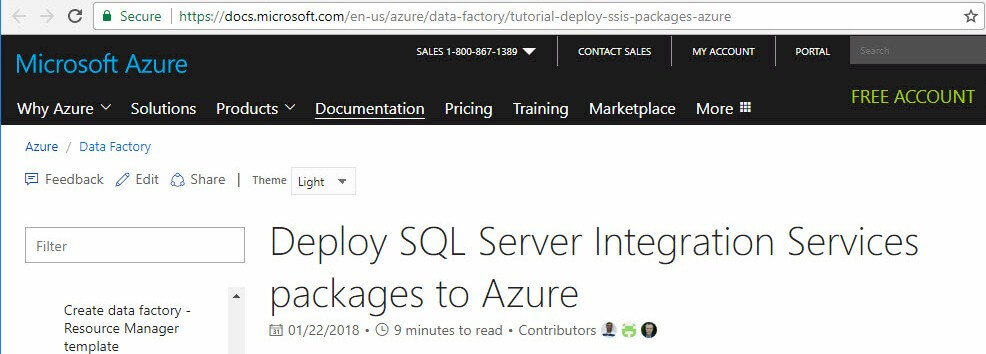
There’s a great article on how to deploy SQL Server Integration Services packages to Azure. It’s called Deploy SQL Server Integration Services packages to Azure, which, when you think about it, is a very good title:
There’s some PowerShell in this article because, at the time of this writing (Jan 2018), you still have to use PowerShell to configure an Azure Data Factory. Note: Microsoft is working on a UI. Promise! But why wait? You can figure this out. Trust me.
I didn’t do everything exactly like the article. Why not? I’ve already done some of the steps using the Azure portal. I will share with you what I did. If you prefer to use the script in the article, that’s awesome! I based my script off the one they share.
First, open Windows PowerShell ISE as an administrator:
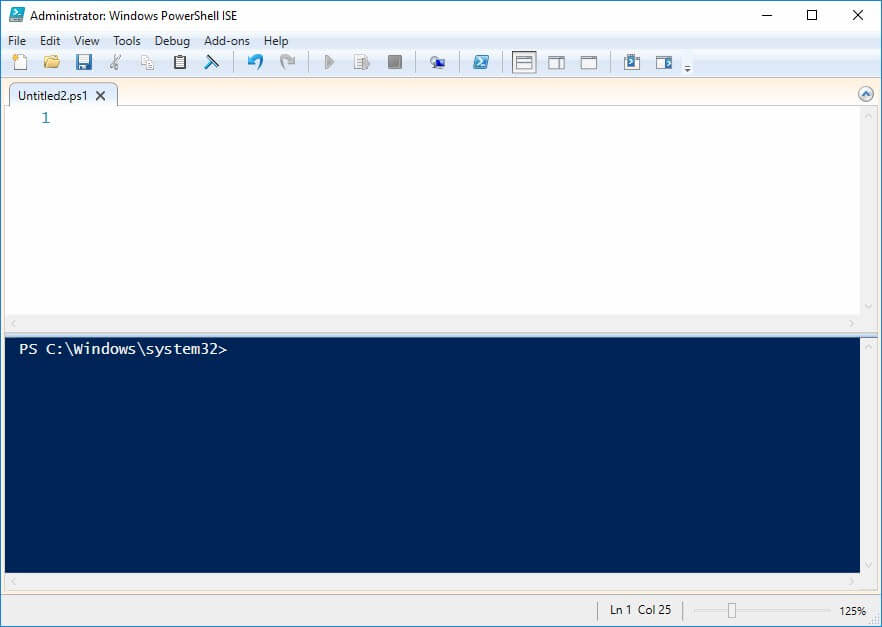
You’ll be prompted by the system with an ARE YOU SURE dialog box. Click Yes.
I’m taking selections from a really good online article titled Install and configure Azure PowerShell. If anything I share doesn’t work (or doesn’t work as expected), please refer to this article for help or visit your friendly neighborhood search engine.
The PowerShell ISE will open and it may look like this:
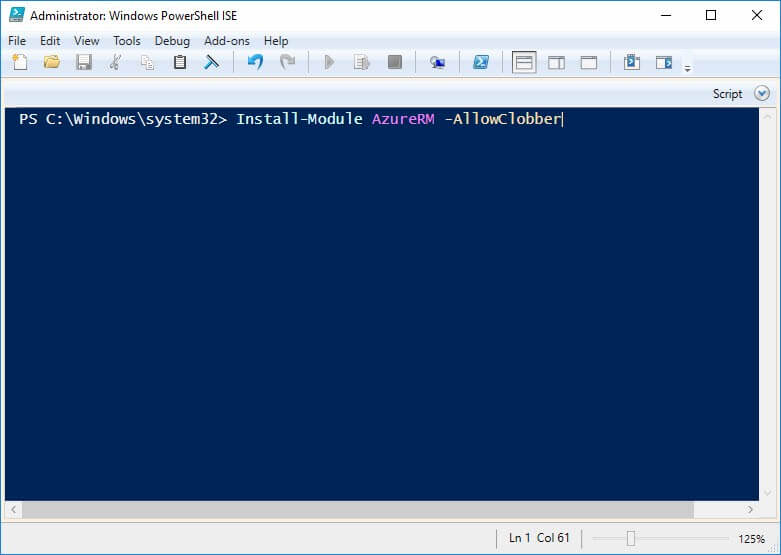
I’m going to close the script window and work in the command line area. In there, I first paste a command that gets the Azure Resource Manager PowerShell Modules from the PowerShell Gallery by issuing this command:
Install-Module AzureRM -AllowClobber
When I press enter nothing happens because I’ve already installed the AzureRM module. I can prove that by issuing the following command to list available PowerShell modules:
Get-Module –ListAvailable
The results? There’s AzureRM, big as life (as we say in Farmville):

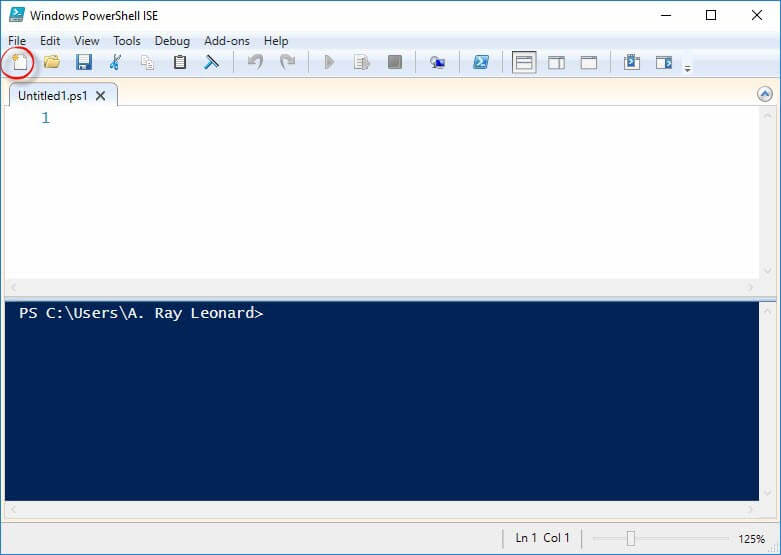
Once AzureRM is installed, you can close Windows PowerShell ISE. We’re going to open it right back up again, this time without the elevated Administrator permissions. And this time, let’s use that scripting window. Click the New icon to open a PowerShell script tab that still has that new script tab smell:
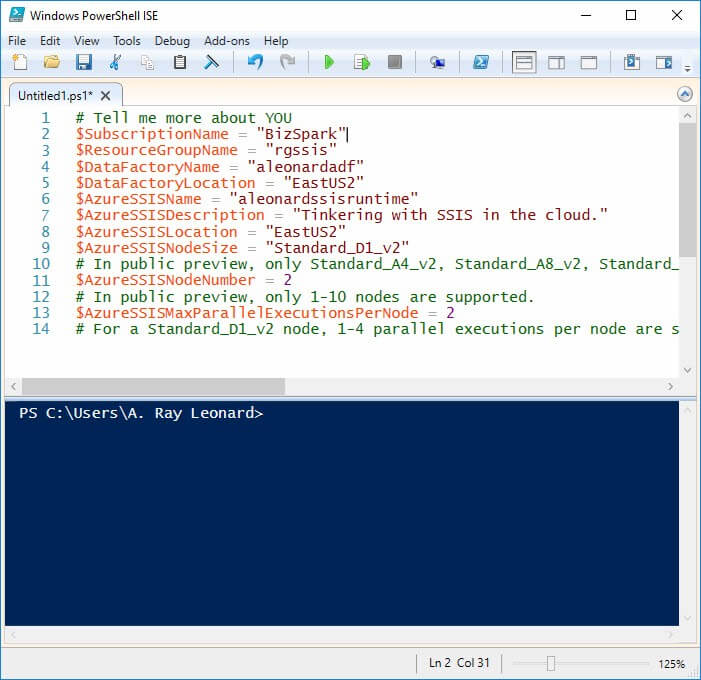
Let’s define some variables!
# Tell me more about YOU
$SubscriptionName = "<Azure subscription name>"
$ResourceGroupName = "<Azure resource group name>"
$DataFactoryName = "<Data factory name>"
$DataFactoryLocation = "<Data factory location>"
$AzureSSISName = "<Specify a name for your Azure-SSIS Integration Runtime>"
$AzureSSISDescription = "<Make up a snappy description. You want to express yourself, don't you?>"
$AzureSSISLocation = "<A location for SSIS>"
$AzureSSISNodeSize = "Standard_D1_v2"
# In public preview, only Standard_A4_v2, Standard_A8_v2, Standard_D1_v2, Standard_D2_v2, Standard_D3_v2, Standard_D4_v2 are supported
$AzureSSISNodeNumber = 2
# In public preview, only 1-10 nodes are supported.
$AzureSSISMaxParallelExecutionsPerNode = 2
# For a Standard_D1_v2 node, 1-4 parallel executions per node are supported. For other nodes, it's 1-8.
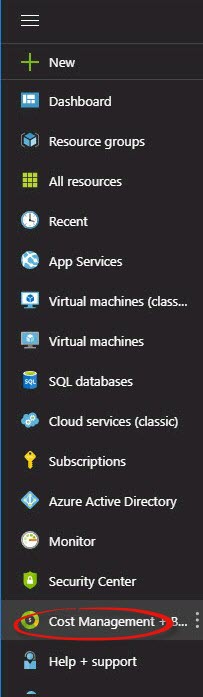
If you’re new to Azure, there may be some things in this list that make you scratch your head and mutter, “Wha-huh?” For instance, the very first thing, Subscription Name. One way to learn your Azure Subscription Name is to click on Cost Management:
When the Cost Management page displays, click Subscriptions:
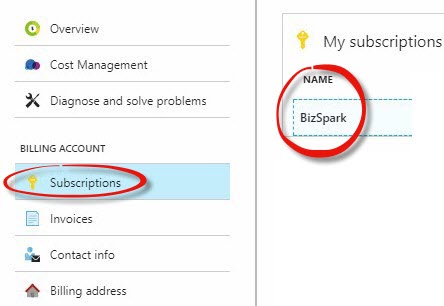
There’s the name of your Azure Subscription, big as life.
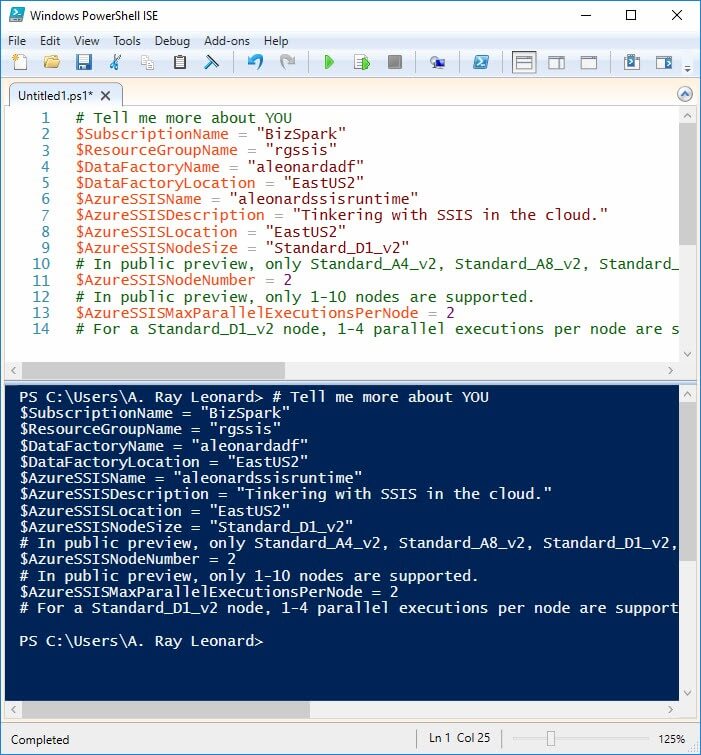
When I fill in these variables, my PowerShell looks like this:
# Tell me more about YOU
$SubscriptionName = "BizSpark"
$ResourceGroupName = "rgssis"
$DataFactoryName = "aleonardadf"
$DataFactoryLocation = "EastUS2"
$AzureSSISName = "aleonardssisruntime"
$AzureSSISDescription = "Tinkering with SSIS in the cloud."
$AzureSSISLocation = "EastUS2"
$AzureSSISNodeSize = "Standard_D1_v2"
# In public preview, only Standard_A4_v2, Standard_A8_v2, Standard_D1_v2, Standard_D2_v2, Standard_D3_v2, Standard_D4_v2 are supported
$AzureSSISNodeNumber = 2
# In public preview, only 1-10 nodes are supported.
$AzureSSISMaxParallelExecutionsPerNode = 2
# For a Standard_D1_v2 node, 1-4 parallel executions per node are supported. For other nodes, it's 1-8.
Remember, I set up the Resource Group earlier when I built the Azure SQL database.
If I click the big green Play button (or press the F5 key) at the top of the PowerShell ISE, everything displayed in the script tab will be copied into the command window and executed:
What’s cool – if you’re new to PowerShell – is the values assigned to these variables remain assigned even after the commands have executed. Don’t believe me? Let’s check!
Add the following command to the bottom of the script:
write-host($SubscriptionName)
Now select the new command in the script window and press the F8 key or the smaller Run Selection button with the play-this-text icon on the toolbar:
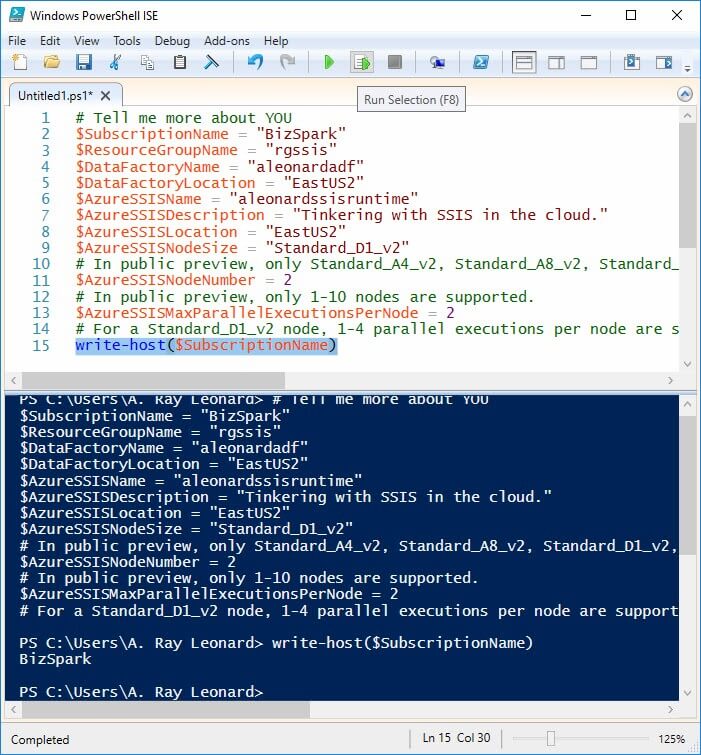
What do you get? The value of the $SubscriptionName variable. I share this because – if you’re new to PowerShell – you may not realize you don’t have to rerun the entire script each time we add a chunk of commands. Cool?
Cool.
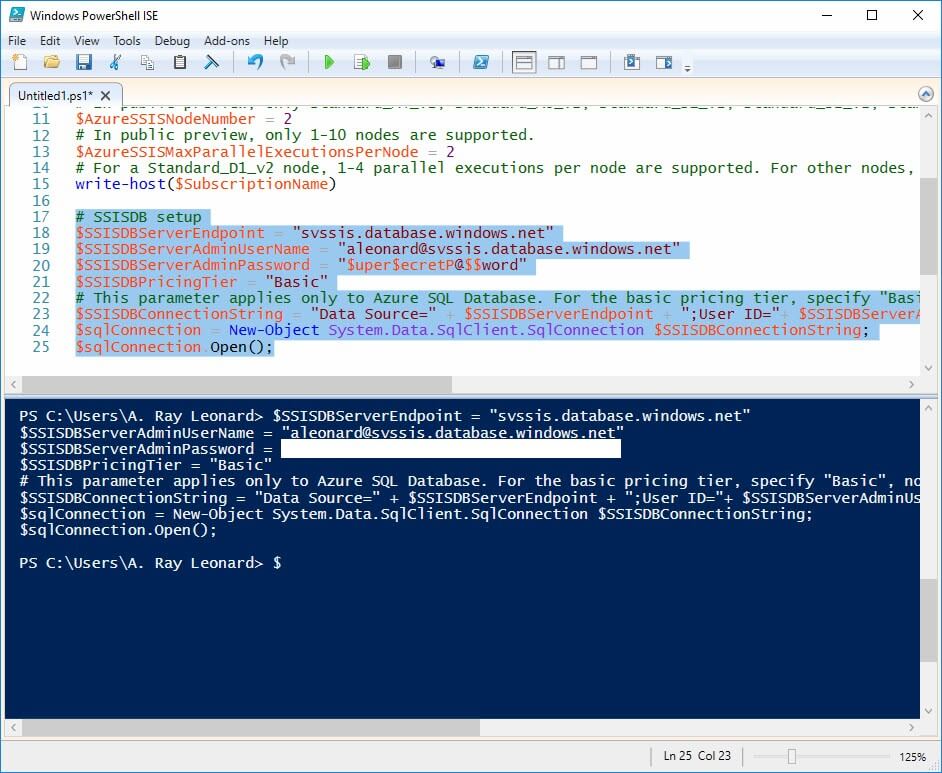
Let’s add another chunk of commands:
# SSISDB setup
$SSISDBServerEndpoint = "svssis.database.windows.net"
$SSISDBServerAdminUserName = "aleonard@svssis.database.windows.net"
$SSISDBServerAdminPassword = "$uper$ecretP@$$word"
$SSISDBPricingTier = "Basic"
# This parameter applies only to Azure SQL Database. For the basic pricing tier, specify "Basic", not "B". For standard tiers, specify "S0", "S1", "S2", 'S3", etc.
$SSISDBConnectionString = "Data Source=" + $SSISDBServerEndpoint + ";User ID="+ $SSISDBServerAdminUserName +";Password="+ $SSISDBServerAdminPassword
$sqlConnection = New-Object System.Data.SqlClient.SqlConnection $SSISDBConnectionString;
$sqlConnection.Open();
If all goes well, you will see results similar to those show here:
If things do not go well, you may see an error similar to this:
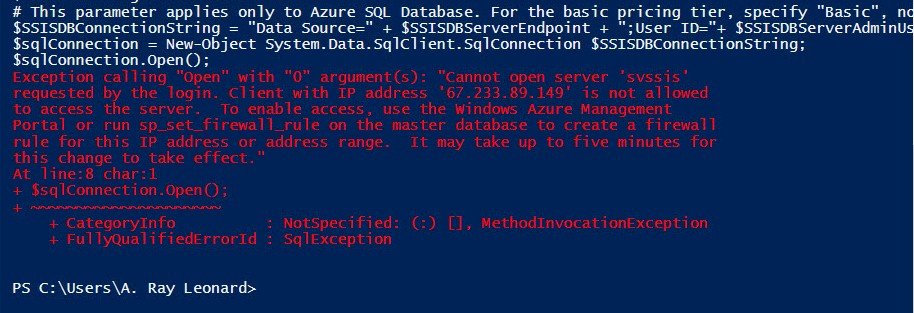
I got this error:
Exception calling "Open" with "0" argument(s): "Cannot open server 'svssis'
requested by the login. Client with IP address '67.233.89.149' is not allowed
to access the server. To enable access, use the Windows Azure Management
Portal or run sp_set_firewall_rule on the master database to create a firewall
rule for this IP address or address range. It may take up to five minutes for
this change to take effect."
At line:8 char:1
+ $sqlConnection.Open();
+ ~~~~~~~~~~~~~~~~~~~~~
+ CategoryInfo : NotSpecified: (:) [], MethodInvocationException
+ FullyQualifiedErrorId : SqlException
Why? I hadn’t connected to my Azure SQL database and set the firewall rule.
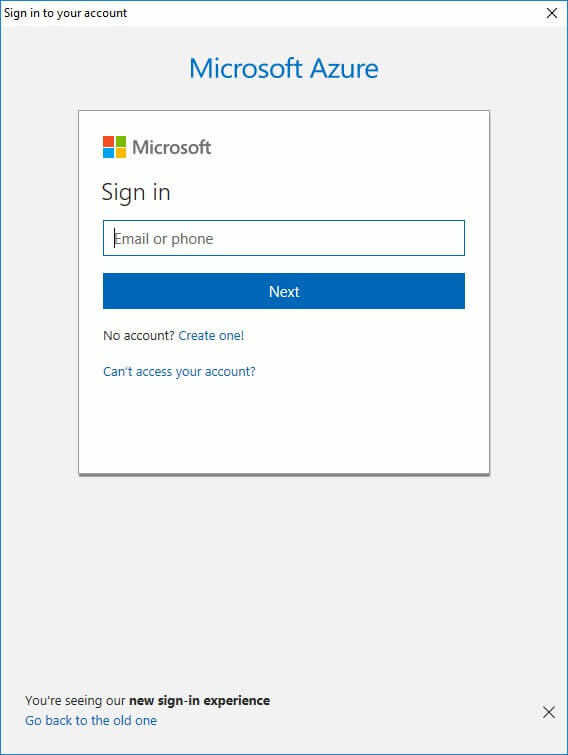
Next, let’s log into Azure and build the “Integration Runtime”:
# Hook into Azure
Login-AzureRmAccount
Select-AzureRmSubscription -SubscriptionName $SubscriptionName
New-AzureRmResourceGroup -Location $DataFactoryLocation -Name $ResourceGroupName
Set-AzureRmDataFactoryV2 -ResourceGroupName $ResourceGroupName `
-Location $DataFactoryLocation `
-Name $DataFactoryName
$secpasswd = ConvertTo-SecureString $SSISDBServerAdminPassword -AsPlainText -Force
$serverCreds = New-Object System.Management.Automation.PSCredential($SSISDBServerAdminUserName, $secpasswd)
Set-AzureRmDataFactoryV2IntegrationRuntime -ResourceGroupName $ResourceGroupName `
-DataFactoryName $DataFactoryName `
-Name $AzureSSISName `
-Type Managed `
-CatalogServerEndpoint $SSISDBServerEndpoint `
-CatalogAdminCredential $serverCreds `
-CatalogPricingTier $SSISDBPricingTier `
-Description $AzureSSISDescription `
-Location $AzureSSISLocation `
-NodeSize $AzureSSISNodeSize `
-NodeCount $AzureSSISNodeNumber `
-MaxParallelExecutionsPerNode $AzureSSISMaxParallelExecutionsPerNode
When you execute this code, you are first prompted to login to Azure:
If you’re following these instructions carefully, you already have a resource group created that will be updated, so you will see a prompt:
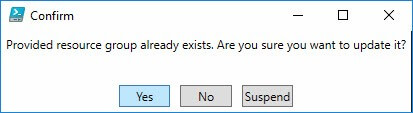
Click Yes.
There will be a lot of activity in the command window while PowerShell executes these commands. Wait until you see the PowerShell prompt before continuing.
Next, we start the Integration Runtime (IR). This can take a while. 20-30 minutes is normal at the time of this writing (late January 2018).
Enter the following command to start your engine:
Start-AzureRmDataFactoryV2IntegrationRuntime -ResourceGroupName $ResourceGroupName `
-DataFactoryName $DataFactoryName `
-Name $AzureSSISName `
-Force
You will see something new – a progress bar:

If all goes according to plan, the progress bar will continue to make progress over the next several minutes.


…If you didn’t queue up the Jeopardy theme before, now’s a good time…
Experience informs me that if the progress bar makes it past 60-90 seconds, you’ve probably done everything correctly.
It eventually finishes. If all goes as planned PowerShell supplies a snappy and informative message similar to:
CreateTime : 1/27/2018 12:57:59 AM
Nodes : {tvm-3623504638_1-20180127t005909z, tvm-3623504638_2-20180127t005909z}
OtherErrors : {}
LastOperation : Microsoft.Azure.Management.DataFactory.Models.ManagedIntegrationRuntimeOperati
onResult
State : Started
Location : EastUS2
NodeSize : Standard_D1_v2
NodeCount : 2
MaxParallelExecutionsPerNode : 2
CatalogServerEndpoint : svssis.database.windows.net
CatalogAdminUserName : aleonard@svssis.database.windows.net
CatalogAdminPassword : **********
CatalogPricingTier : Basic
VNetId :
Subnet :
Id : /subscriptions/ab66b236-fe87-421f-8b3b-bfb6c37e509d/resourceGroups/rgssis/prov
iders/Microsoft.DataFactory/factories/aleonardadf/integrationruntimes/aleonard
ssisruntime
Type : Managed
ResourceGroupName : rgssis
DataFactoryName : aleonardadf
Name : aleonardssisruntime
Description : Tinkering with SSIS in the cloud.

You’ve built – and started! – an instance of the Azure Integration Runtime, aka SSIS-in-the-cloud!
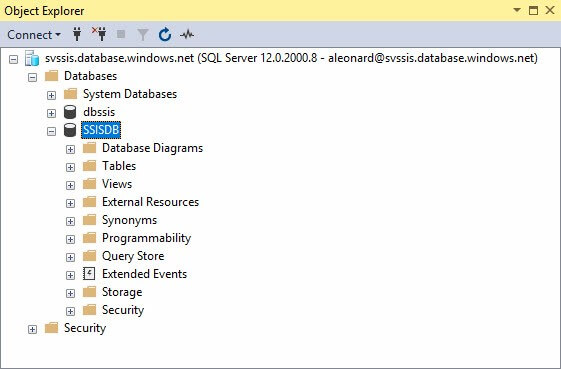
What’s more, you’ve also built an instance of the SSIS Catalog in the cloud. Don’t believe me? Refresh or reconnect to your Azure SQL database server using SSMS:
By the power vested in me by the Farmville Virginia Chapter of Cloud Data Integrators (membership: 1), I hereby pronounce you a cloud-integratin’ developer! Go update LinkedIn and then come back for Part 2!
Stop It!
The Integration Runtime is expensive when left running. Be sure to Stop the execution when done!
Stop-AzureRmDataFactoryV2IntegrationRuntime -ResourceGroupName $ResourceGroupName `
-DataFactoryName $DataFactoryName `
-Name $AzureSSISName `
-Force
Also, I started “tearing down” the rgssis Resource Group. I’m no expert on Azure billing policy, but I find I’m billed even when the ADFv2 IR is stopped.
:{>
Great post, Andy. Now I am inspired to go and do this and I do not have the time. Looks like I will be up late yet again.
Cheers!
Thank you for sharing this, Andy!