
In an earlier post, I demonstrated one way to build a basic parent-child design pattern in Fabric Data Factory by calling one pipeline (child) from another (parent). In this post, I modify the parent and child pipelines to demonstrate calling a child pipeline that contains a parameter. In this post, we will:
- Clone and edit the child pipeline
- Clone and edit the parent pipeline
- Test
Clone and Edit the Child Pipeline
Open the workspace from the earlier post.
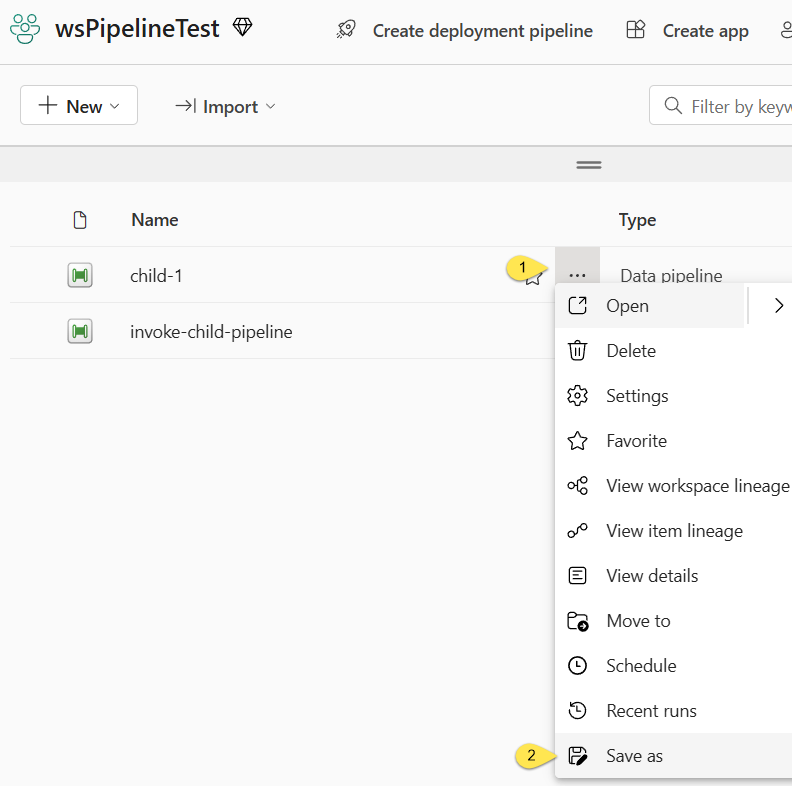
- Click the ellipsis beside the pipeline named “child-1”
- Click “Save as”:
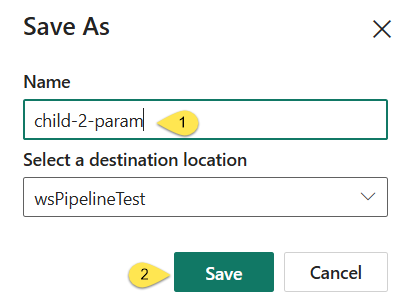
When the pipeline “Save As” dialog displays,
- Set the Name of the new pipeline to “child-2-param”
- Click the “Save” button:
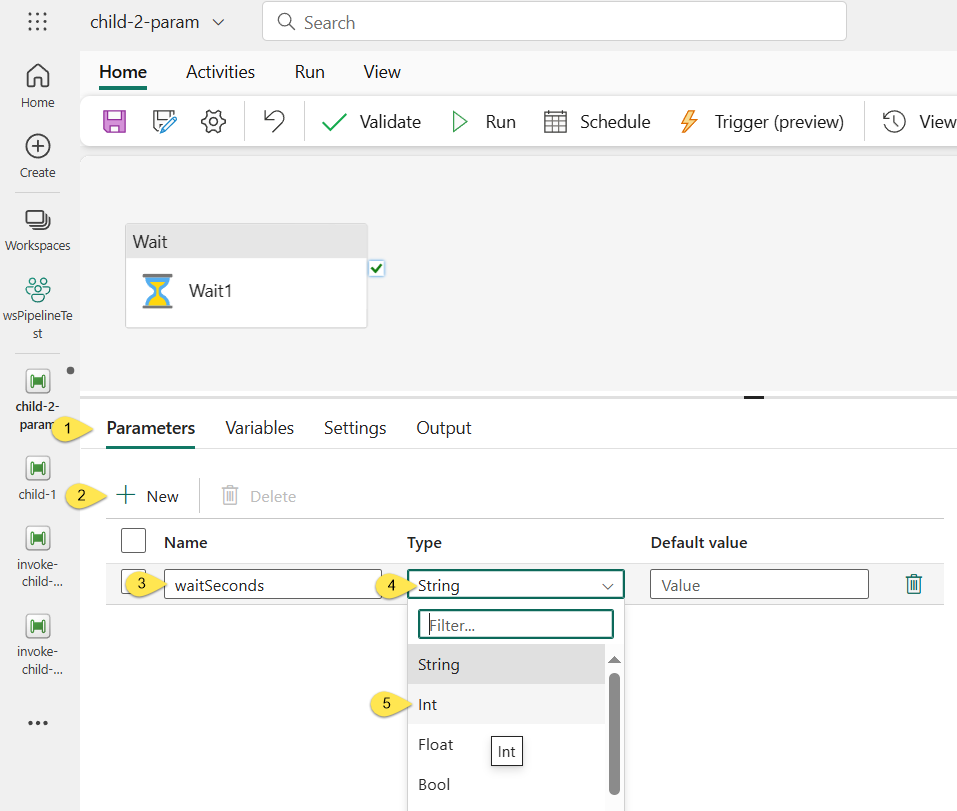
When the child-2-param pipeline displays,
- Click the “Parameters” tab
- Click the “+ New” button
- Set the “Name” property of the new parameter to “waitSeconds”
- Click the “Type” property dropdown
- Select “Int”:
Not shown above: I set the default value to 2.
Next,
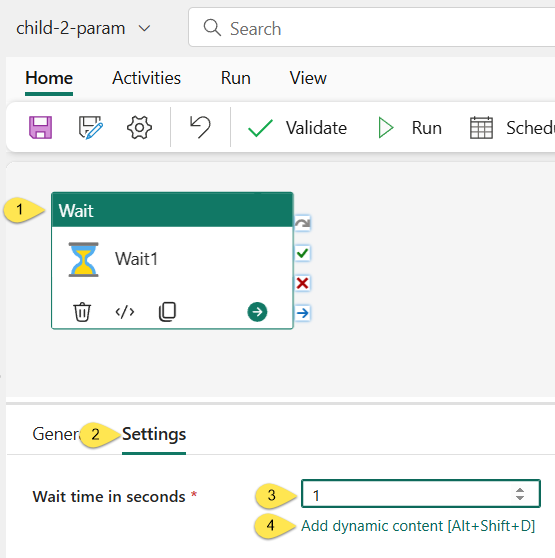
- Click the Wait activity to select it
- Click the Settings tab
- Click inside the “Wait time in seconds” property value entry
- When the “Add dynamic content [Alt + Shift + D]” link displays, click it to open the “Pipeline expression builder” blade:
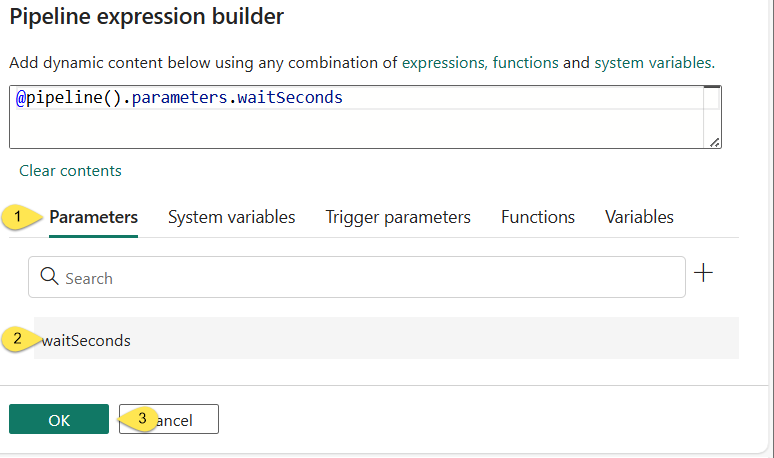
When the “Pipeline expression builder” blade displays,
- Click the “parameters” tab (which should display by default)
- Click the “waitSeconds” parameter (which should cause the expression “@pipeline().parameters.waitSeconds” to display in the “Add dynamic content below using any combination of expressions, functions and system variables” value textbox)
- Click the “OK: button:
Once configured, the “Wait time in seconds” property value appears as shown:

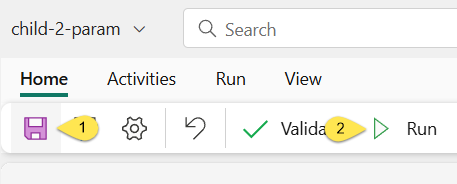
- Save the “child-2-param” pipeline
- Test-execute (Run) the “child-2-param” pipeline:
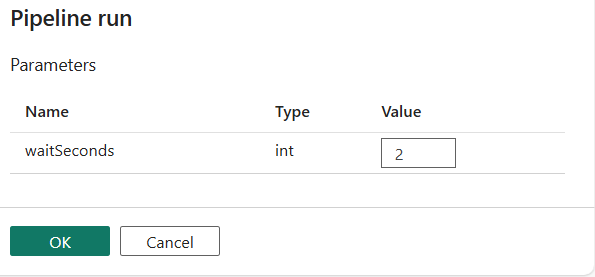
When the “Pipeline run” blade displays, click the “OK” button to proceed.
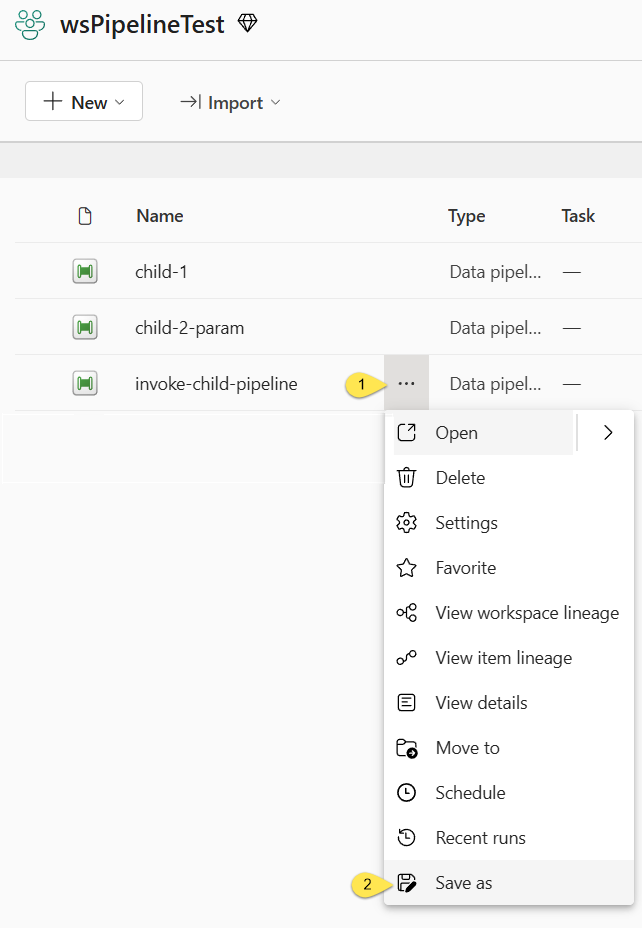
Clone and Edit the Parent Pipeline
As before with the child pipeline, clone the parent pipeline using the “Save as” functionality at the workspace level.
- Click the ellipsis beside the pipeline named “invoke-child-pipeline”
- Click “Save as”:
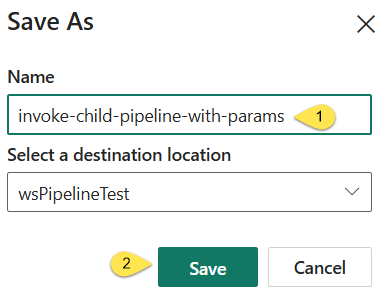
When the pipeline “Save As” dialog displays,
- Set the Name of the new pipeline to “invoke-child-pipeline-with-params”
- Click the “Save” button:
- Click the “Invoke Pipeline (Preview)” activity
- Click the “Pipeline” property dropdown
- If the pipeline list is not up-to-date, click the refresh button:
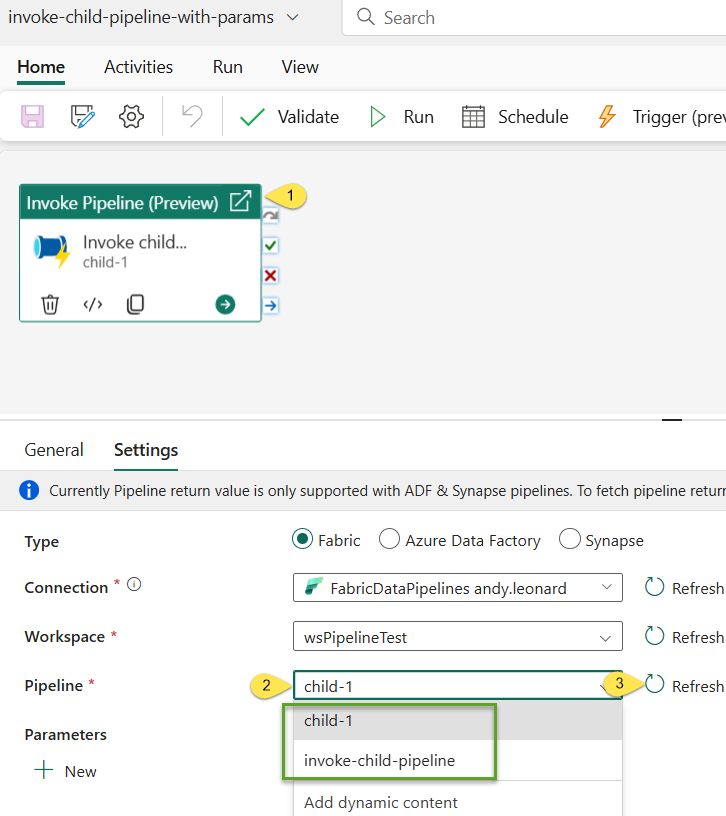
Set the “Pipeline” property value to “child-2-param”:

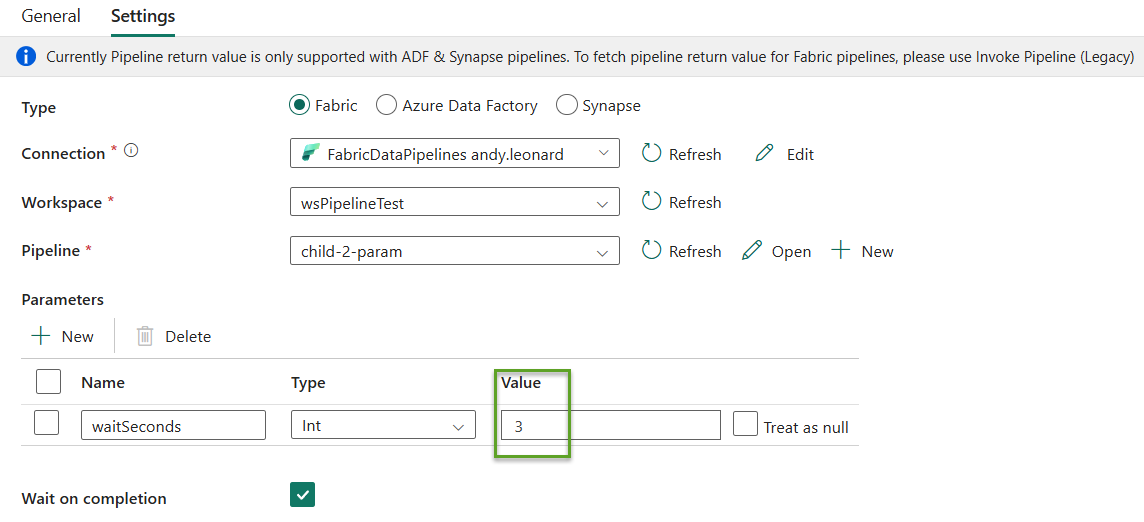
Once the “child-2-param” pipeline is selected, the Parameters property reads the “waitSeconds” parameter from the child pipeline and displays the child parameter and its default value (2). I updated the value to 3:
Test
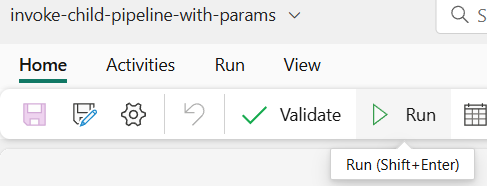
Next, Save the parent pipeline…

…and then Run it:
If all goes according to plan, the test execution succeeds:
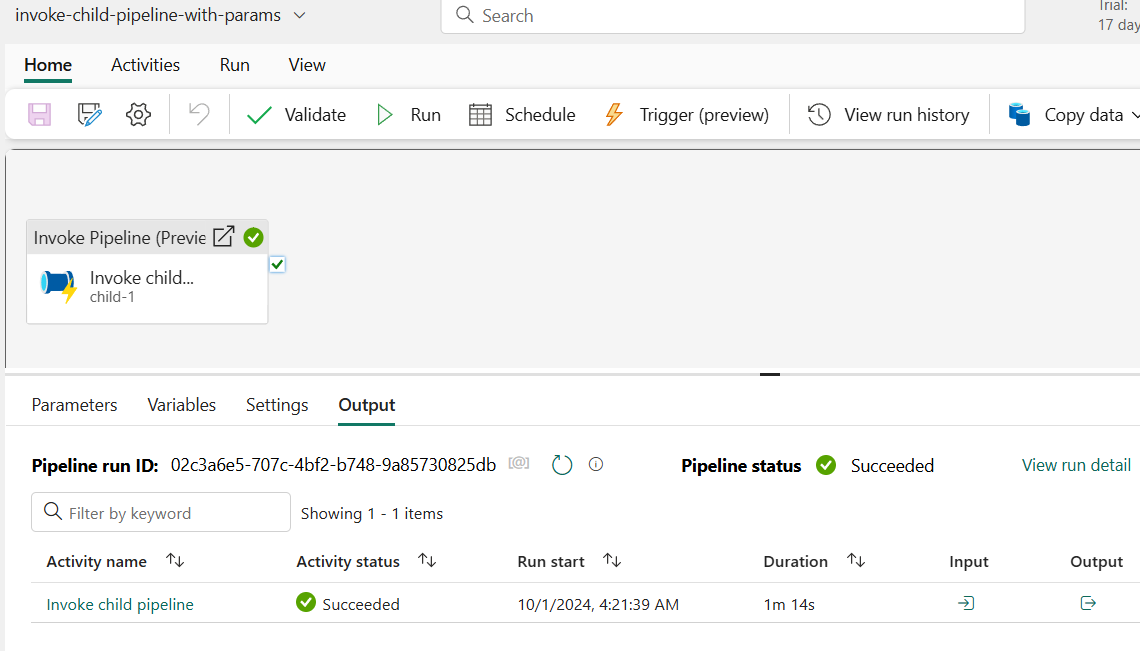
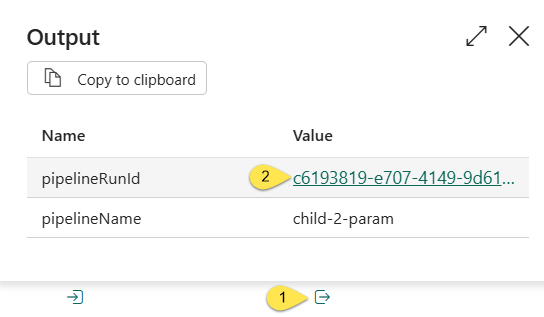
- Click the Output image
- Click the pipelineRunId link to open the Monitoring Hub for the child pipeline execution:
Pipeline execution details for the child pipeline (child-2-param) display.
Click the Parameters count link to view the parameter(s) value for this execution:
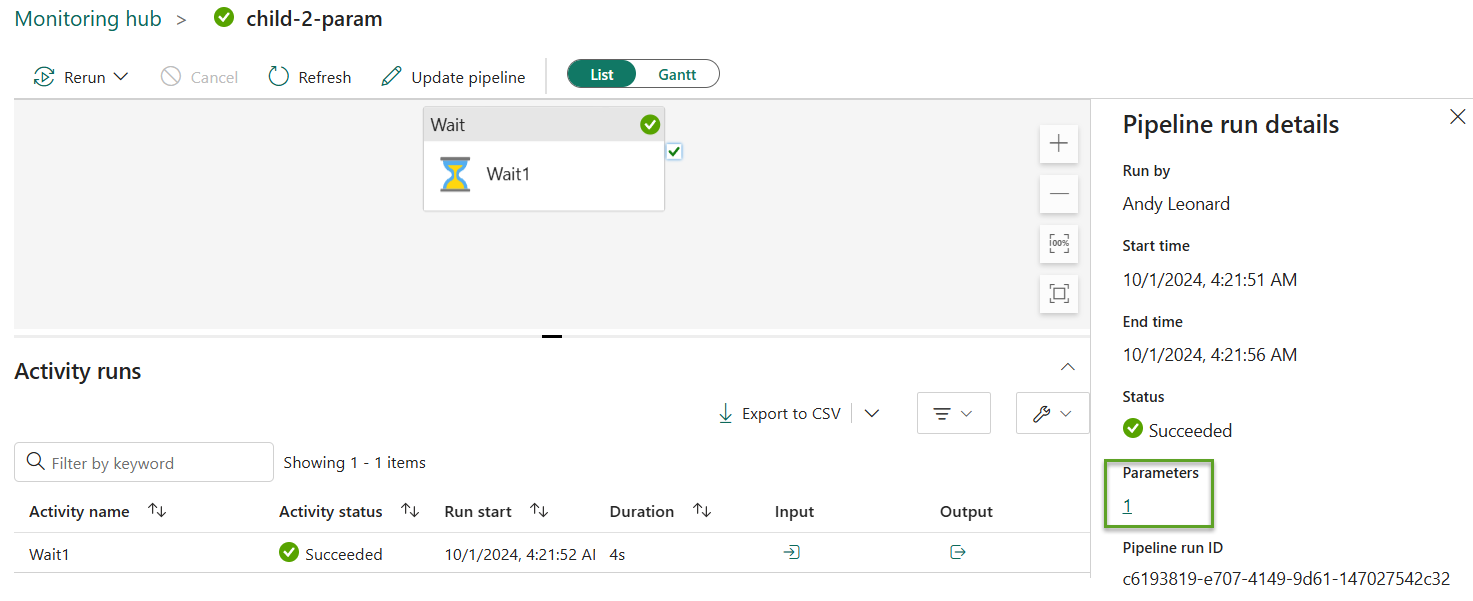
The value configured in the parent pipeline’s Invoke Pipeline (Preview) activity’s Parameters property – 3 – is the value sent to the child pipeline:

Conclusion
To learn more from me about the new Invoke Pipeline (Preview) activity, register for Enterprise Data & Analytics Fabric training and subscribe to my newsletter:

Need Help?
Enterprise Data & Analytics delivers data engineering consulting and data engineering code reviews!. Let our experienced teams lead your enterprise data integration implementation. Contact us today!
One thought on “Fabric Data Factory Design Pattern – Parent-Child with Parameters”