In this post, I’m going to demonstrate how to build the objects Business Intelligence Markup Language (Biml) requires before creating anything – the Biml Relational Hierarchy. The Biml Relational Hierarchy provides the foundation for all relational interaction between packages, cubes, dimensions, facts, and T-SQL.
It’s important to note that Biml is useful for generating SSIS and SSAS, but Biml can generate any text – which includes .Net code (I’ve used Biml to generate C#) – that is based on a database schema.
To play along at home grab the 14-day free trial of Mist here and download the World Wide Importers sample database here.
The Biml Relational Hierarchy
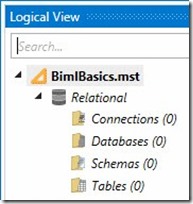
Once you create a new project in Mist (mine is called “BimlBasics”), the Logical View displays an empty Relational hierarchy. Note that the relational hierarchy is flat. There are good reasons for representing the hierarchy thus, but they are beyond the scope of this post (but trust me, it’s a good and smart thing). One thing I will share in this post: The objects beneath the Relational node reside in the “RootNode” object in Biml. Reeves Smith [@SQLReeves] explains RootNode in this (excellent) article: Stairway to Biml Level 5 – Biml Language Elements at SQL Server Central.
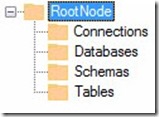
The “logical flatness” of these objects in RootNode make them easier to access and manipulate programmatically. One way to illustrate the logical flatness of the RootNode’s relational hierarchy is shown here:
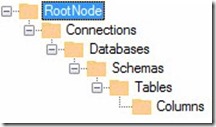
But, these objects – connections, databases, schemas, and tables (and columns) – are really part of a related hierarchy. Another way to think of the RootNode’s relational hierarchy is shown here:
“But Andy, there’s no “Columns” node in the flattened presentation.” True. The columns are there, though; they’re inside the Tables as we will see in a bit.
Populating the Relational Hierarchy
There are two ways to populate the relational hierarchy:
-
Graphically
-
Programmatically
In this post, I am going to cover graphically populating the relational hierarchy. Scott Currie [Varigence] provided a remarkable example of programmatically populating the relational hierarchy in his BimlScript.com article Biml Basics for Relational DBs.
Populating the relational hierarchy graphically is simple; just follow the steps as they are listed from top to bottom in the Logical View’s Relational node in the Mist IDE. Begin with Connections.
Connection
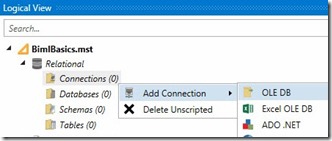
Right-click the Connections node, hover over Add Connection, and then click OLE DB:
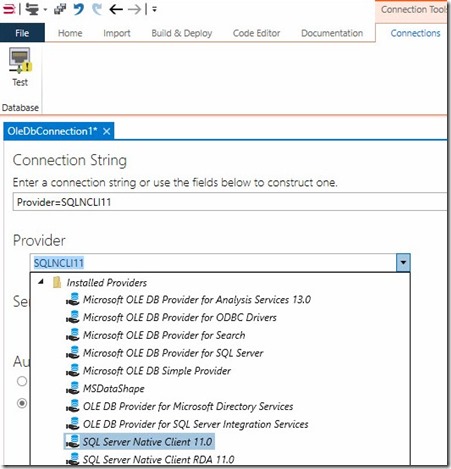
The “OleDbConnection1” window displays. You can enter a connection string value in the Connection String textbox or build a connection string. To build a connection string, first select a Provider from the dropdown:
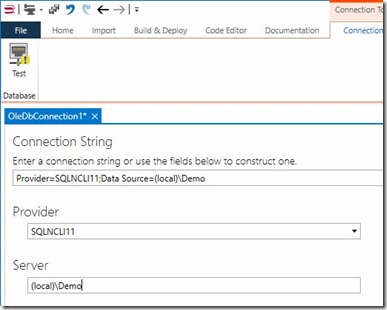
Enter a database instance in the Server textbox:
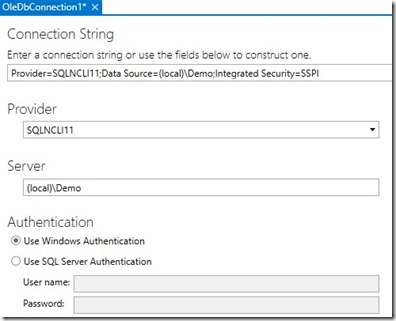
Select an authentication method and enter credentials (if needed):
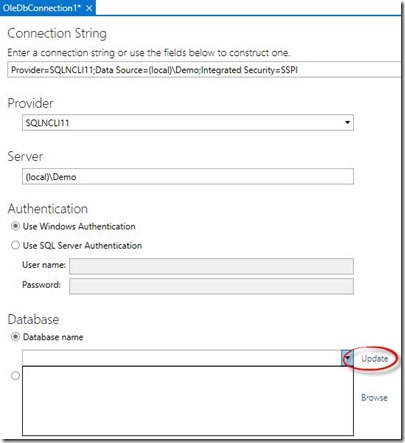
The Database Name dropdown is empty until you click the Update link:
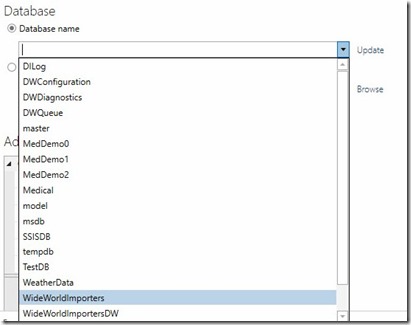
After clicking the update link, the Database Name dropdown is populated with a list of databases:
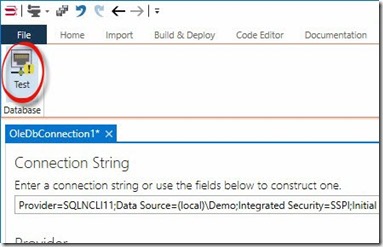
You can test the connection by clicking the Test button:
If the test is successful, you will see the following dialog:
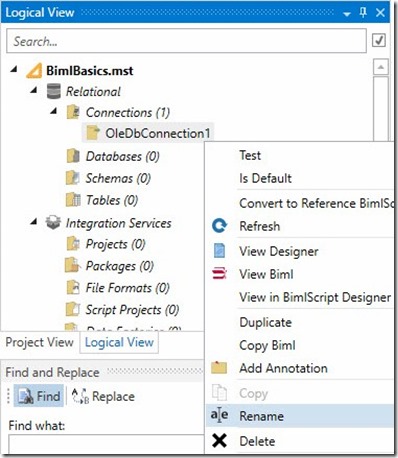
You can rename the Connection in Logical View by right-clicking the connection and clicking Rename:
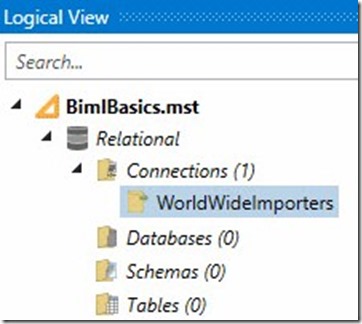
I renamed my connection “WorldWideImporters”:
Logical View now reflects a configured Database. Let’s configure a Database.
Database
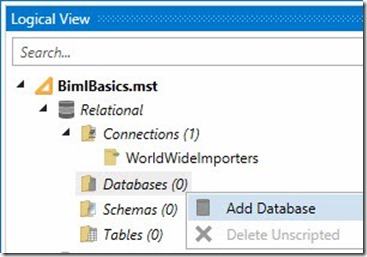
To add a database to the relational hierarchy, right-click Databases in Logical View, and then click Add Database:
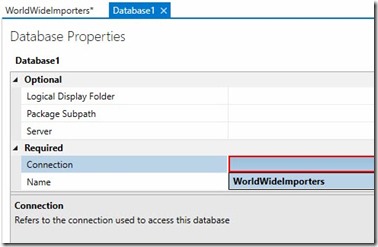
When the Database Properties window displays, Select the WorldWideImporters connection from the Connection property dropdown:
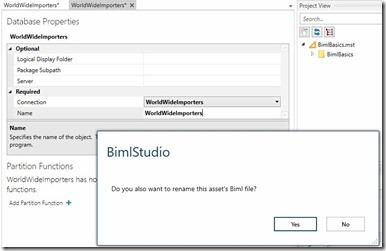
Edit the Name property of the Database (I named mine WorldWideImporters). When you navigate away from the Name property textbox you are prompted to confirm you want to also rename the Database object’s Biml file:
Click Yes.
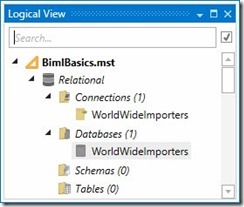
Logical View now reflects a configure Connection and Database:
Let’s next configure a schema.
Schema
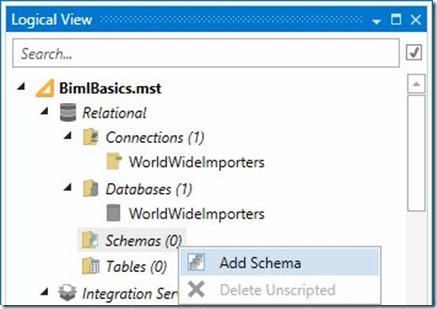
To add a schema to the relational hierarchy, right-click Schemas in Logical View, and then click Add Schema:
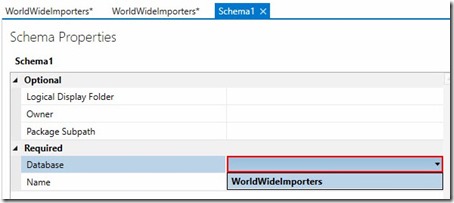
When the Schema Properties page displays, configure the Database property from the dropdown:
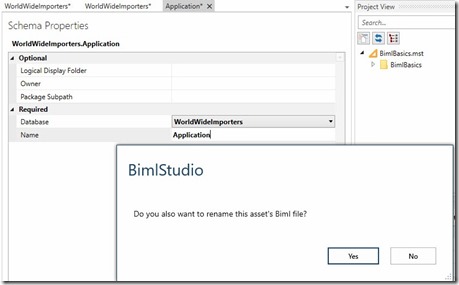
Provide the name of the Schema in the Name property textbox (I chose the Application schema). When you navigate away from the Name property textbox, you are prompted to confirm you want to also rename the Schema object’s Biml file:
Click Yes.
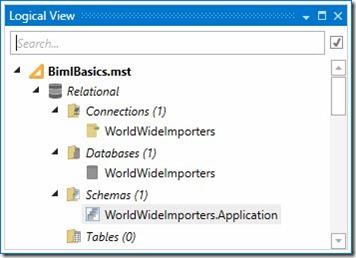
Logical View now reflects a connection, database, and schema:
Next, let’s import a table:
Table
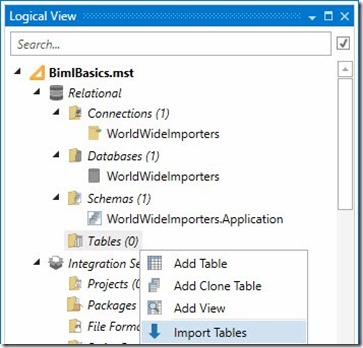
There a couple ways to add a table to the relational hierarchy. If the table exists in the relational database, you can save time by importing the table. Right-click Tables in Logical View and then click Import Tables:
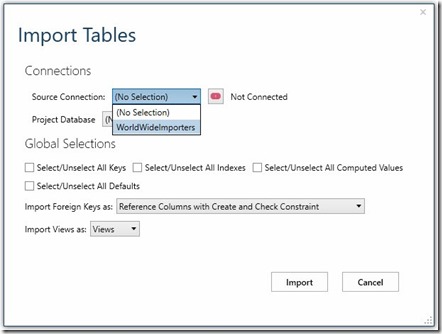
When the Import Tables dialog displays, select the connection (WorldWideImporters) from the Source Connection dropdown:
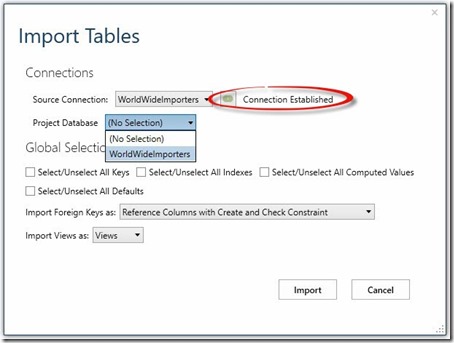
Note the Connection Established indicator changes from red to green when you successfully connect.
Select the Project Database from the dropdown (WorldWideImporters):
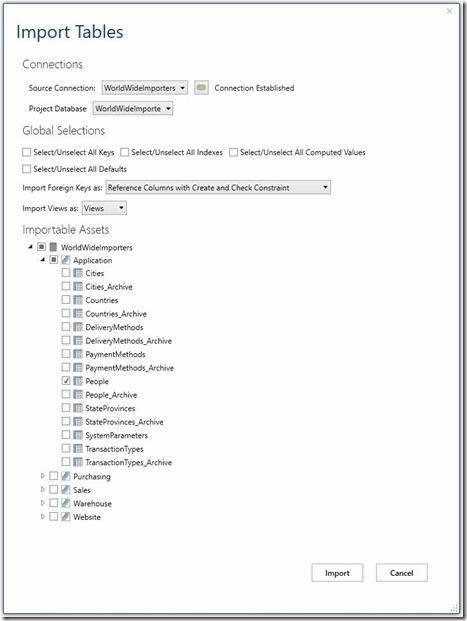
the Importable Assets treeview displays the available schemas, tables, and views in the WorldWideImporters database. I’m going to import a single table named “People”:
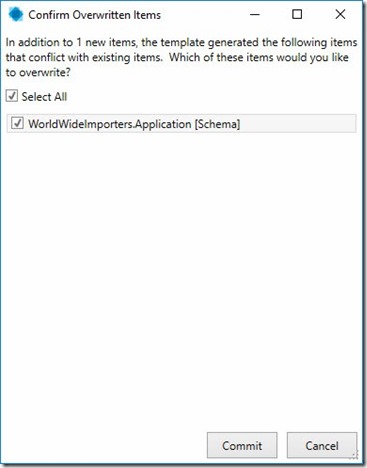
Note that I could have skipped creating the Application schema in the Biml relation hierarchy as it is imported as part of the table import process. In this case, I choose to overwrite the schema object I created earlier with the imported version:
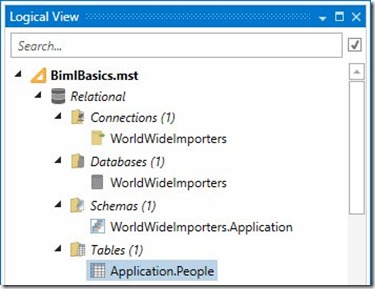
The Logical View now displays a completed Biml relational hierarchy that includes a connection, database, schema, and table:
Columns?
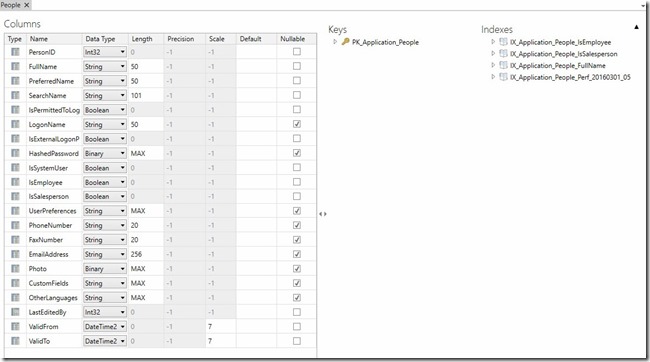
I can hear you thinking, “Where are the columns, Andy?” I’m glad you asked. If you double-click the Application.People table, the graphical viewer will display the table designer, which displays many table objects including columns:
Conclusion
Congratulations! You’ve just populated a Biml relational hierarchy.
:{>
Learn More:
Biml Academy
Stairway to Biml
Stairway to Integration Services
Varigence.com
BimlScript.com
SQL Server Central
Need help or training implementing a Biml solution?
Contact Enterprise Data & Analytics today!


Comments