
I’m an automation weenie, that’s a fact. It’s why I’m drawn to frameworks – especially data engineering execution orchestration frameworks.
Speaking of frameworks, if you haven’t checked out Martin Schoombee’s series titled Building a Framework for Orchestration in Azure Data Factory: A Series, you are missing out. First, Martin is scary smart. Second, he shares practical and clever ideas for designing ADF pipelines and managing ADF pipeline execution. Why do I mention Martin’s (excellent) series at the start of this post? I use the ADF REST API to design metadata-driven ADF execution orchestration frameworks. While Martin and I take different approaches, we’re trying to deliver a very similar solution: automate complex data engineering by abstracting away (at least) some of the complexity. And this post is my first about using Fabric Data Factory REST API methods.
This post is current as of 30 May 2024. There are other posts by fantastic bloggers about how to use the Fabric REST API. Fabric development is progressing so fast, some of those posts are less up-to-date. Make no mistake, this post will most likely not age well, and for the very same reason. That’s ok. We bloggers live to serve. I, like all the rest, will endeavor to persevere – and we will all write more posts, Lord willing.
In this post, I share one way to invoke Fabric Data Factory pipelines using the REST API.
I will be using the web version of Postman to call REST API methods.
You can sign up for a free Postman account. Since it’s free, I encourage you to check the box to receive news and offers from them. As I mentioned in an earlier post, you can always unsubscribe if the messages are unhelpful or if they get too “chatty.”
Agenda
- Build a simple pipeline for testing purposes.
- Grab the Fabric Authorization token.
- Construct the REST API method call.
- Test it!
Cool? Let’s roll.
Build a Simple Pipeline
Connect to Fabric.
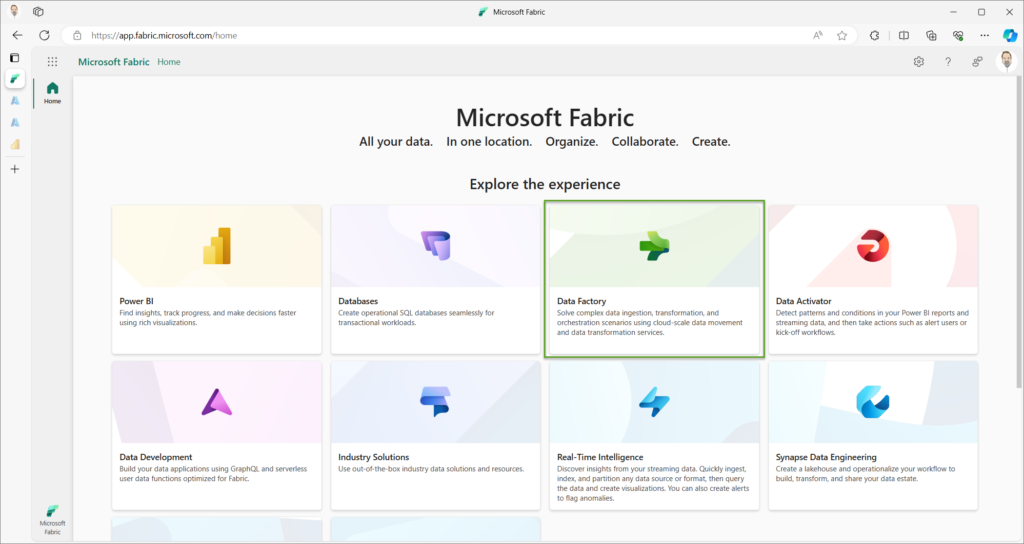
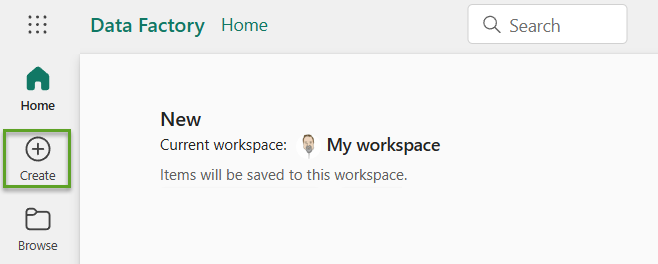
Click the Data Factory capacity to open the Data Factory Home page:
If you’d rather work in a different workspace, click the Workspaces item from the left menu and then click the “+ New Workspace” button:

When the Create a workspace blade displays, provide a Name and (optional) Description for your shiny, new workspace, and then click the Apply button:

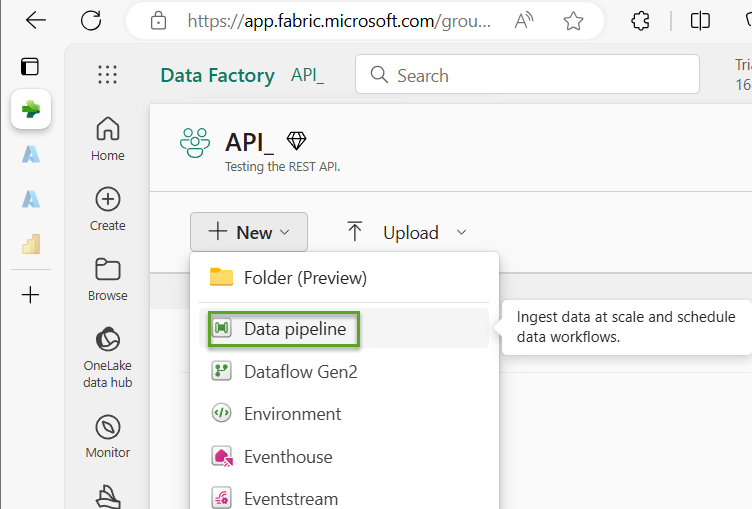
When the workspace displays, click the “+ New” button and then click “Data pipeline”:
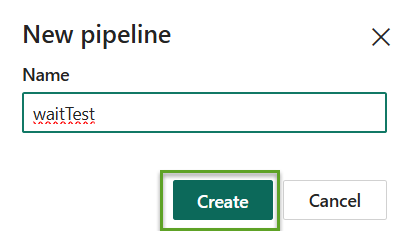
When the “New pipeline” dialog displays, enter a Name for your pipeline and then click the Create button:
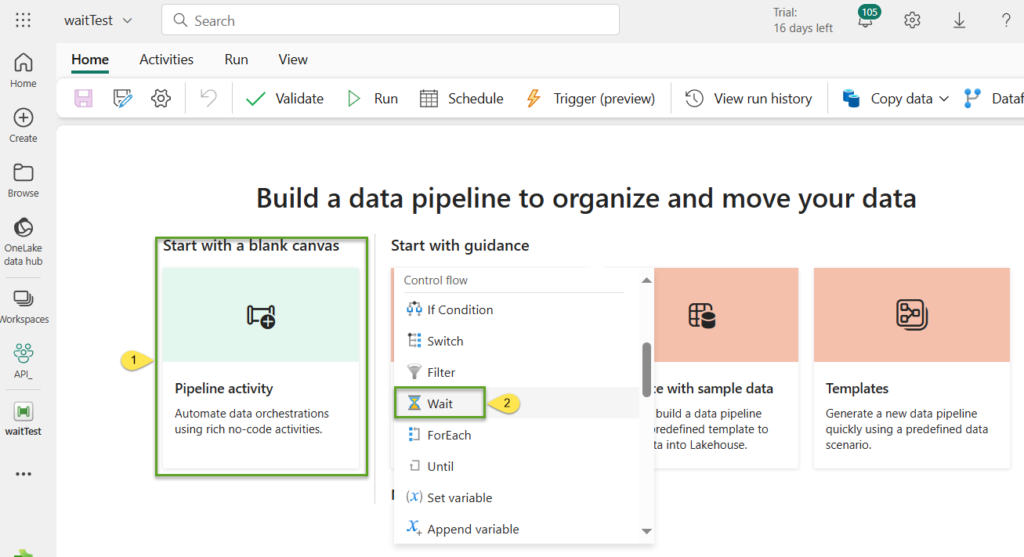
When the “Build a data pipeline to organize and move your data” screen displays:
- Click “Start with a blank canvas”
- Scroll to – and then click – the “Wait” activity:
The waitTest pipeline is ready.
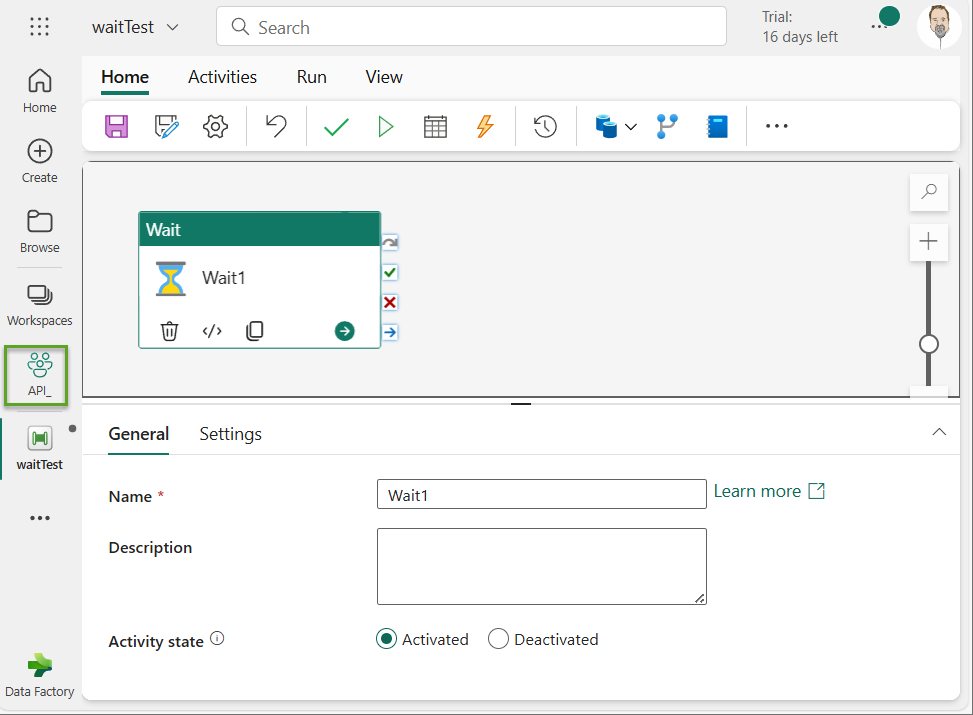
Let’s build a second test pipeline while we’re here. To begin, click the API workspace button on the left menu.
When the API workspace displays:
- Click the ellipsis beside the waitTest pipeline
- Click the “Save as” option:

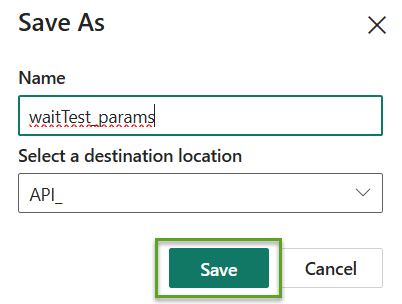
Name your new (cloned via “Save as”) pipeline “waitTest_params” and then click the Save button:
When the waitTest_params pipeline displays:
- Click the Parameters tab
- Click the “+ New” button to add a new parameter
- Name the new parameter “waitSeconds”
- Set the waitSeconds parameter type to Int
- Enter a Default value for the waitSeconds parameter (I entered 2)
- Click the Save icon:

Ok, we’re done creating test Fabric Data Factory pipelines.
Acquire the Fabric Authorization Token
I’m not sure if the browser matters, but I’m using Edge.
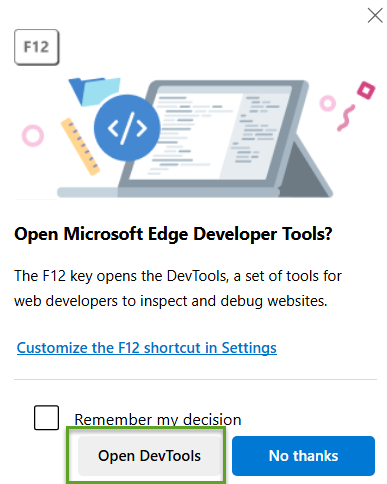
While you’re connected and logged into Fabric, press the F12 key to open the DevTools prompt and then click the “Open DevTools” button to proceed:
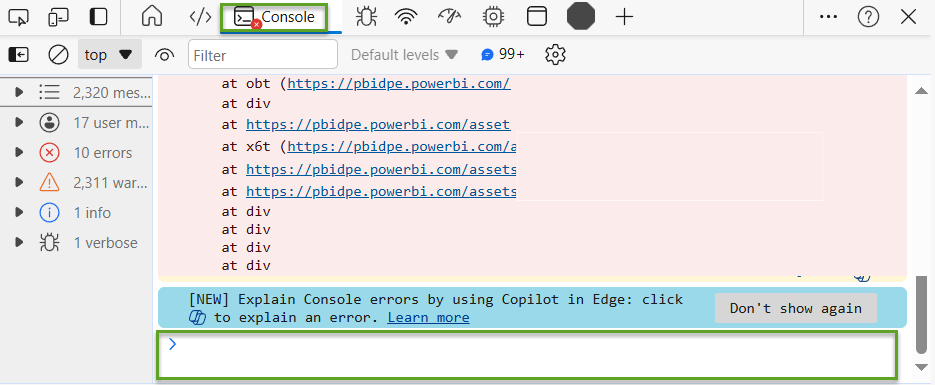
When DevTools opens, you may (like me) be overwhelmed by the number of messages displayed by default. If “Console” isn’t selected, click the Console button at the top of the window. You’ll want to focus on the prompt at the bottom of the window:
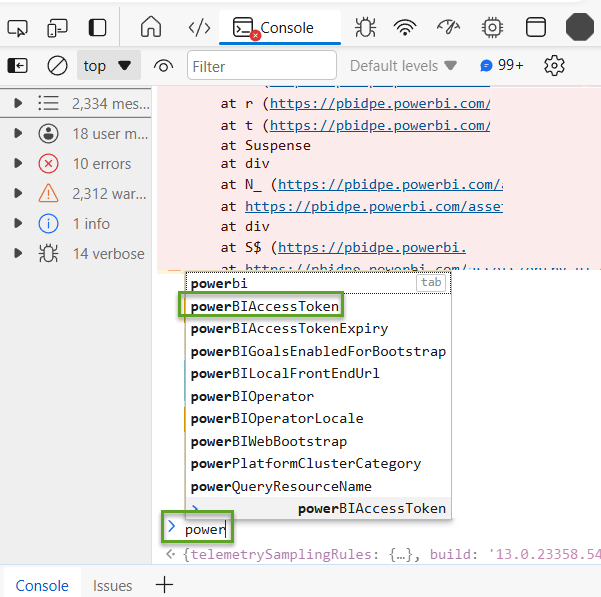
In the prompt for Console, enter “powerBIAccessToken”. When you begin typing, IntelliSense will kick in and help. Click the full command (“powerBIAccessToken”) to complete the command, unless you really enjoy typing:
When you execute the “powerBIAccessToken” command (press Enter), a string will be returned. Now, make no mistake, the actual string will be about 4-5 times as long as what I’ve pictured here – so don’t let that throw you:
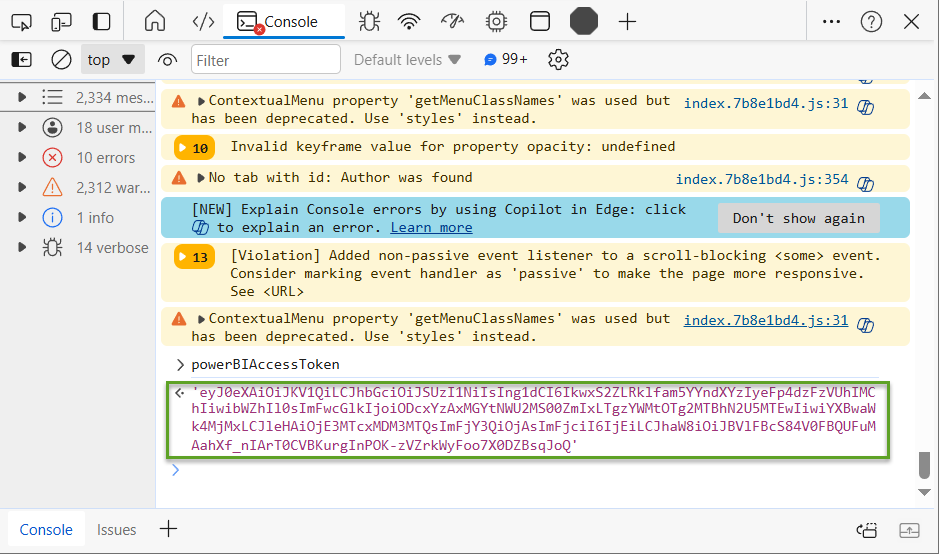
The powerBIAccessToken value is displayed enclosed in apostrophes. The value does not include the apostrophes, so highlight and copy carefully.
The powerBIAccessToken value changes regularly. I can hear some of you thinking, “How often does the powerBIAccessToken value change, Andy?”
I do not know. I just know that it changes from time to time. It may change each time one logs into Fabric.
I share this tidbit with you to spare you troubleshooting the syntax of your REST API method calls later when the syntax is just fine, but you’re using an expired powerBIAccessToken value.
You are welcome.
Construct the Call to the REST API Method
To start building the REST API method call, you need a good template. To execute a Fabric Data Factory pipeline on 30 May 2024, I use the following template:
POST https://api.fabric.microsoft.com/v1/workspaces/{workspaceId}/items/{PipelineId}/jobs/instances?jobType=Pipeline
Here there be placeholders; the text enclosed in the curly braces are placeholders. There are (only) two placeholders and next I show you how to locate their values. I placed this command in Notepad:

If DevTools is still open, close it by clicking the “X” in the almost-upper right corner. If you click the “X” in the really, really-upper right corner, you will close your browser. If I’m right about the powerBIAccessToken value changing every time you log in, you will need to re-capture that value. That’s incentive to click the “X” that’s inline with the Console menu button near the top of the DevTools window. Note: This is why I’m working late to complete this post:

Store the token someplace. If you log out or close the browser, it’s ok. Just remember to get a updated powerBIAccessToken when you start again.
To get the {workspaceId} value, click on the workspace name in the left menu and then copy the GUID-ish-looking value that follows “https://app.fabric.microsoft.com/groups/” in the URL:
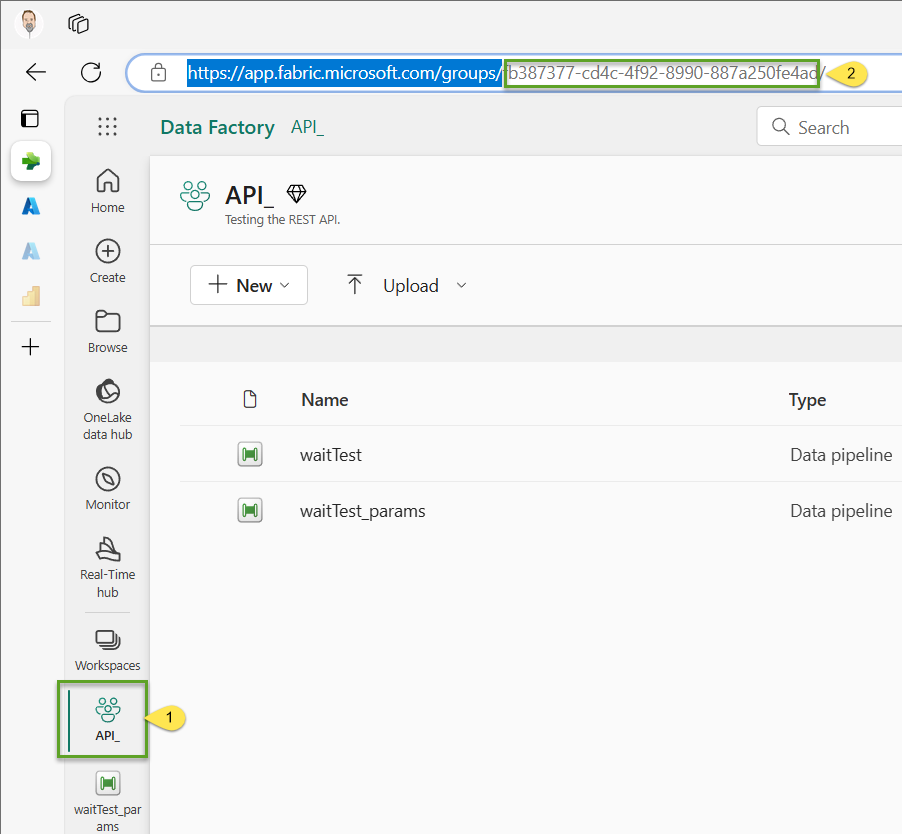
I copied the GUID-ish-looking value that follows “https://app.fabric.microsoft.com/groups/” in the URL and pasted it over the {workspaceId} placeholder in my template Notepad file:

Next, open the waitTest pipeline:
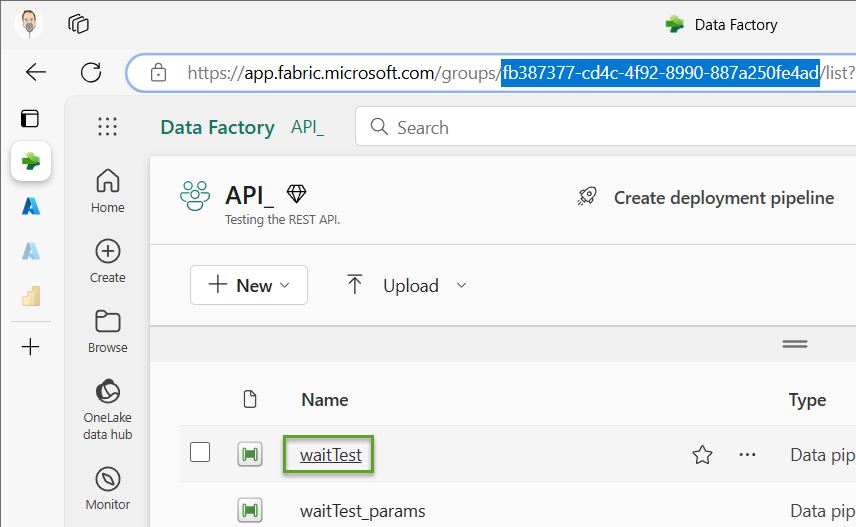
When the waitTest pipeline displays, copy the GUID-ish-looking value that follows the URL that begins with “https://app.fabric.microsoft.com/groups/{workspaceId}/pipelines/”. Paste that GUID-ish-looking value over the {PipelineId} placeholder in your Notepad file:
The REST API method call is now complete (Save the file).
Testing
Visit the Postman site.
If you do not have an account, you can create a free account.
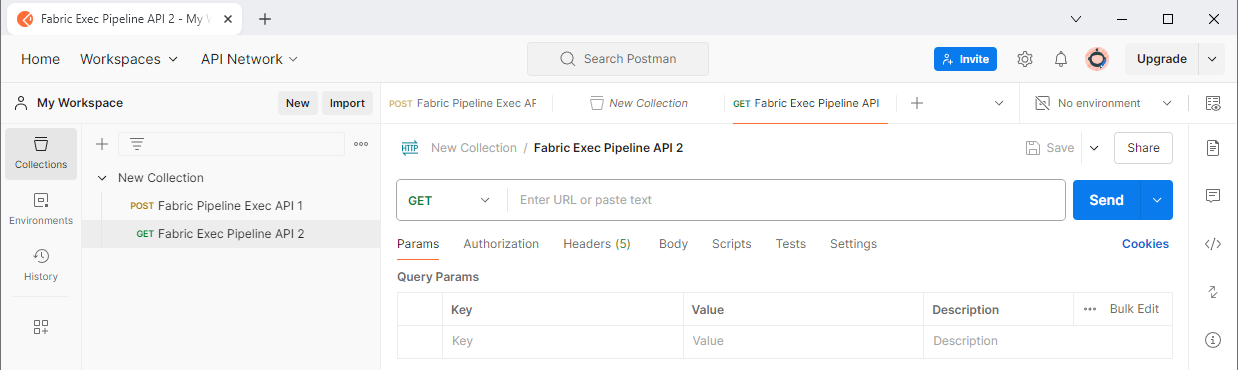
I confess I’m a n00b using Postman, so I will definitely miss steps here, for which I apologize in advance. I was able to get to the following screen by opting to use the web interface:
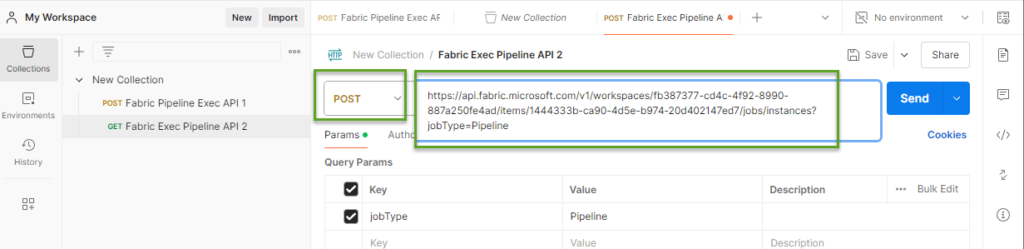
First, I change the GET to POST and then copy-paste the freshly-built REST API method call from my Notepad file, remembering to delete “POST” at the beginning of the REST API method call:
Next, I:
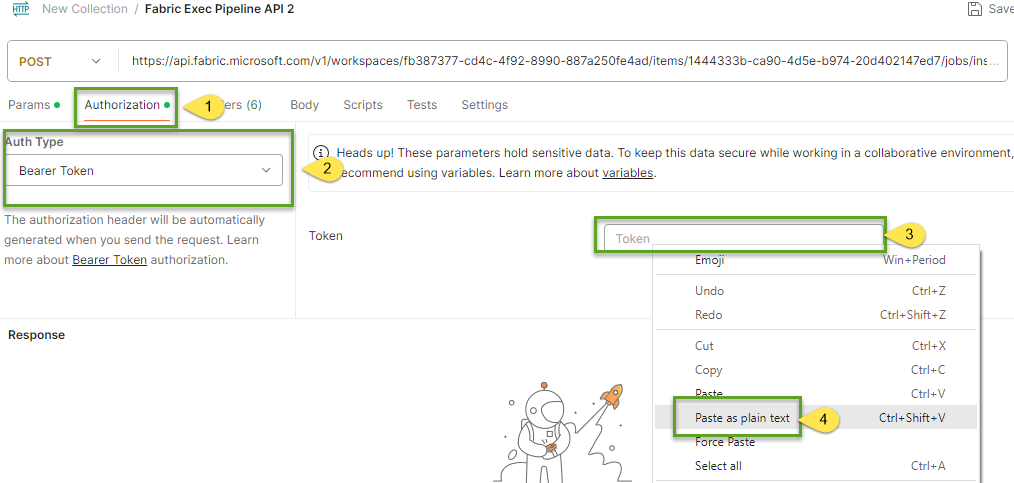
- Click Authorization on the header menu
- Change the Auth Type to “Bearer Token”
- Right-click in the Token textbox
- Click “Paste as plain text” to paste the powerBIAccessToken value into the field:
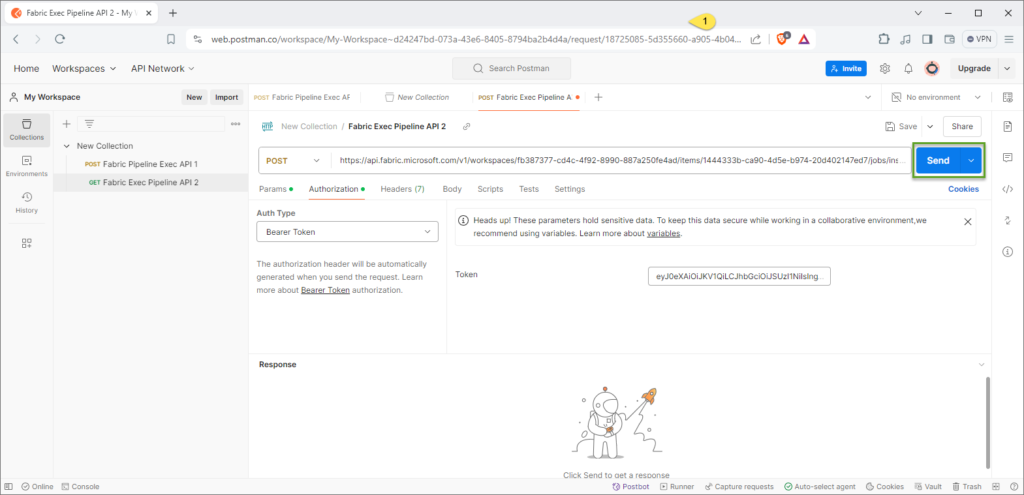
We are ready to test! Click the Send button:
… and here’s where we learn that the powerBIAccessToken value is valid for less time than it takes Andy to write a blog post:
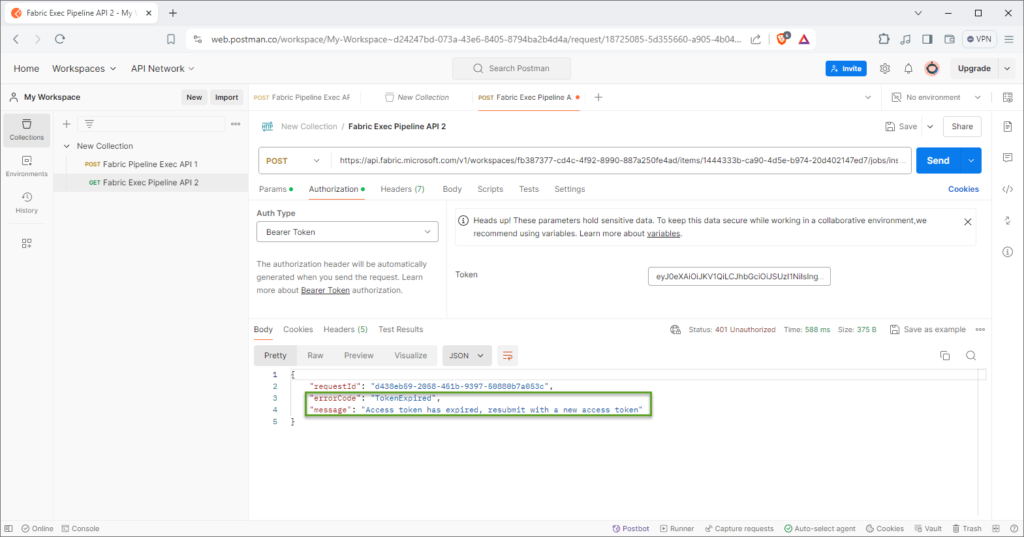
Durnit (apologies for the language…)!
The fix is fairly painless:
- Press F12 to open DevTools in Edge
- Execute the powerBIAccessToken command in the console
- Copy the powerBIAccessToken value
- Paste the powerBIAccessToken value into the Token textbox in Postman
- Click the Send button again:
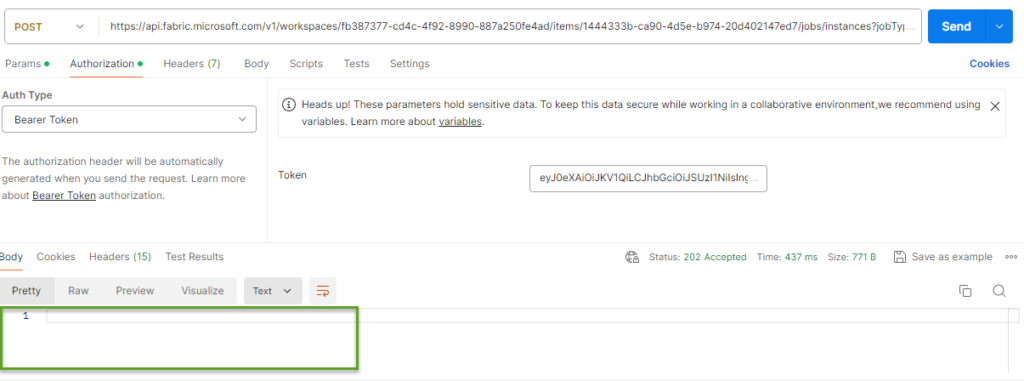
No response. It turns out no response is healthy and good.
Return to Fabric Data Factory:
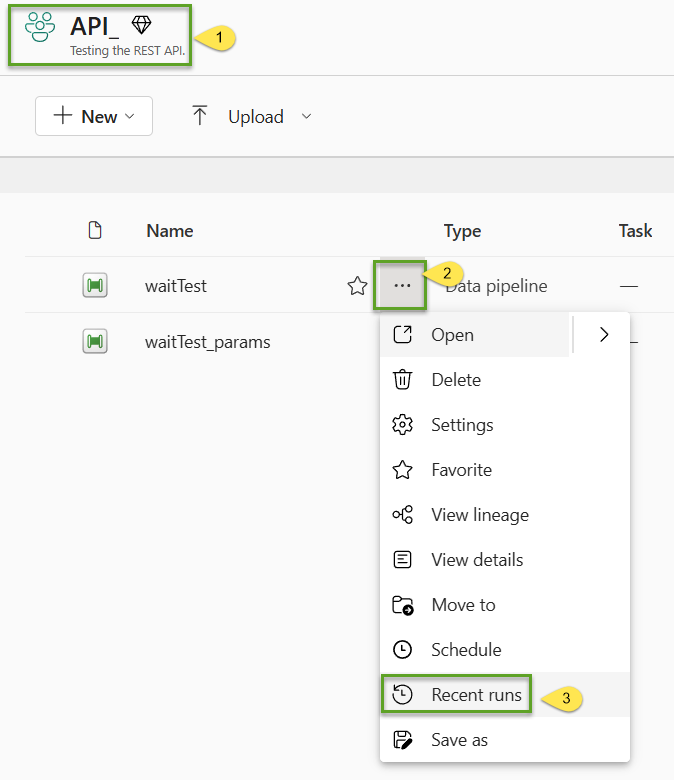
- Open the Workspace
- Click the ellipsis beside the waitTest pipeline
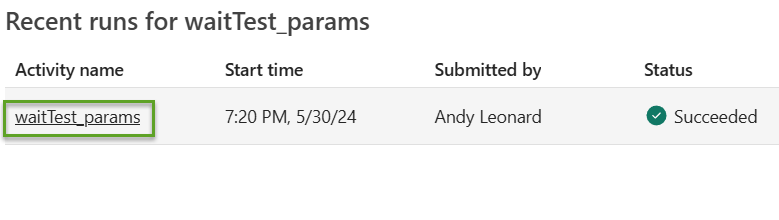
- Click “Recent runs”:
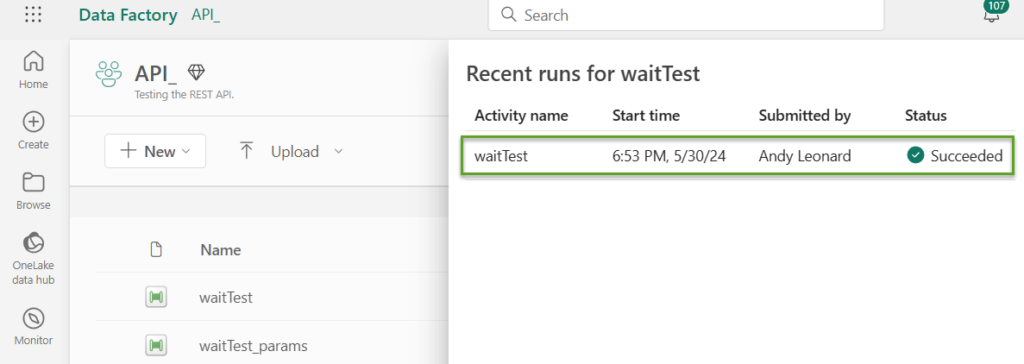
There we go – Succeeded!
Next, let’s test the waitTest_params pipeline.
Begin by editing the Postman call:
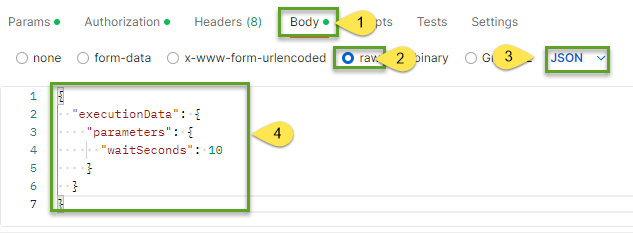
- Click Body
- Click raw
- Make sure JSON is selected
- Add the following parameters JSON to the Body textbox:
Grab the PipelineID value from the URL like before:

- Update the Postman REST API method call
- Click Send:

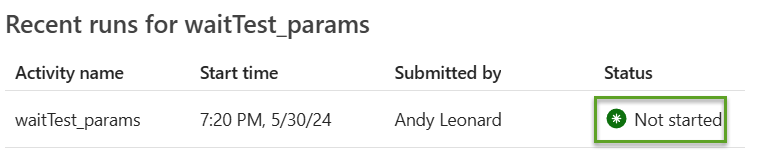
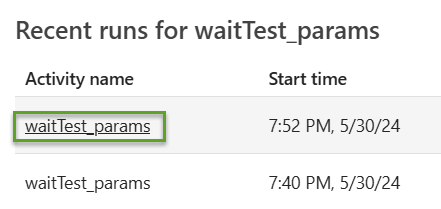
Check the Recent Runs for the waitTest_params pipeline… and “Not started?” Huh. Ok.
We wait a few minutes and look again at Recent Runs. This time we have Succeeded! Let’s examine the run by click the name of the pipeline:
Run details show us the pipeline execution succeeded but it did not successfully pass the parameter value we sent from Postman. The execution took only 2 seconds and we wanted the Wait to wait for the value of the waitSeconds parameter which we sent as 10.
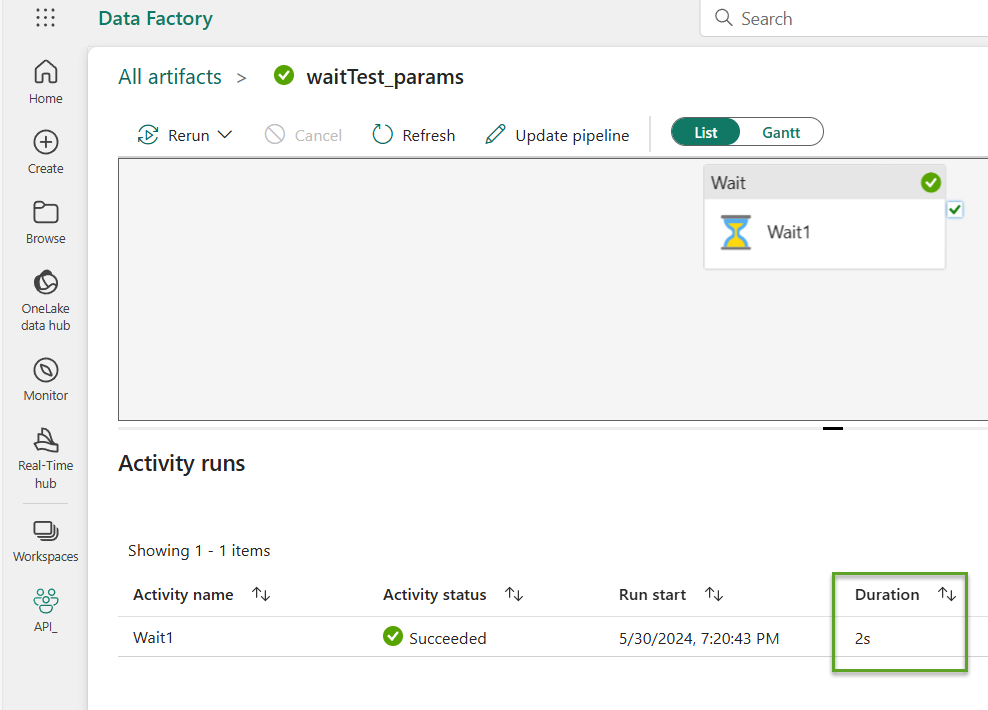
Now I have a confession. This is contrived failure. I did this to demonstrate what I consider to be the worst kind of failure during testing: Execution succeeds but the target of execution does not do what I wanted it to do.
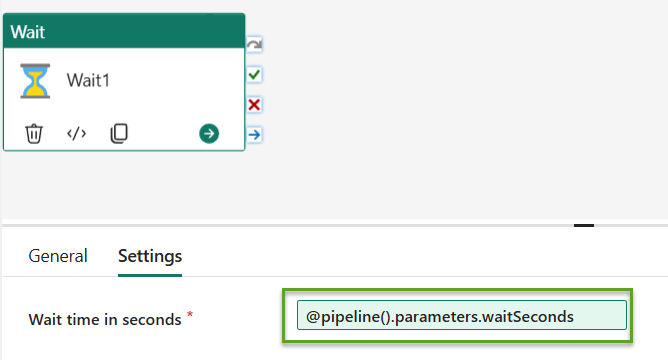
I did not connect the waitSeconds parameter to the “Wait time in seconds” property of the Wait activity. Here’s how we fix it.
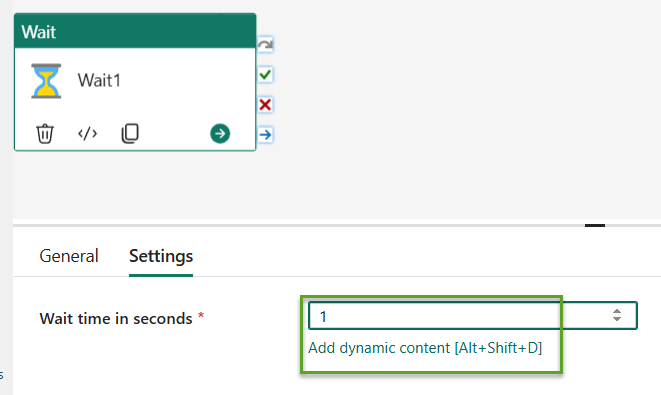
Open the waitTest_params pipeline. Click on the Wait activity and then click Settings. Click inside the “Wait time in seconds” property textbox, and then click the “Add dynamic content [Alt + Shift + D]” link to open the Pipeline expression builder:
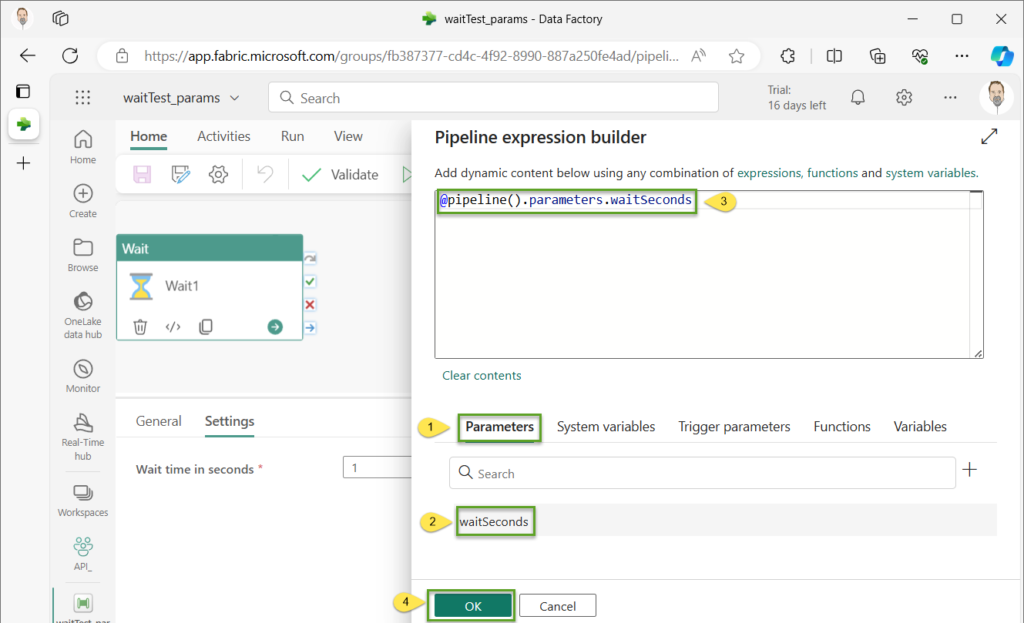
When the Pipeline expression builder opens:
- Click Parameters
- Click waitSeconds
- Observe the expression in the Pipeline expression builder textbox
- Click OK:
The “Wait time in seconds” property is now configured to use the waitSeconds parameter:
Click Send in Postman.
We have a new successful recent run:
And that run took 11 seconds.

Now the pipeline is working as we want.
Conclusion
While I’m pleased to use the Fabric Data Factory REST API to start a pipeline, we have a long way to go before this solution is as cool as Martin’s framework or frameworks I’ve designed for Azure Data Factory (ADF). But it’s a start, and a good start at that.
As always, I welcome your feedback. Please leave a comment with your thoughts and suggestions.
:{>
Hi Andy,
Thanks for this excellent bog post. It seems like this is literally the only post on this topic across the internet!
Question – Given the bearer token can/will expire in host intervals what other authorization options do we have and how can it be setup?
I am looking to call the pipeline API from an external application to allow end users to be able to trigger a pipeline so need something that will work for a long time.
Hi Vivek,
Thank you for reading my blog and for this comment!
Given the bearer token can/will expire in host intervals what other authorization options do we have and how can it be setup?
This is an excellent question – one I am working on answering. At present, I do not know. When I learn how, I will post about how to automate bearer token retrieval (or solve this issue some other way). I should place a link on this post pointing to that as-yet-unwritten post.
Thank you!
:{>
Hello, thank you very much for the great article. Is there any development on how to automate this topic? I need to start the Pipeline with the REST API in a really important project for me.
Hi Başak,
Thanks for reading my blog and for your question.
I am experimenting with the new Invoke Pipeline (Preview) activity that was released around 19 Sep 2024. I have a couple draft blog posts that are almost ready to post. I’m also tinkering with the new functionality to see if I might be able to use metadata to drive a framework in Fabric Data Factory.
I will post more when I learn more!
:{>
Hi Andy,
Have you been able to make any further progress on the authorization part?
The blog post below seems to suggest we can at least use OAuth 2.0. Haven’t tried it myself though.
https://www.purplefrogsystems.com/2024/05/how-to-call-microsoft-fabric-data-pipelines-dynamically-using-apis/
Hi Vivek,
I’ve not personally made more (well, enough) progress on this issue.
Thank you for that link, I will look into it when I have more time. I am currently busy with consulting work, which incidentally funds my coding+blogging habit.
I also note progress on Fabric Service Principle functionality, but I am not sure if it applies to the problem I am trying to solve. That’s another item on my to-do list.
:{>
I am completely new to this subject. I want to understand why we are using two pipelines here?
Hi Shaik,
Thank you for reading my blog and for your excellent question. Welcome to data engineering!
There are a few reasons to use one pipeline to call another.
1. There’s a limit on the number of activities allowed in a data factory pipeline. The activity count is currently limited to 80. It used to be 40 activities max were permitted. I maintain 80 activities in a single pipeline is a “monolith.” I discourage monolithic pipeline design mostly because monoliths are difficult to troubleshoot and maintain. Instead, I prefer…
2. Unit-of-work pipeline design – small, targeted, unit-of-work pipelines support intentional pipeline design. This pattern operates similar to functions and methods in other languages. It also promotes code re-use. A focused single-table-load pipeline might be triggered as part of multiple processes. That’s the upside of unit-of-work pipeline design. It’s important to remember that, in engineering (and life), there is no free lunch. The downside is: How do you now manage the execution of lots of small pipelines?
3.Orchestration provides a way to manage the execution of lots of small pipelines. The pattern discussed in this post is often referred to as “parent-child.” The parent pipeline is the orchestrator. It “calls” child pipelines. Remember, the child pipelines can (I argue that they should) be designed like functions and methods. You can consider the parent (orchestrator) pipeline akin to a
main()method in other languages.These are but three reasons to use multiple pipelines. There are more.
Hope this helps,
Andy
Thanks for the reply. I have one more question. Currently we are copying the access tokens from the browser. But if i want to generate the access tokens using postman what is the procedure. Because the browser access token is expiring in hour. So i need a access token which will refresh and available for us to make API calls in postman tool. Kindly help me.
Hi Shaik,
You and are waiting on the same functionality!
:{>
Is there a way to generate access token using power automate http request? To also be used to trigger a pipeline run
Hi Ross,
You and I are waiting on the same functionality!
:{>