

In my previous three posts I’ve examined how to install Docker for Windows, pull a test image, search for a SQL Server on Windows image, install and interact with it (Part 0). I’ve shared why I want to do all this (Part 1). And I’ve shared one way to execute SSIS on a container in Part 2.
In this post, I show my next (attempted) step: adding an SSIS Catalog to a container. Spoilers:
1. It’s more work than you think;
2. This is merely one way to do attempt it;
3. This is my first attempt to get one step closer to my ultimate goal; and
4. This attempt fails.
One Very Important Note
This attempt at creating an SSIS Catalog on a container does not succeed.
The next post in this series shows how I succeeded in this portion of the task. If you want to skip this post and go directly to SSIS, Docker, and Windows Containers, Part 4 – Adding an SSIS Catalog, Attempt 2, we can still be friends. Promise.
I can hear some of you thinking,…
“So, Why Write This Post, Andy?”
I have been working on getting an SSIS Catalog running in a container for a couple years.
I share this post not to discourage you.
I share it to let you know one way I failed.
I thought I had succeeded when the PowerShell in this post worked. The PowerShell works, by the way – just not in a container configured thus.
This is but one failure.
I failed more than once, I promise.
Why’d I keep going? Love. I love this field and I love helping others and I love figuring out new stuff – especially when I’ve been told, “It cannot be done.” When I hear that, I’m all “Challenge accepted!”
Did I become discouraged? Yep.
Did I want to give up? Yep.
Did I give up? Nope. I made the-problem-I-was-trying-to-solve give up first.
The most important reason I wrote this, though? Someone out there probably knows how to make this work. They will read the post and think, “Andy, you idiot! This is what you need to do to make this work.” Hopefully they will then share this in the comments (you can skip the “idiot” part, though. I already know that…).
“You are welcome.”
Get New
If you followed along in Part 0, you should have a fairly recent image of SQL Server Developer Edition running in a Windows container. But images change from time to time, so you may want to double-check by searching for – and pulling – a fresh image using these commands:
docker search mssql
docker pull microsoft/mssql-server-windows-developer
Before We Begin
Remember from Part 2, an SSIS Catalog-aware version of dtexec is already installed on the container. But:
- There is no SSIS Catalog installed on the container
- The Integration Services (IS) components are not installed on the container
- The SQL Server installation media – which we could use to add IS components – is not available on the container
How then can we create an SSIS Catalog? It turns out there are a few ways to accomplish this task. PowerShell is one of the ways.
You can find lots of good explanations and walk-throughs about how to provision an SSIS Catalog online. I narrow my search considerably by adding the required (in my opinion) search term “mattm” – short for Matt Masson – who was on the SSIS Developer Team that built the SSIS Catalog and who also blogged about the SSIS Catalog. Matt has since moved to another team inside Microsoft.
Durnit.
You may find one of Matt’s examples here. This example works if you’re connecting to a physical server. But this script breaks at line 20 when executed against this Windows container in its current state:
# Line 20
$integrationServices = New-Object $ISNamespace”.IntegrationServices” $sqlConnection
That is not Matt’s fault. Matt’s a genius. Trust me.
The problem is not all SSIS Catalog-required objects are present on this image. I can hear you thinking, …
“Andy, How Do We Get All the SSIS Catalog-Required Objects Installed On This Image?”
I’m glad you asked.
The answer is “We modify our container.”
Disclaimer: I’m about 100% certain there’s another way to do this and about 99% sure there’s a better way. I’m going to show you what I did. Cool?
Cool.
Create a Local Host Directory
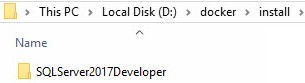
On my laptop I created D:\docker\install as shown here.
In the directory I placed the installation media for SQL Server 2017 Developer Edition. Note: If you browse to that link you will need to scroll to see the Download Now button for Developer Edition:
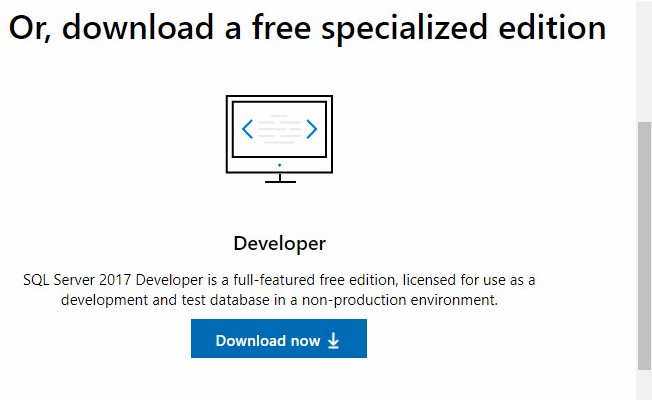
I blogged about one way to install SQL Server 2017 Developer Edition if you’d like to learn a little more. But I warn you, this post doesn’t describe many configuration options and should not be used to configure a production SQL Server 2017 instance.
Reference a Host Directory When Starting a Container
Here I choose to reuse mySqlServerContainer2. To accomplish that, though, I need to tear down the previous version. I do so using the following PowerShell commands:
docker stop mySqlServerContainer2
docker rm mySqlServerContainer2
This is one reason I like containers: I can burn them down and rebuild them easily. Try that with a virtual machine…
You can configure a Docker volume when you run a container by adding the -v switch and referencing a directory on the host. Our modified docker run command appears as show here:
docker run -d -p 1433:1433 -e sa_password=$up3r$3cr3t -e ACCEPT_EULA=Y –name mySqlServerContainer2 -m 2048M -v D:\docker\install:c:\install microsoft/mssql-server-windows-developer
Docker run creates a container for us that has 2G RAM and its C:\install directory is mapped into our D:\docker\install directory on the host. I have to tell you, this functionality beats the dickens out of transferring files into the container using PowerShell (as demonstrated in Part 2)!
Run:
docker start mySqlServerContainer2
docker exec -it mySqlServerContainer2 powershell
This starts the container and drops you into PowerShell inside the container. Run the “ls” command to list files:

Change to the install directory and view its contents by executing the following commands:
cd install
ls
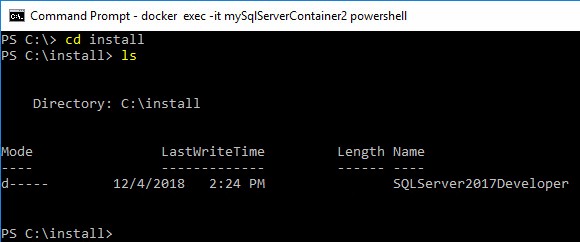
As you can see, if we want to add files that are accessible from within our container, we merely add them to our host directory.
Add Integration Services to the Container
To add the IS (Integration Services) features to our default instance of SQL Server 2017 on the container, we execute the SQL Server 2017 Developer Edition installation application – setup.exe – from the command line. Note: I ran the container with 2G RAM to provide enough RAM for this operation to complete. The command is:
C:\install\SQLServer2017Developer\setup.exe /Q /ACTION=Install /FEATURES=IS /INSTANCENAME=MSSQLServer /IACCEPTSQLSERVERLICENSETERMS /INDICATEPROGRESS
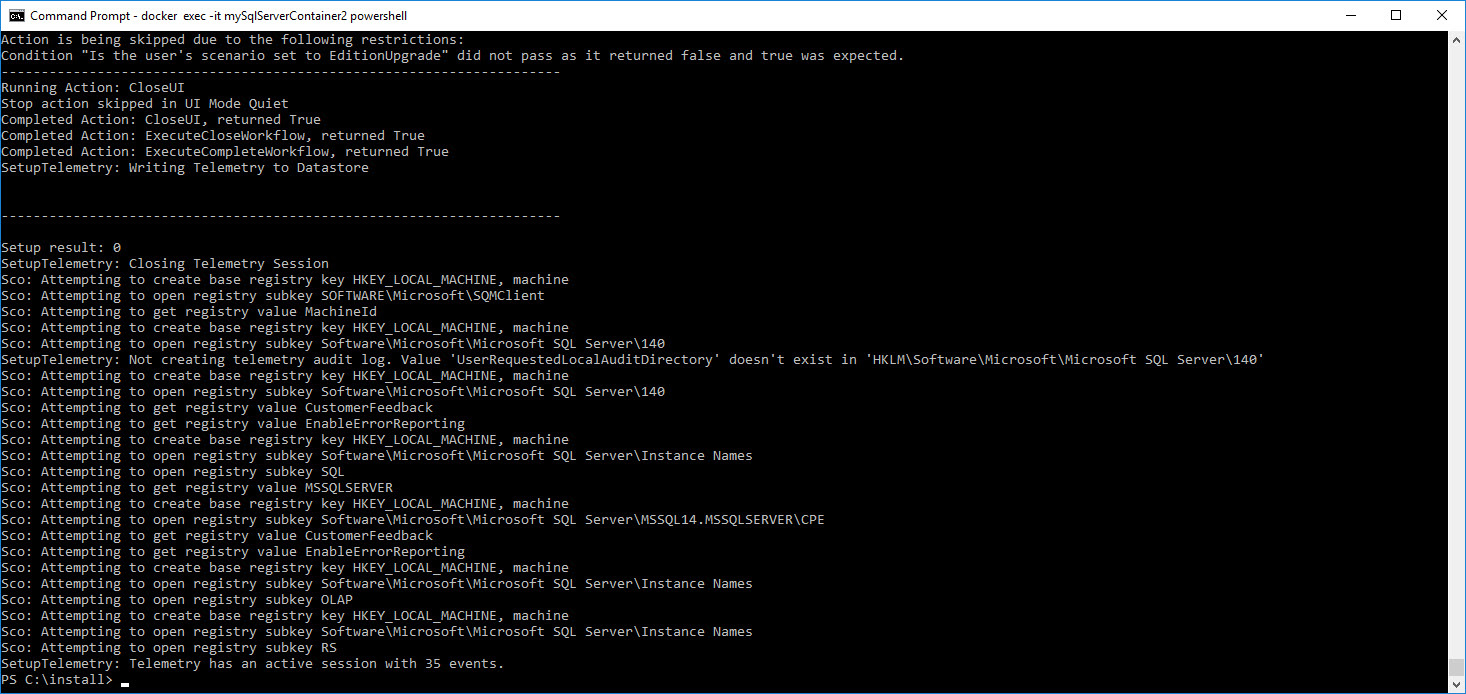
In response to this command, the container spins for a few minutes. When the installation completes, the container appears as shown here:
(Attempt to) Create the SSIS Catalog
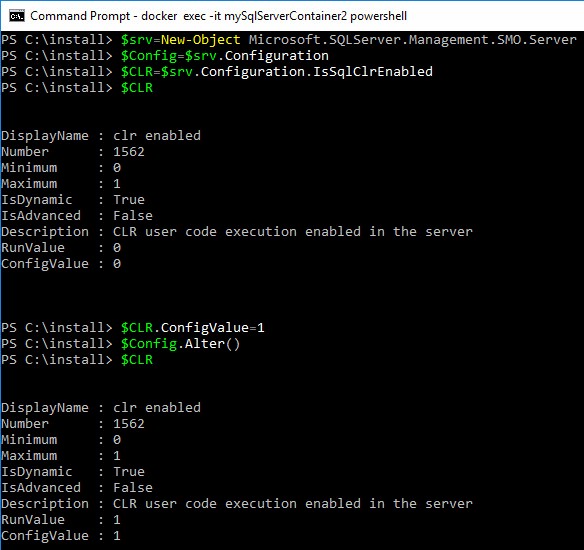
Now that IS is installed on the container, let’s enable SQLCLR. CLR is required to run the SSIS Catalog because several Catalog operations are managed via the .Net Framework. To enable CLR, please execute the following PowerShell script – with a tip o’ the hat to Rob Sewell (blog | @sqldbawithbeard) and his post titled Enable CLR with PowerShell:
# adapted from https://sqldbawithabeard.com/2014/05/05/enable-clr-with-powershell/
$srv=New-Object Microsoft.SQLServer.Management.SMO.Server
$Config=$srv.Configuration
$CLR=$srv.Configuration.IsSqlClrEnabled
$CLR
$CLR.ConfigValue=1
$Config.Alter()
$CLR
My results appear as shown here:
Returning to Matt Masson’s (awesome) PowerShell script, we can execute the following PowerShell script to create an SSIS Catalog adapted from Matt’s post titled Publish to SSIS Catalog using PowerShell:
# adapted from https://www.mattmasson.com/2012/06/publish-to-ssis-catalog-using-powershell/
[System.Reflection.Assembly]::LoadWithPartialName(“Microsoft.SqlServer.Management.IntegrationServices”) | Out-Null;
$ISNamespace = “Microsoft.SqlServer.Management.IntegrationServices”
$sqlConnectionString = “Data Source=localhost;Initial Catalog=master;Integrated Security=SSPI;”
$sqlConnection = New-Object System.Data.SqlClient.SqlConnection $sqlConnectionString
$integrationServices = New-Object $ISNamespace”.IntegrationServices” $sqlConnection
if ($integrationServices.Catalogs.Count -gt 0) { $integrationServices.Catalogs[“SSISDB”].Drop() }
$catalog = New-Object $ISNamespace”.Catalog” ($integrationServices, “SSISDB”, “SUPER#secret1”)
$catalog.Create()
Once executed, my results are:

If you skipped the Enable CLR step (which I simulate by resetting IsSqlClrEnabled to 0) you will get an error when you attempt to execute the $catalog.Create() command:
Exception calling “Create” with “0” argument(s): “Integration Services uses CLR stored procedures. Enable “clr enabled” configuration option.”
At line:1 char:1
$catalog.Create()
+ ~~~~~~~~~~~~~
+ CategoryInfo : NotSpecified: (:) [], MethodInvocationException
+ FullyQualifiedErrorId : IntegrationServicesException
Conclusion
It appears we have an SSIS Catalog on our container but looks can be deceiving. As mentioned near the top of this post, we have not, in fact, created an SSIS Catalog in our container. As ever, we need to test and see.
Next, we test and find we do not have an SSIS Catalog running in our container, so we try again – and this time succeed:
SSIS, Docker, and Windows Containers, Part 4 – Adding an SSIS Catalog, Attempt 2
4 thoughts on “SSIS, Docker, and Windows Containers, Part 3 – Adding the SSIS Catalog, Attempt 1”