

In my previous four posts I examined how to install Docker for Windows, pull a test image, search for a SQL Server on Windows image, install and interact with it (Part 0). I shared why I want to do all this (Part 1). I shared one way to execute SSIS on a container in Part 2. And I shared one way to (attempt to) add an SSIS Catalog to a SQL Server-on-Windows container in Part 3 (but that attempt failed).
In this post, I show my next step: connecting to an SSIS Catalog to a container and deploying SSIS to the Catalog. Spoilers:
1. It’s more work than you think;
2. This is merely one way to do it
3. This way actually creates an SSIS Catalog on our container; and
4. This is another step closer to my ultimate goal.
If You Skipped the Previous Post…
If you skipped the previous post titled SSIS, Docker, and Windows Containers, Part 3 – Adding the SSIS Catalog, Attempt 1, you need to do some things. If you worked through the last post you may skip to the heading “About Connecting…”.
Getting the SSIS Catalog-Required Objects Installed On This Image
I can hear some of you thinking, “How do we accomplish this, Andy?”
I’m glad you asked.
The answer is “We modify our container.”
Disclaimer: I’m about 100% certain there’s another way to do this and about 99% sure there’s a better way. I’m going to show you what I did. Cool?
Cool.
Create a Local Host Directory
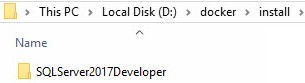
On my laptop I created D:\docker\install as shown here.
In the directory I placed the installation media for SQL Server 2017 Developer Edition. Note: If you browse to that link you will need to scroll to see the Download Now button for Developer Edition:
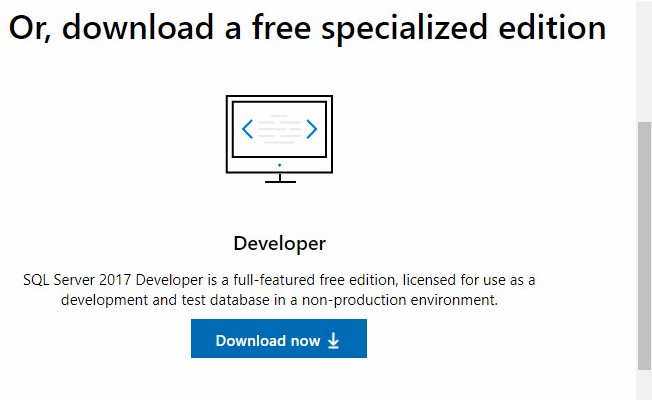
I blogged about one way to install SQL Server 2017 Developer Edition if you’d like to learn a little more. But I warn you, this post doesn’t describe many configuration options and should not be used to configure a production SQL Server 2017 instance.
For more information about extracting SQL Server 2017 Developer Edition installation media to the file system, please see the post titled One Way to Extract SQL Server 2017 Installation Media.
Reference a Host Directory When Starting a Container
Here I choose to reuse mySqlServerContainer2. To accomplish that, though, I need to tear down the previous version. I do so using the following PowerShell commands:
docker stop mySqlServerContainer2
docker rm mySqlServerContainer2
This is one reason I like containers: I can burn them down and rebuild them easily. Try that with a virtual machine…
You can configure a Docker volume when you run a container by adding the -v switch and referencing a directory on the host. Our modified docker run command appears as show here:
docker run -d -p 1433:1433 -e sa_password=$up3r$3cr3t -e ACCEPT_EULA=Y –name mySqlServerContainer2 -m 2048M -v D:\docker\install:c:\install microsoft/mssql-server-windows-developer
Docker run creates a container for us that has 2G RAM and its C:\install directory is mapped into our D:\docker\install directory on the host. I have to tell you, this functionality beats the dickens out of transferring files into the container using PowerShell (as demonstrated in Part 2)!
Run:
docker start mySqlServerContainer2
docker exec -it mySqlServerContainer2 powershell
This starts the container and drops you into PowerShell inside the container. Run the “ls” command to list files:

Change to the install directory and view its contents by executing the following commands:
cd install
ls
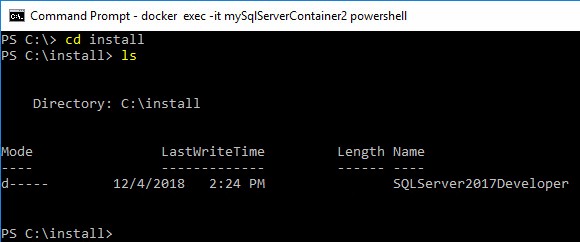
As you can see, if we want to add files that are accessible from within our container, we merely add them to our host directory.
Add Integration Services to the Container
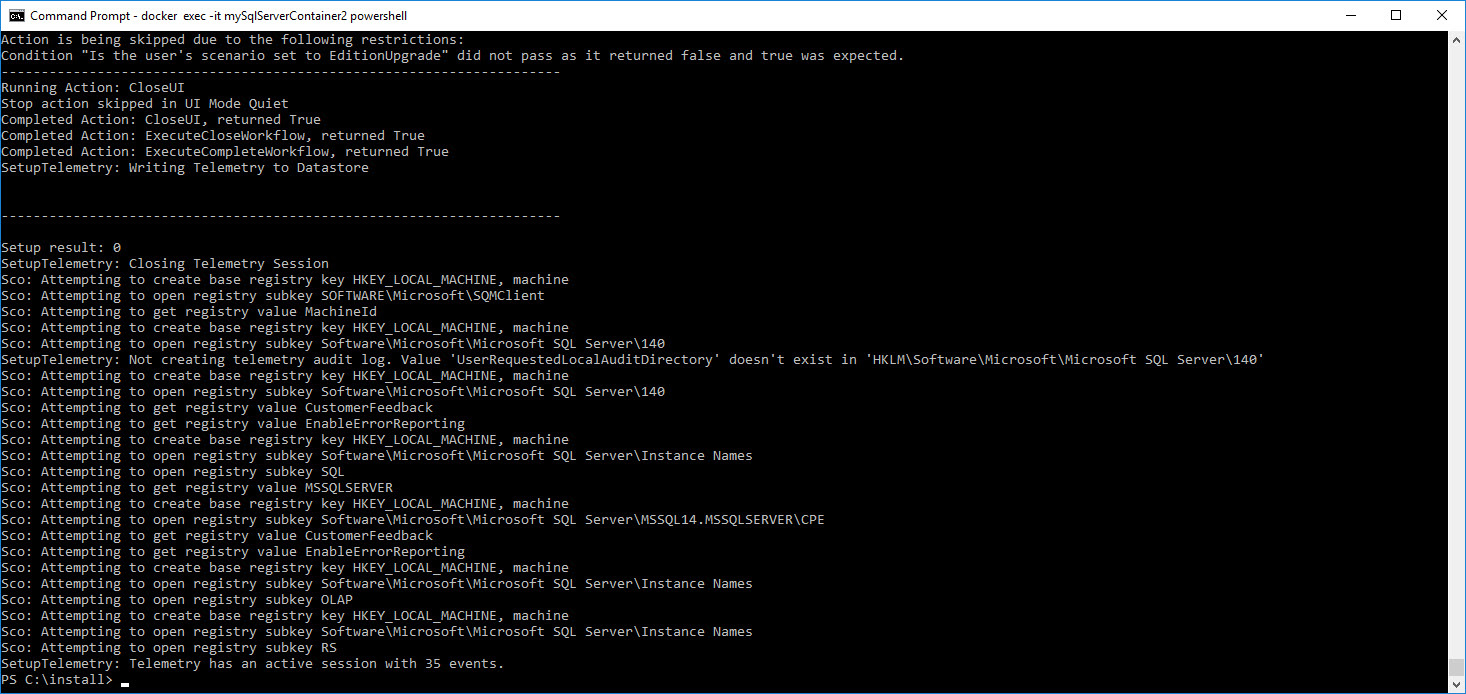
To add the IS (Integration Services) features to our default instance of SQL Server 2017 on the container, we execute the SQL Server 2017 Developer Edition installation application – setup.exe – from the command line. Note: I ran the container with 2G RAM to provide enough RAM for this operation to complete. The command is:
C:\install\SQLServer2017Developer\setup.exe /Q /ACTION=Install /FEATURES=IS /INSTANCENAME=MSSQLServer /IACCEPTSQLSERVERLICENSETERMS /INDICATEPROGRESS
In response to this command, the container spins for a few minutes. When the installation completes, the container appears as shown here:
About Connecting…
My goal is to connect to the instance of SQL Server that resides on my container using SQL Server Management Studio (SSMS). Once connected, I want to be able to interact with the SSIS Catalog on the container’s SQL Server instance.
So, two requirements:
1. Connect; and
2. Interact with the SSIS Catalog.
Connecting, Part 0
I can open SSMS and connect using a SQL Login. But… to what am I connecting? One way to connect is to use the IP address of the container. I can get the IP by executing the following docker command from a command prompt on the host:
docker inspect –format ‘{{.NetworkSettings.Networks.nat.IPAddress}}’ mySqlServerContainer2
When I execute this command, my results appear as shown here:

Copy the IP address.
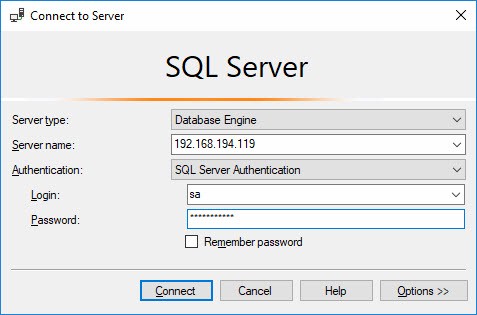
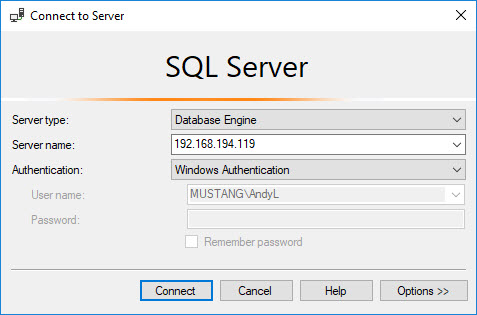
Open SSMS and paste the IP address into the Server textbox. Set Authentication to SQL Server Authentication. Enter “sa” (without the double-quotes) into the Login textbox. Enter the password you configured for the a login when you started the docker container.
The command I used was:
docker run -d -p 1433:1433 -e sa_password=$up3r$3cr3t -e ACCEPT_EULA=Y –name mySqlServerContainer2 -m 2048M -v D:\docker\install:c:\install microsoft/mssql-server-windows-developer
The sa_password argument contains my sa password: $up3r$3cr3t:
When I attempt to connect I get the following error message:
A connection was successfully established with the server, but then an error occurred during the login process. (provider: SSL Provider, error: 0 – The certificate chain was issued by an authority that is not trusted.)

A quick Bingle search reveals the connection string is requesting an encrypted connection to the SQL Server instance, and that’s just a little more than the container is prepared to offer. The solution? Click Options and view the settings on the Connection Properties tab:
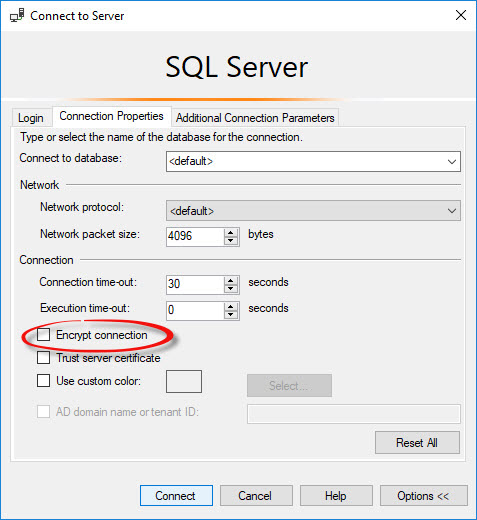
If it is checked, un-check the Encrypt Connection checkbox.
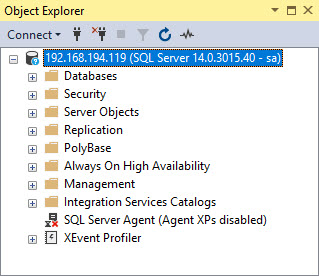
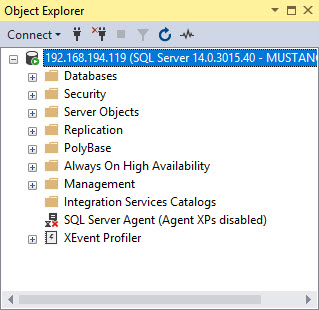
Click the Connect button and SSMS should connect to the default SQL Server instance on the container:
Expanding the SSMS Object Explorer’s Integration Services Catalogs node, we see… no SSIS Catalog.
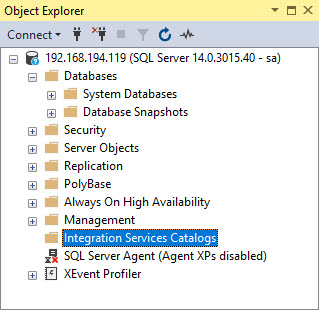
What gives?
Well, remember the PowerShell script we executed to create the SSIS Catalog?
It did not create the SSIS Catalog.
Why not?
My Best Guess: The SSIS Catalog uses objects in the .Net Framework to perform some operations (this is why SQLCLR must be enabled to create an SSIS Catalog). If you work with the SSIS Catalog – and try new and different things (like connecting using a SQL Login)…
… you will learn some SSIS Catalog functionality will not work unless you connect using Windows Authentication.
I can hear you thinking, “Why, Andy?”
I do not know.
I know we must take a different approach.
As stated in previous posts in this series, I am certain there are other ways to solve this issue, and I am nearly certain there’s a better way. This is how I address this obstacle:
I first create a local administrator account.
Creating a Local Administrator Account
Use the following PowerShell script to create a local administrator account with the following credentials on mySqlServerContainer2:
- Name: su
- Password: $up3r$3cr3t
- Privileges: Administrator
$Username = “su”
$Password = “$up3r$3cr3t”
$group = “Administrators”
$adsi = [ADSI]”WinNT://$env:my”
NET USER $Username $Password /add /y /expires:never
NET LOCALGROUP $group $Username /add
WMIC USERACCOUNT WHERE “Name=’$Username'” SET PasswordExpires=FALSE
When I execute these commands my command prompt appears as shown here:

Start SSMS from a command prompt using the runas command with the /netonly switch:
runas /netonly /user:mySqlServerContainer2\su “D:\Program Files (x86)\Microsoft SQL Server\140\Tools\Binn\ManagementStudio\Ssms.exe”
When I execute this command my initial command prompt results appear as shown here:

Here’s what’s cool about starting SSMS using runas with the /netonly switch: When prompted to login to the SQL Server instance, you configure the connection to use Windows Authentication:
One note: Be very careful typing the password into the runas command. If you supply an incorrect password, SSMS will raise an error when trying to connect:
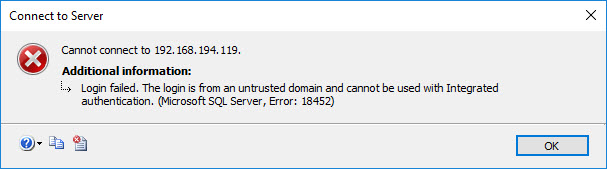
The error message is:
Login failed. The login is from an untrusted domain and cannot be used with Integrated authentication.
If you get it right, we connect (yay!) but still no SSIS Catalog (boo!):
Creating an SSIS Catalog on a Container
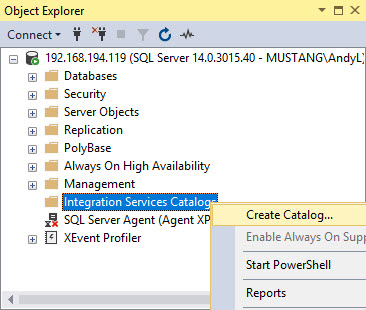
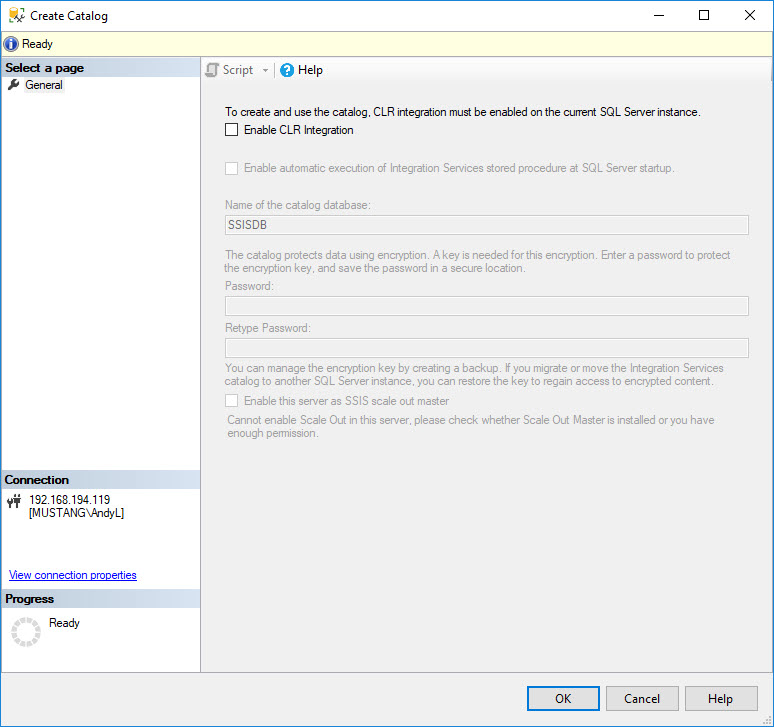
Right-click the Integration Services Catalogs node in SSMS’s Object Explorer, and then click Create Catalog:
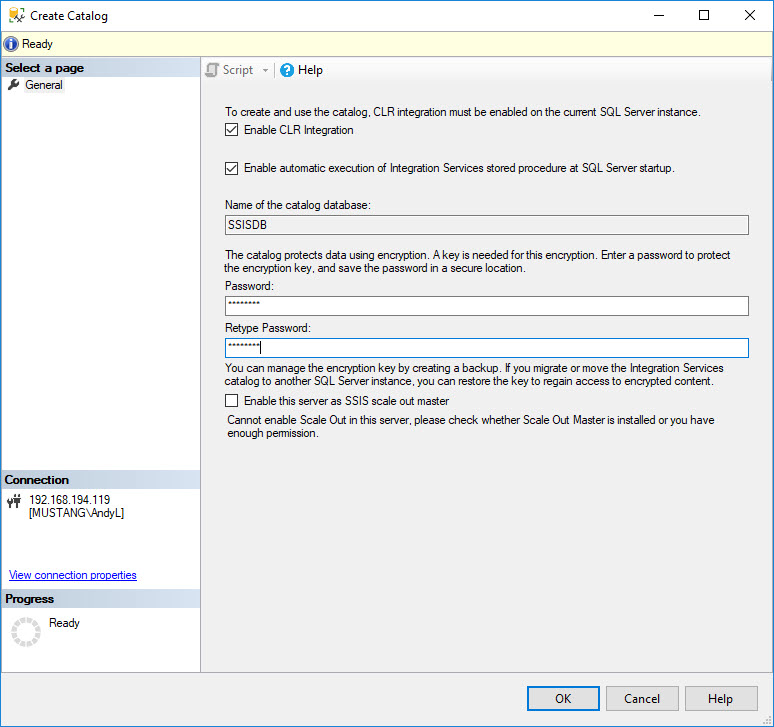
When the Create Catalog dialog displays, check the Enable CLR Integration checkbox to enable the remainder of the Catalog configuration controls on the form:
Once configured, click the OK button to create the SSIS Catalog on the container:
The SSIS Catalog is created. No, really.
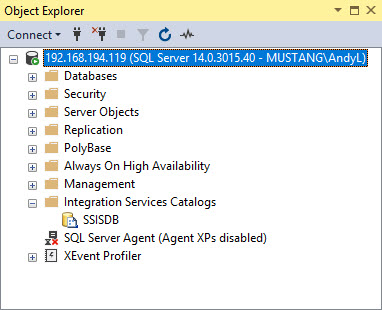
Conclusion
After two attempts I have an SSIS Catalog running in a SQL Server Windows container.
Hi Andy,
Awesome work mate.
cheers for that.
BTW what does this $adsi = [ADSI]”WinNT://$env:my” serves?
I created SSISDB catalog with SA account. Would it be safe to use it this way?
Thanks, Leo
Hi Leonardo,
The on-premises version of the SSIS Catalog requires Windows Authentication.
Hope this helps,
Andy
Thanks for the details. I am stuck in opening the SSMS from the container.
1. SSMS was not installed. I copied the installer and installed it similar to your instructions for SSDT.
2. When I finally run the command for starting ssms.exe, no GUI window opens up. I can see ssms listed in Get-Process, but cant use it.
Please help.