
On 17 Feb 2022, I first saw the Microsoft announcement of the public preview of Azure-SSIS integration runtimes in Azure Synapse Analytics. I blogged about the announcement in a post titled Azure-SSIS Integration Runtime now available in Azure Synapse Analytics.
I am excited to share one way for you to provision an Azure-SSIS IR in Synapse Analytics, following these steps. To start provisioning a shiny new Azure Synapse Analytics Azure-SSIS integration runtime, open Synapse Studio:
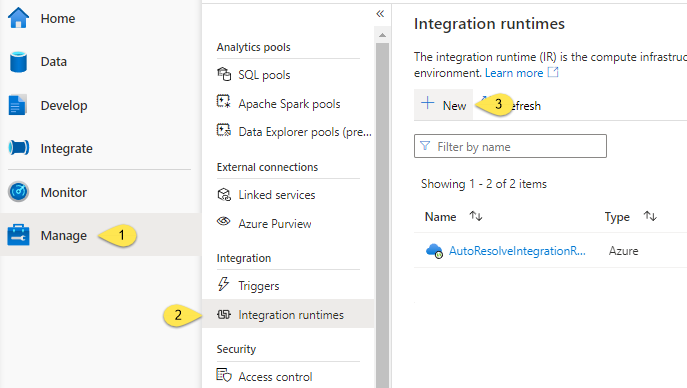
- Navigate to Manage
- Click Integration runtimes
- Click the “+ New” button:
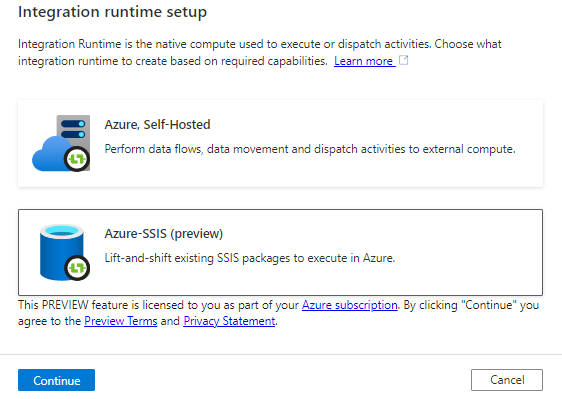
When the “Integration runtime setup” blade displays, select the “Azure-SSIS (preview)” tile and then click the Continue button:
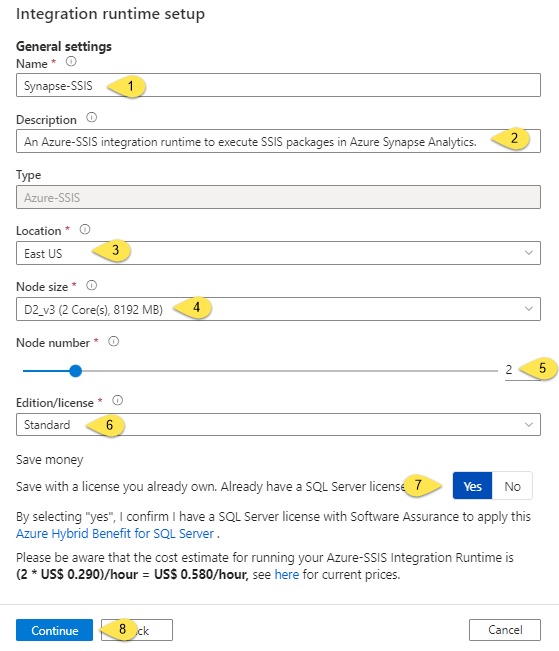
When the “Integration runtime settings – General settings” blade displays:
- Enter a name for the integration runtime
- Enter an (optional) description
- Select the Location property (I accepted the default)
- Select the Node size property
- Set the Node number property (I accepted the default)
- Select the Edition/license
- If you already own a SQL Server license, click the Yes button in the “Save money” configuration
- Click the Continue button:
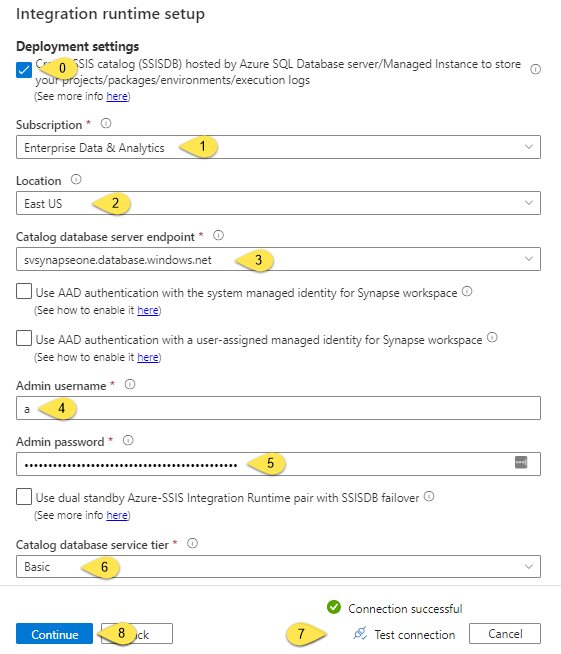
When the “Integration runtime settings – Deployment settings” blade displays:
0. Leave the “Create SSIS catalog (SSISDB) hosted by Azure SQL Database server/Managed Instance to store your projects/packages/environments/execution logs” checkbox checked (the default)
1. Select an Azure subscription
2. Select a location (I accepted the default)
3. Select an Azure SQL database instance on which to store the SSISDB database (the SSIS Catalog)
4. Enter the Azure SQL DB Admin username into the “Admin username” property textbox
5. Enter the Azure SQL DB Admin password into the “Admin password” property textbox
6. Select a “Catalog database service tier”
7. Click the “Test connection” link to, well, test the connection. If all goes as planned, “Connection successful” displays
8. Click the Continue button to proceed:
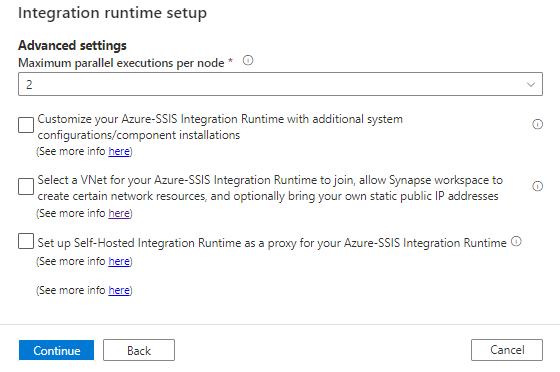
When the “Integration runtime settings – Advanced settings” blade displays, accept the defaults (for our purposes):
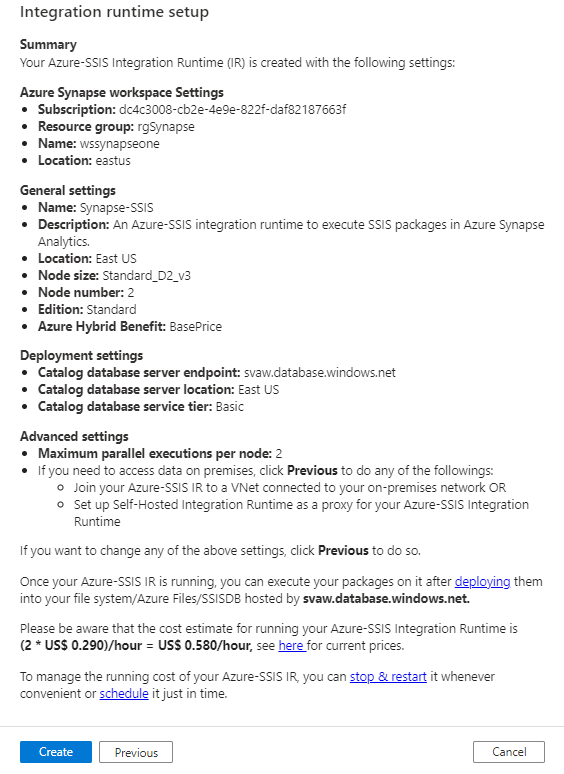
When the “Integration runtime settings – Summary” blade displays, check the settings and then click the Create button:
When the Create button is clicked, the Azure-SSIS integration runtime process commences:

The configuration is saved and – if all goes as planned – the integration runtime starts:
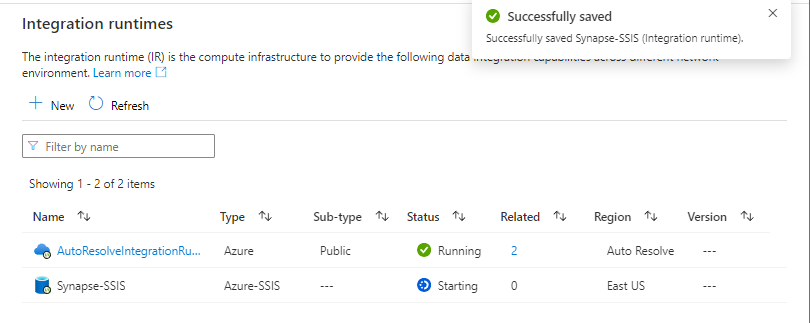
After some amount of time, the integration runtime begins running:
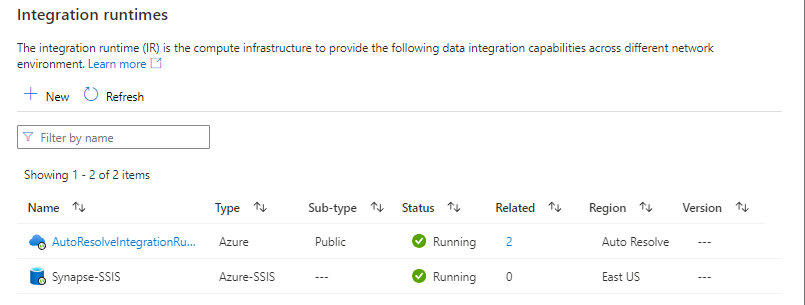
And that’s it. You have created an Azure-SSIS integration runtime in Azure Synapse Analytics.
Want to Learn More?

I deliver live, online SSIS training. At the time of this writing, the next set of public course deliveries is scheduled for 28 Mar 2022 – 07 Apr 2022. Access the most up-to-date schedule for live, online training at the Enterprise Data & Analytics Training page.
I also deliver private training for enterprise teams. Contact me for more information or schedule a meeting to discuss private training.
Access recorded training any time! Sign up for Premium Level and gain access to recorded training for a full year!
One thought on “One Way to Create an Azure-SSIS IR in Synapse Analytics”