

This is part of a series of posts. This post focuses on using Azure Data Factory with a GitHub repository.
- One Way to Add an Existing Data Factory to Github, Part 1
- One Way to Add an Existing Data Factory to Github, Part 2
- One Way to Add an Existing Data Factory to Github, Part 3
Making Changes Using the Main Branch
Next, introduce a change to Azure Data Factory. In my Azure Data Factory at the time of this post, I have a single pipeline published (deployed). The pipeline is named “pipeline1” and pipeline1 contains a single Wait activity. I introduce a change by cloning this pipeline:
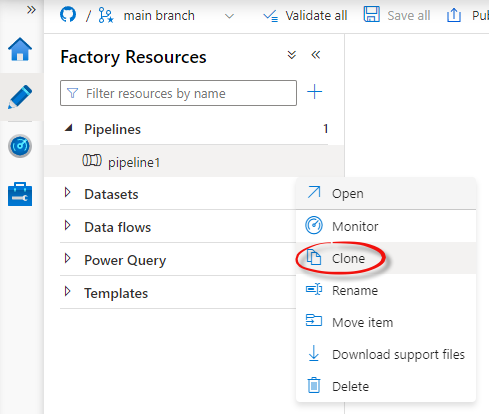
Provided git is configured and connected to my ADF; once the pipeline is cloned, the “Save All” button is displayed and active:

Click the “Save all” button.
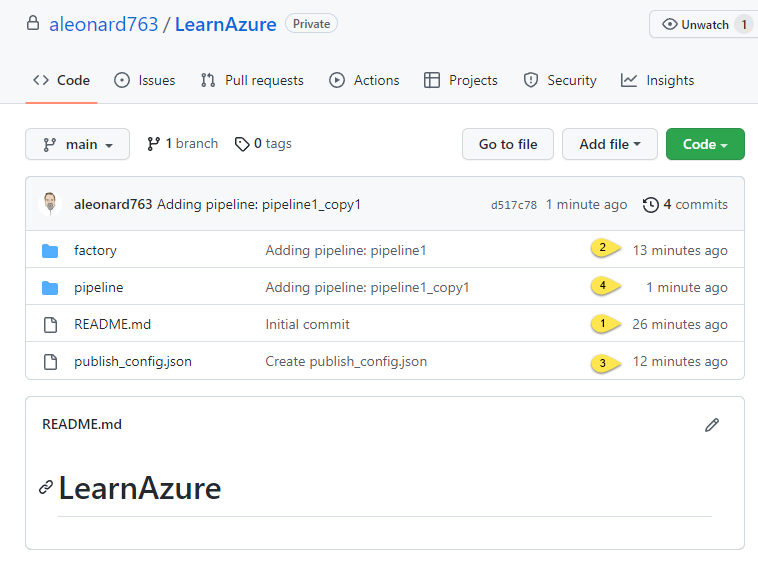
Navigate to the github repository. In the image below, we observe:
- The initial commit-on-creation which included the README file
- The addition of pipeline1 JSON in the factory folder
- The addition of the publish_config.json file
- The addition of the cloned pipeline named pipeline1_copy1
This is a snapshot of the changes to my Azure Data Factory since setting up the git repository – including setting up the git repository (commit #1).
While it is possible – especially in single-developer scenarios – to use a single branch as shown above, it is not recommended. Git is designed to support teams of developers working on the same code at the same time. Breathe. We’re not there yet.
Let’s take this opportunity to encourage…
Isolating Changes: Create a Branch
Applying what we’ve configured and learned thus far, let’s put this to work in a code-management workflow.
When it’s time to make a change, first create a new branch. I can hear some of you thinking, “Why, Andy? Why create a new branch?” That’s an excellent question. I am so glad you asked! Think of the new branch as a temporary copy of the current state of my Azure Data Factory. At a high level, the workflow goes like this:
- Make a copy of the current branch (“main”), giving the new branch a new name (like “rename-pipelines”)
- Makes some changes to the ADF objects in this new branch
- Save the changes to the new branch
- Create a pull request to merge the changes contained in the new branch back into the main branch
- Delete the temporary branch (“rename-pipelines”)
- Return to working on the (newly-updated) ADF objects in (newly-updated) main branch
Let’s Go!
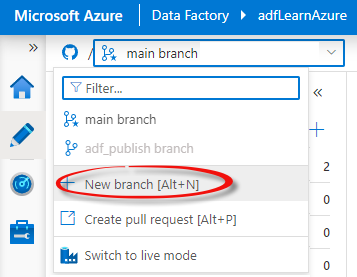
First, click the Branches dropdown and then click “+ New branch”:
What is the change I am about to make? I am going to rename at least one pipeline, so the name of the branch I choose is “rename-pipelines.”
:
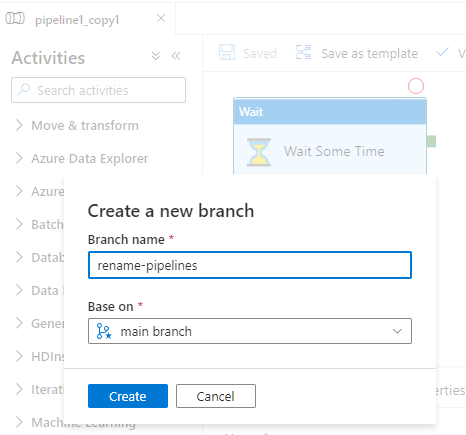
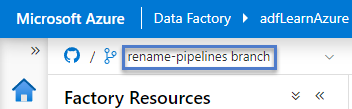
Azure Data Factory now indicates we are working in the new branch:
Complete the changes you desire to make to your Azure Data Factory, click the “Save all” button, and then…
Create a Pull Request
Before we forge ahead, I have a confession. The name “pull request” threw me for the longest time. What helped me was to think about “pull request” from the perspective of the working branch – “main” in this case. I am requesting to pull the changes stored in a different branch into the working branch.
You can start creating a pull request right in Azure Data Factory Studio! I think this is awesome.
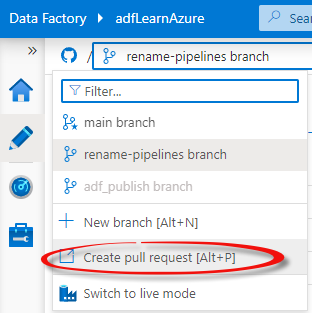
Click the Git dropdown in ADF Studio, and then click “Create pull request”:
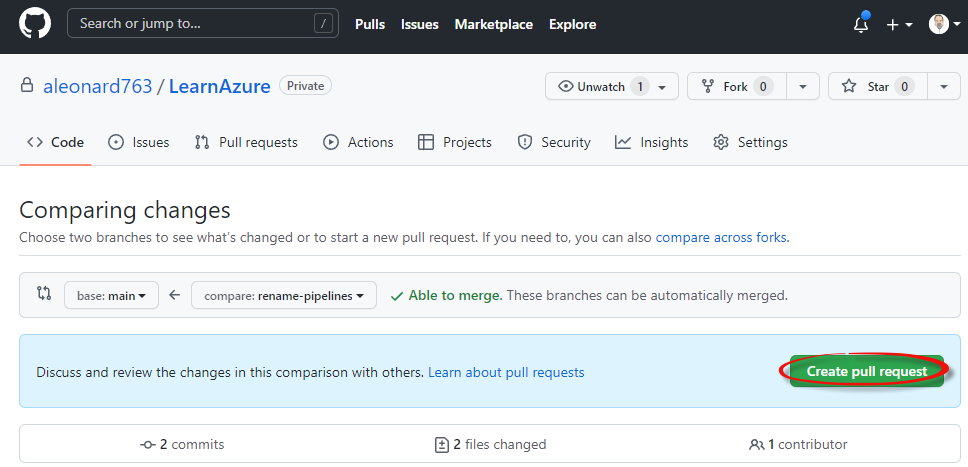
Clicking “Create pull request” takes you to your repository at github.com. Not only that, but clicking “Create pull request” takes you to the page to create a pull request for your current branch to your working branch:
I highly recommend adding a comment – even if you are working alone. For years, I’ve been using the format <date> – <name> – <description> for code comments. Trust me on this: Future you will thank you.
Regarding comparing: It’s best to compare your branch with other branches before creating a pull request. Branch comparison is beyond the scope of this series.
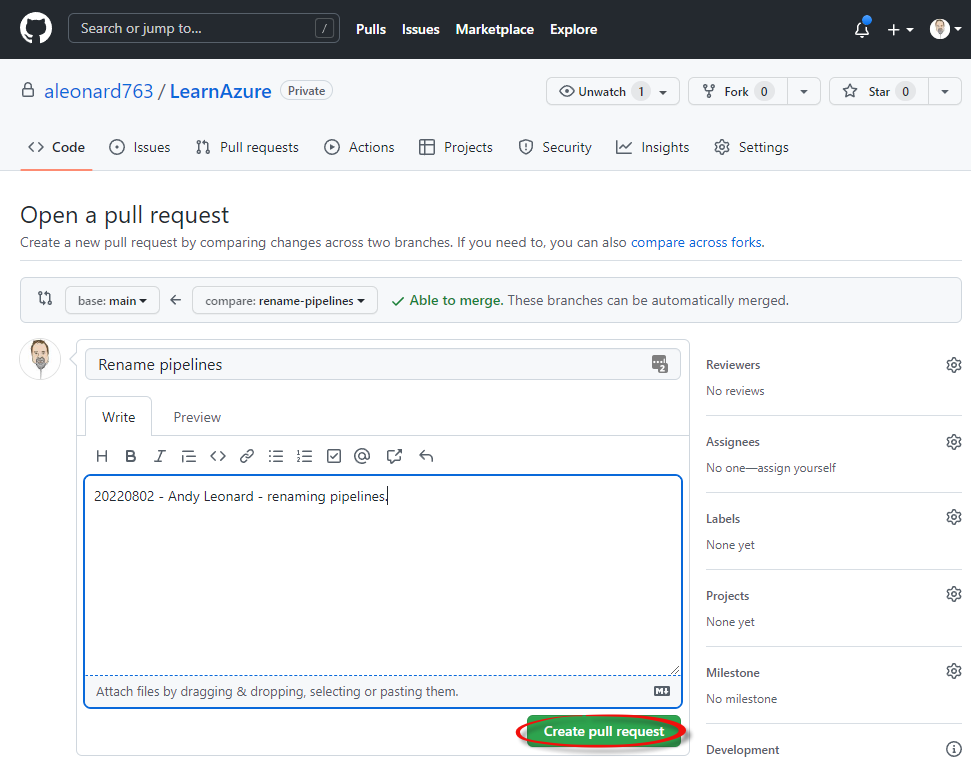
Click the “Create pull request” button to, well, create the pull request.
Merge the Pull Request
The next step is merging the pull request, which is (attempting to) combine the changes in your branch with the working branch.
Why did I write “(attempting to)?” I wrote “(attempting to)” because if you are working as part of a team of developers, it’s possible someone created a different branch from the working branch after you created your branch – and then merged their changes back into the working branch – all before you finished your changes. Often, when this happens, a reconciliation of your branch (now based on outdated code) must be made with the now-updated working branch. Sometimes there are conflicts that must be addressed during these merge scenarios. Branch conflict resolution is beyond the scope of this series, I brought it up so you would at least know it’s a scenario you may encounter.
If you are working as part of a team, or if your enterprise practices a gated release management process (a process whereby changes are evaluated before release is allowed), a pull request will be subjected to one or more steps before being merged.
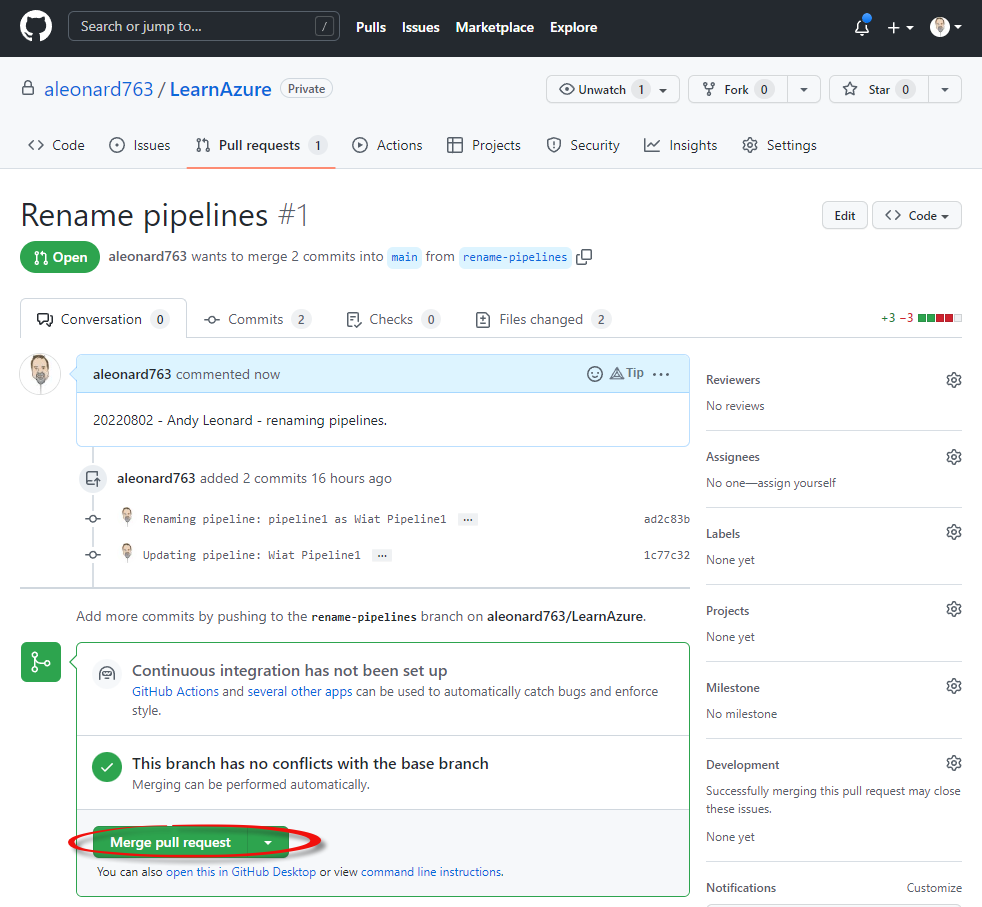
Click the “Merge pull request” button to proceed:
Gitub next displays a summary of the pull request merge for confirmation:
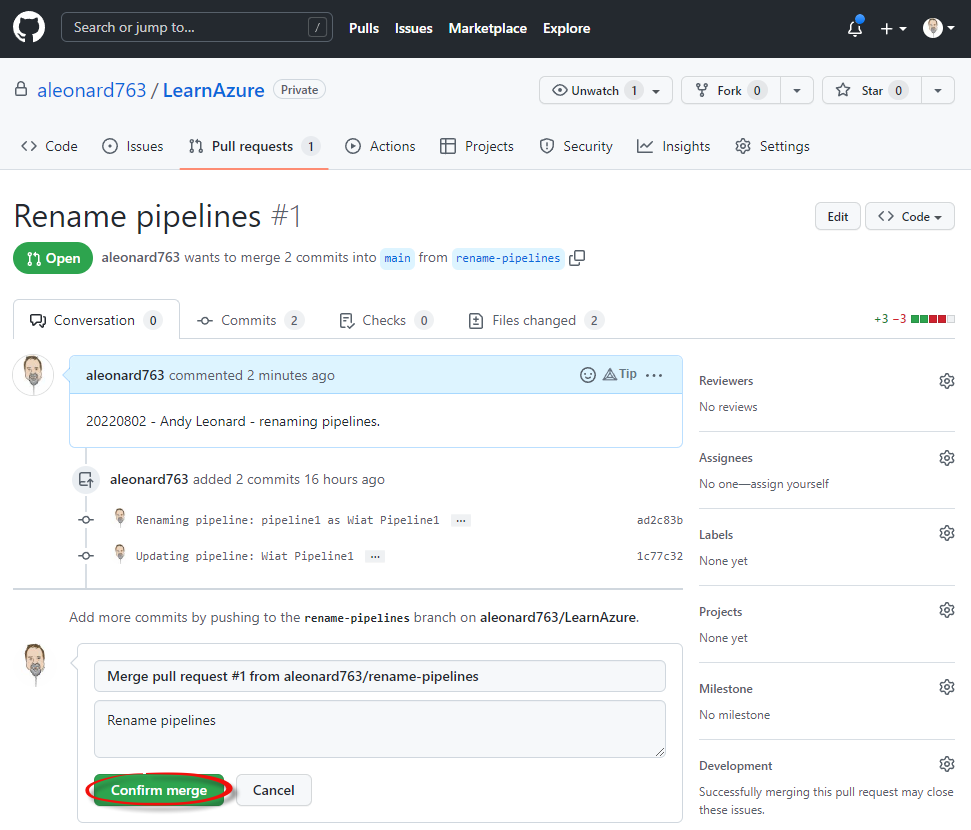
If you agree with the summary after review, click the “Confirm merge” button to proceed.
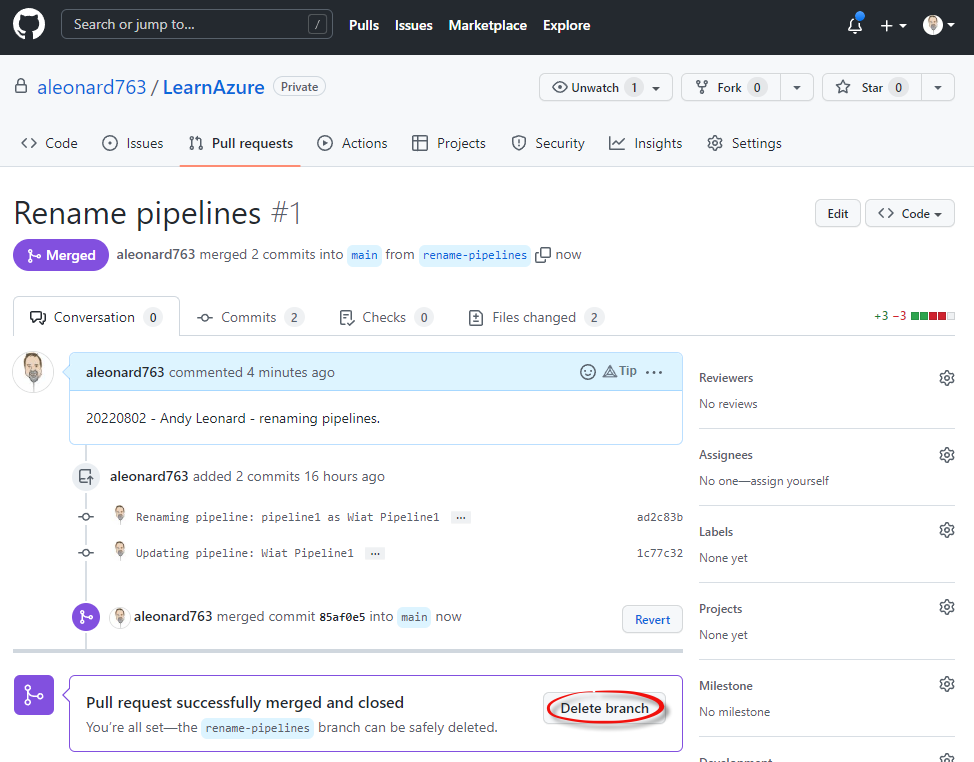
Delete Branch
Once the pull request has been merged into the working branch, there’s no need to keep a copy of the old branch you used for your changes. Click the “Delete branch” button to delete the now-merged branch:
Even though the old branch has been merged – and deleted – you still have options to revert and restore:
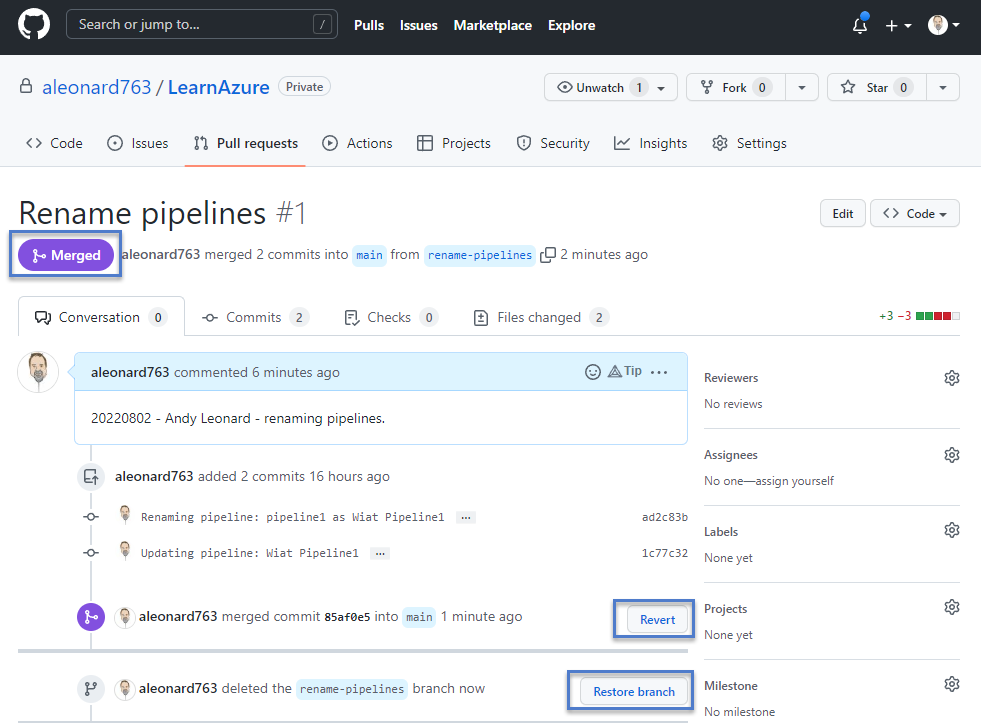
Reverting and restoring are beyond the scope of this series.
A Little Cleanup
Return to Azure Data Factory Studio. Dropdown the Branches list. You may see the branch you just deleted (“rename-pipelines” in this case) in the list:
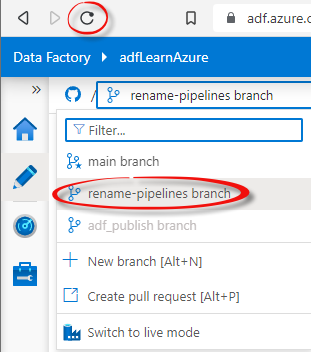
Refresh the Azure Data Factory Studio page in your browser.
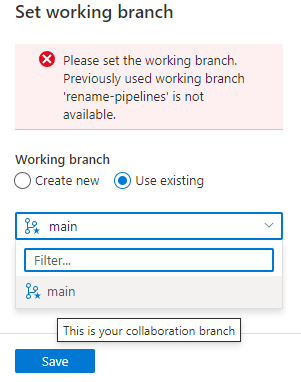
You may be prompted to select a new working branch:
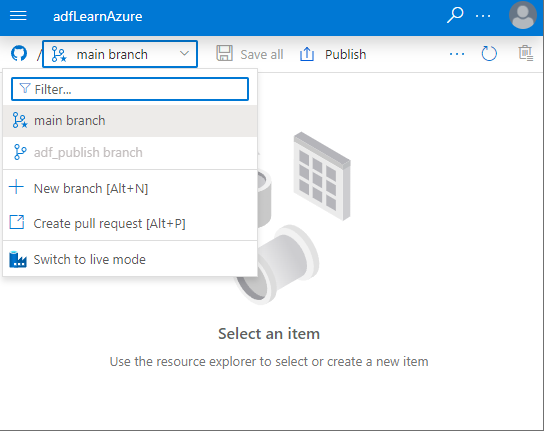
Once the working branch has been selected, the deleted branch should no longer appear in the Branches list:
Conclusion
As stated at the outset of this series, source control is challenging to learn and not a trivial exercise, but it is worth the trouble. I hope this series of posts is helpful in getting you started with git and Azure Data Factory!
Learn More

Join me Monday, 14 Nov 2022, for A Day of Azure Data Factory, a PASS Data Community Summit 2022 full-day pre-conference. Register today!
I’m presenting Master the Fundamentals of ADF at SQL Saturday Boston 7 Oct 2022. Register today!
Unable to make either of those events? Not to worry. Sign up today for Premium Level – All Recordings for 1 Year. Until 31 Aug 2022, use the coupon code “limitedtimediscount33” to save 33% at checkout!
:{>
One thought on “One Way to Add an Existing Data Factory to Github, Part 3”