
In November 2023, I shared how to start learning Microsoft Fabric in a post titled Start a Fabric Free Trial. In December 2023, I shared how to Create a Workspace in Fabric. In this post, I document one way to create a pipeline to load data from a CSV file stored in Azure Blob Storage to Azure SQL Database in your new Fabric workspace.
Assumptions
I assume:
- You have access to an Azure account
- You have experience using Azure Blob Storage, especially configuring Shared Access Signatures (SAS) for access (I recommend Azure Storage Explorer, which is free)
- You have some test data loaded into an Azure Blob Storage container
- You have experience building Azure SQL Database instances, databases, and tables
- You are building your first Microsoft Fabric Data Factory pipeline
- Additional stuff that I forgot (for which I apologize in advance). Please comment if you encounter something I left out.
Construction
To get started,
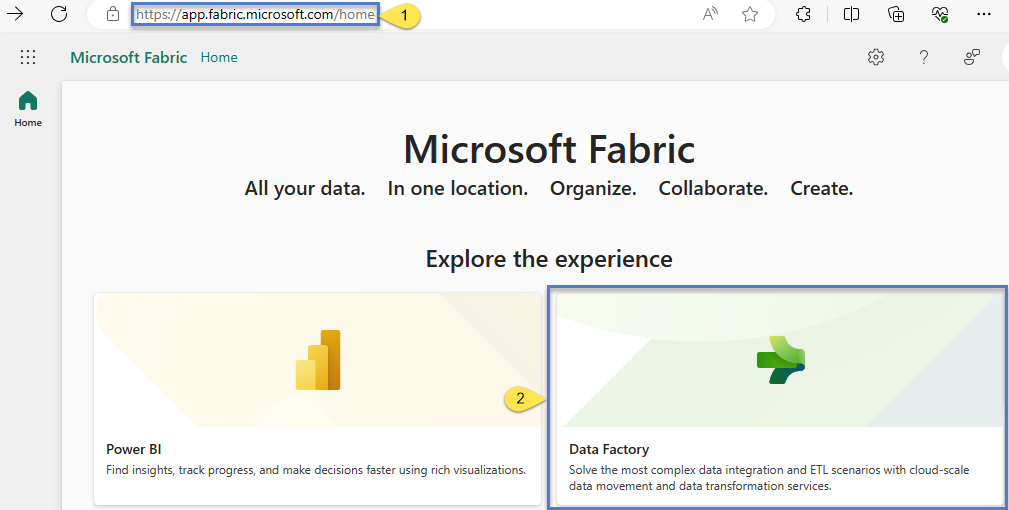
- Navigate to the Microsoft Fabric home page and log in
- Click the Data Factory tile:
When the Data Factory page displays, the current workspace may be the default workspace:
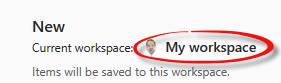
If you want to change the current workspace, click Workspaces on the left menu:

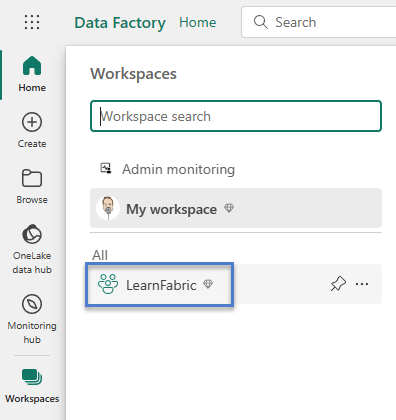
When the Workspaces page displays, click the name of the workspace in which you desire to work (my workspace is named “LearnFabric”):
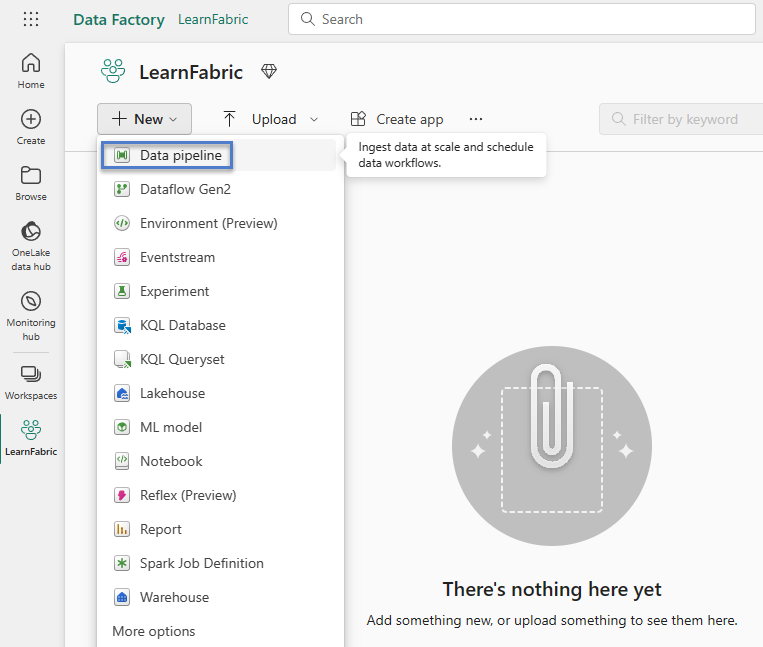
When your workspace displays, click the “+ New” dropdown and select “Data pipeline” to create a new data pipeline in your workspace:
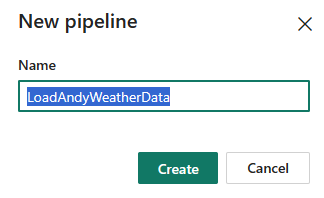
When the “New pipeline” dialog displays, enter a name for your pipeline and then click the Create button:
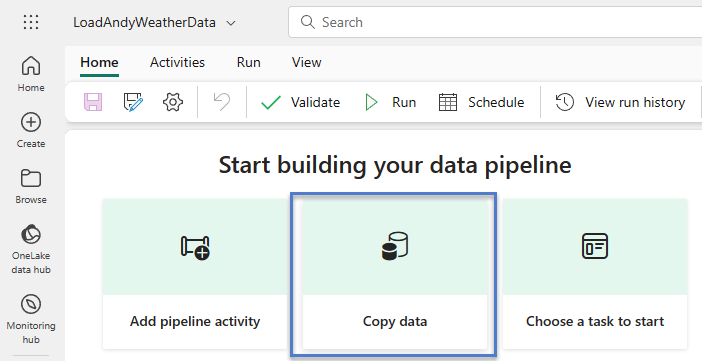
When the pipeline design surface displays, click the “Copy data” tile:
The “Copy data” wizard displays showing the first step – “Choose data source” – selected.
There are several sample datasets available. If you desire to load from a CSV file stored in Azure Blob Storage, scroll until you reach the heading “Data sources,” then click “Azure Blob Storage,” and then click the Next button:

If you have an existing connection configured in this workspace in Fabric Data Factory, you may select it.
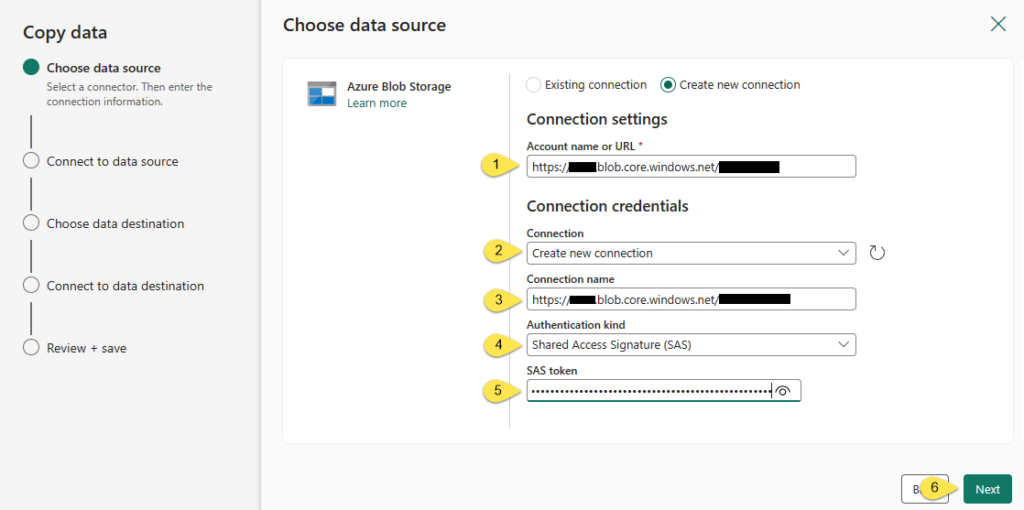
If you do not have an existing connection configured in this workspace in Fabric Data Factory, you may create a new connection by selecting the “Create new connection” option, which displays the following connection configuration properties:
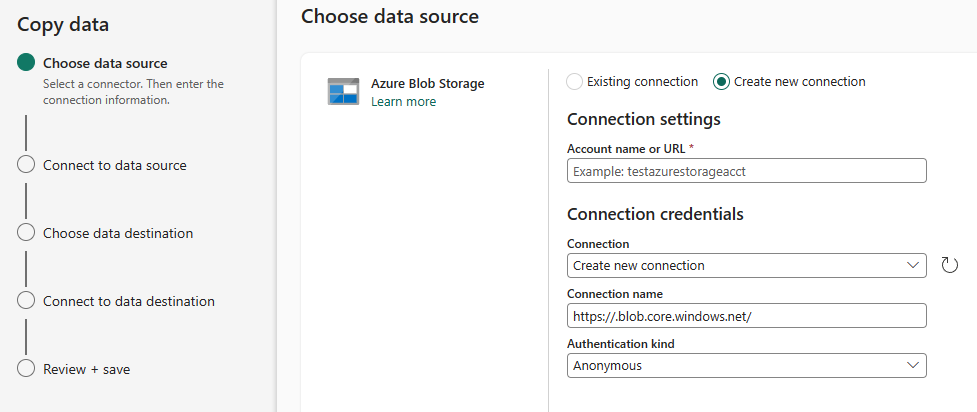
I create a new connection by configuring the following connection properties:
- [Connection settings] Account name or URL – https://<nnnnnnnnnn>.blob.core.windows.net/<ccccccccccccccc> (account name and container name obfuscated)
- [Connection credentials] Connection – Create new connection
- [Connection credentials] Connection name – https://<nnnnnnnnnn>.blob.core.windows.net/<ccccccccccccccc> (account name and container name obfuscated)
- [Connection credentials] Authentication kind – Shared Access Signature (SAS)
- [Connection credentials] SAS token – <SAS token>
- Click the Next button to proceed:
I found this next screen confusing at first:
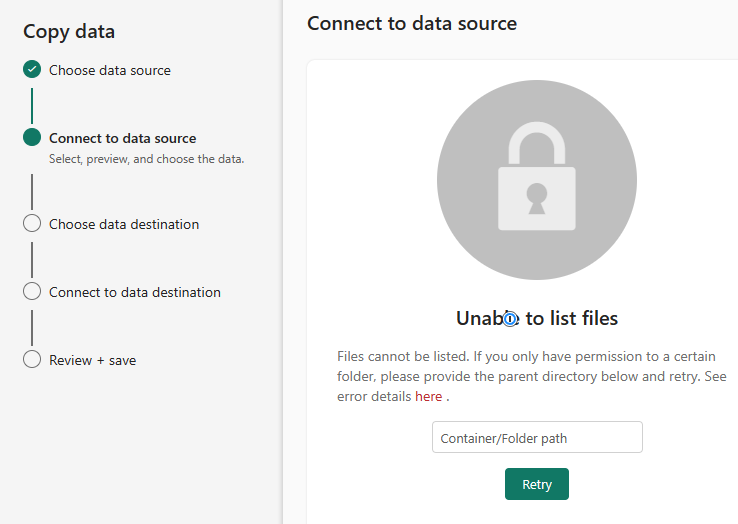
To me, this looks like I misconfigured the source connection settings but that is not the case. All that is needed is for me to enter the “Container/Folder path” and click the Retry button.
The container is included in the “Account name or URL” property I configured on the previous screen. I would think if the string configured in the “Account name or URL” property begins with “https://” and contains “blob.core.windows.net/” it would be safe to assume the next thing beyond the last slash in “blob.core.windows.net/” would be the container name, but I could be missing a use case (or several use cases, or possible future / reserved use cases because I, too, am learning).
In my case, there is no folder; I need only enter the container name and click the Retry button:

Enter your container/folder path and then click the Retry button.
The contents of my Azure Blob Storage container now display beneath the “Select a container or file” category heading on the “Connect to data source” step of the Copy data wizard:
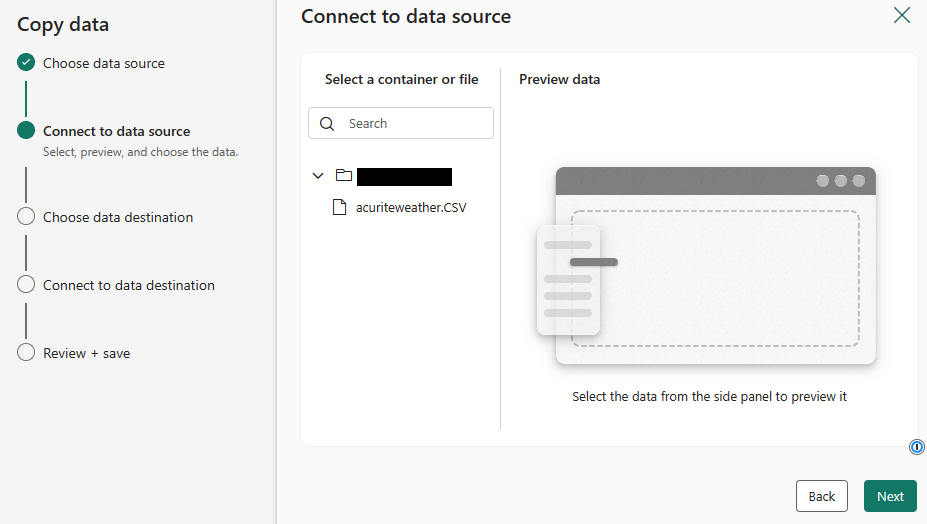
The file I will use is acuriteweather.CSV, which is generated by an application that is available for use with my (AcuRite) AndyWeather weather station.
I blogged about the weather station and how I collect and move weather data in this post titled AndyWeather Internet of Things (IoT).
Sometimes, when I click on the acuriteweather.CSV file, the following error screen loads:
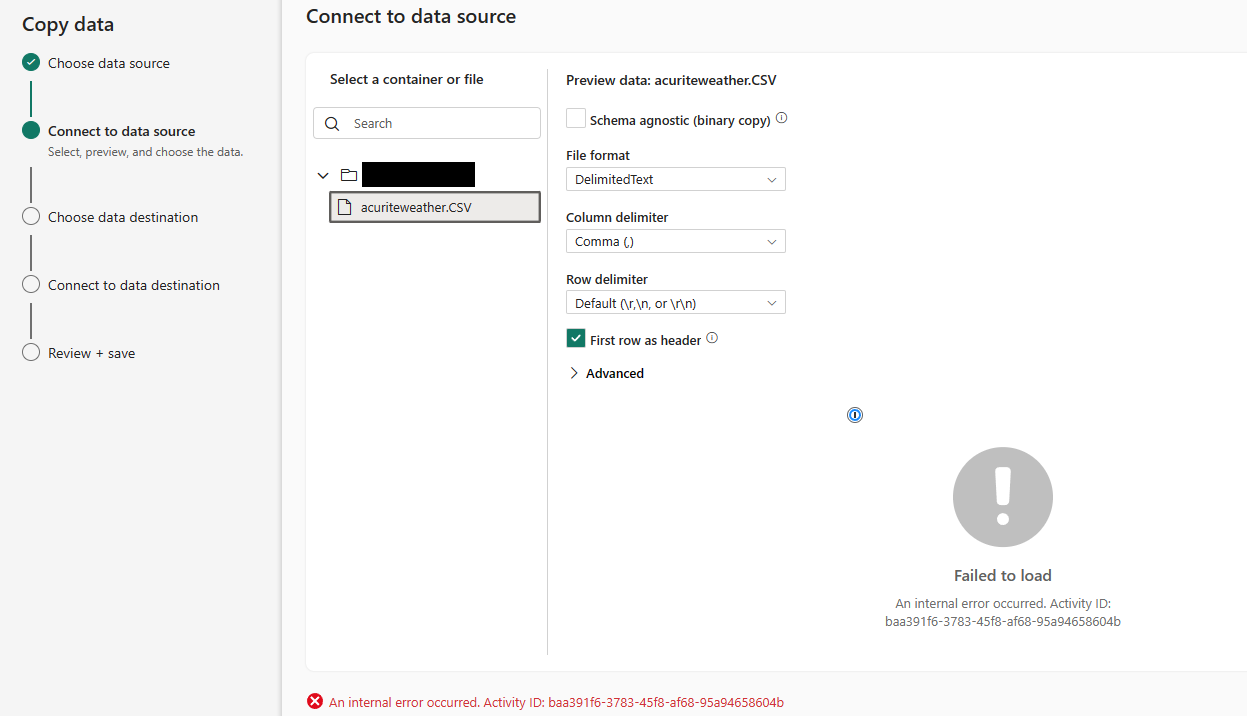
When I get this response, it seems to indicate something went wrong when I clicked the file name.
One way to clear this intermittent error is simple (but non-intuitive):
- Click the “File format” property dropdown
- Re-select “DelimitedText”:
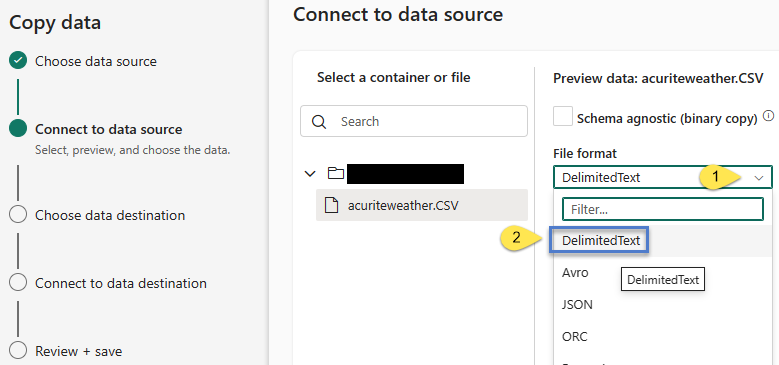
It’s the re-select part that I find confusing. “DelimitedText” appeared already selected. Again, this error comes and goes at the time of this writing (December 2023). </whining>
After the re-select, some data displays:
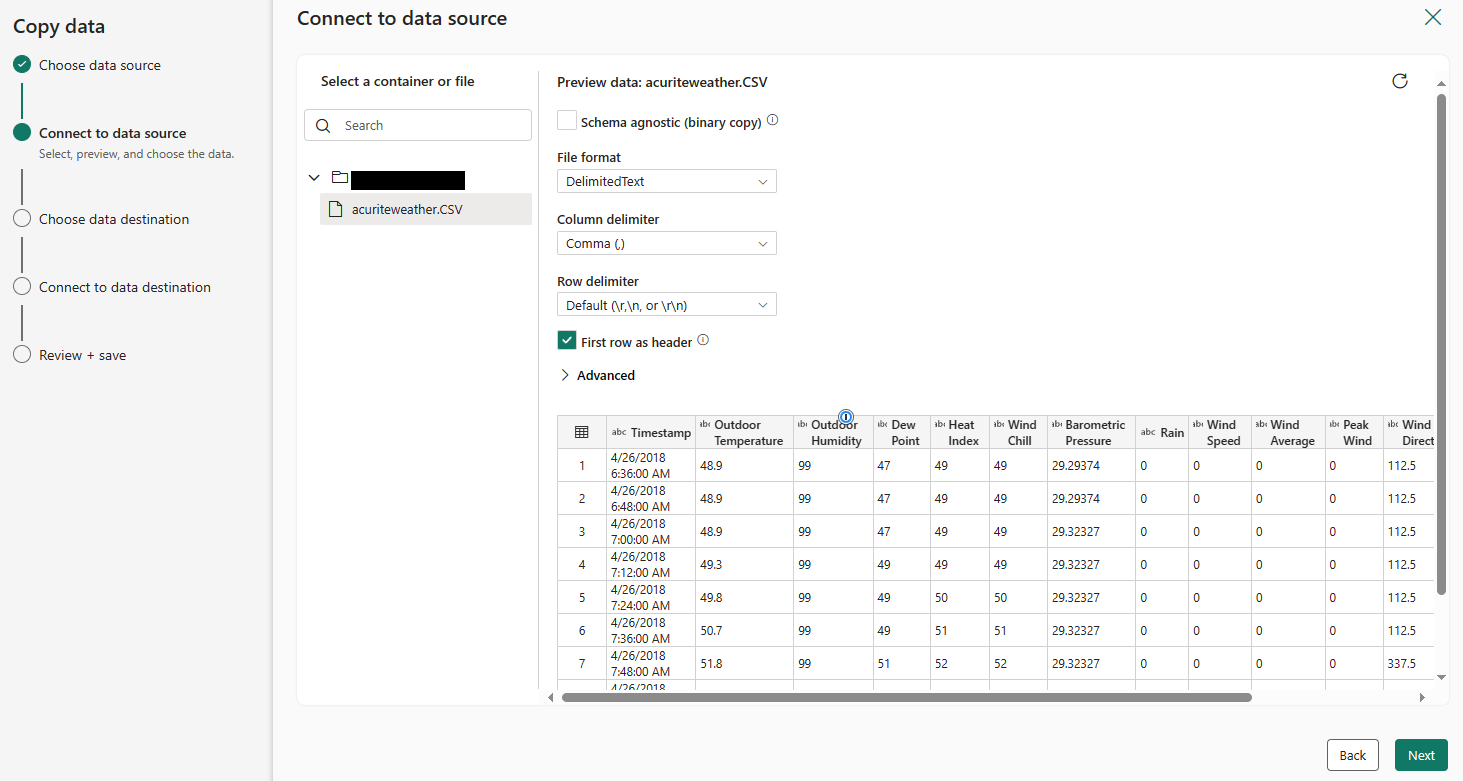
Click the Next button to continue.
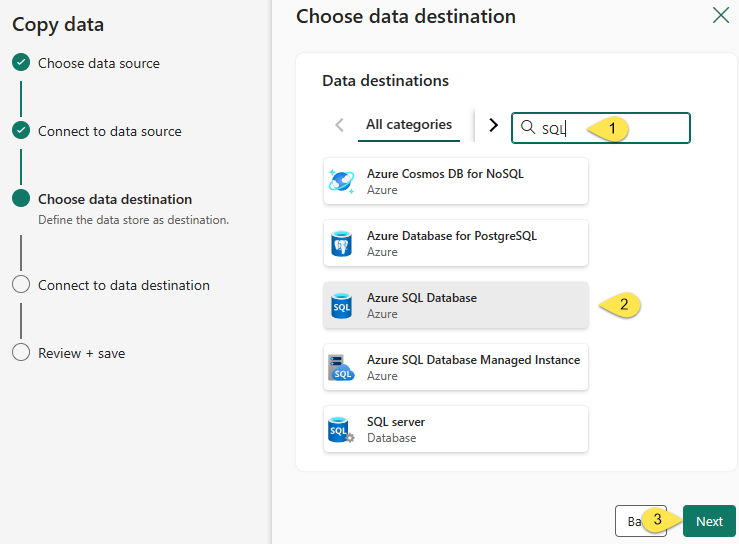
The “Choose data destination” step is next. Since I am loading to an Azure SQL Database, I:
- Enter “SQL” into the search / filter to narrow the displayed options for destinations
- Select “Azure SQL Database”
- Click the Next button to configure the destination connection:
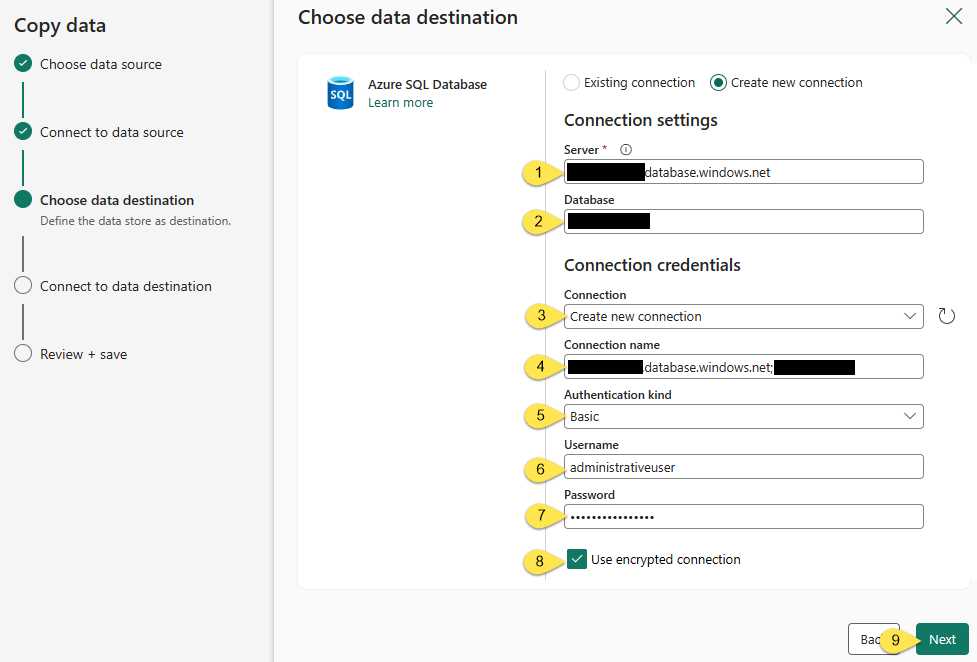
Select a destination Azure SQL Database by configuring the following properties:
- [Connection settings] Server – the instance of your Azure SQL Database server
- [Connection settings] Database – the name of your database
- [Connection credentials] Connection – select “Create new connection”
- [Connection credentials] Connection name – enter a name for your connection
- [Connection credentials] Authentication kind – select your authentication method (I selected “Basic” and that sets the remaining connection properties)
- [Connection credentials] Username (if you selected an Authentication kind that requires a username)
- [Connection credentials] Password (if you selected an Authentication kind that requires a password)
- [Connection credentials] Use encrypted connection
- Click the Next button to proceed:
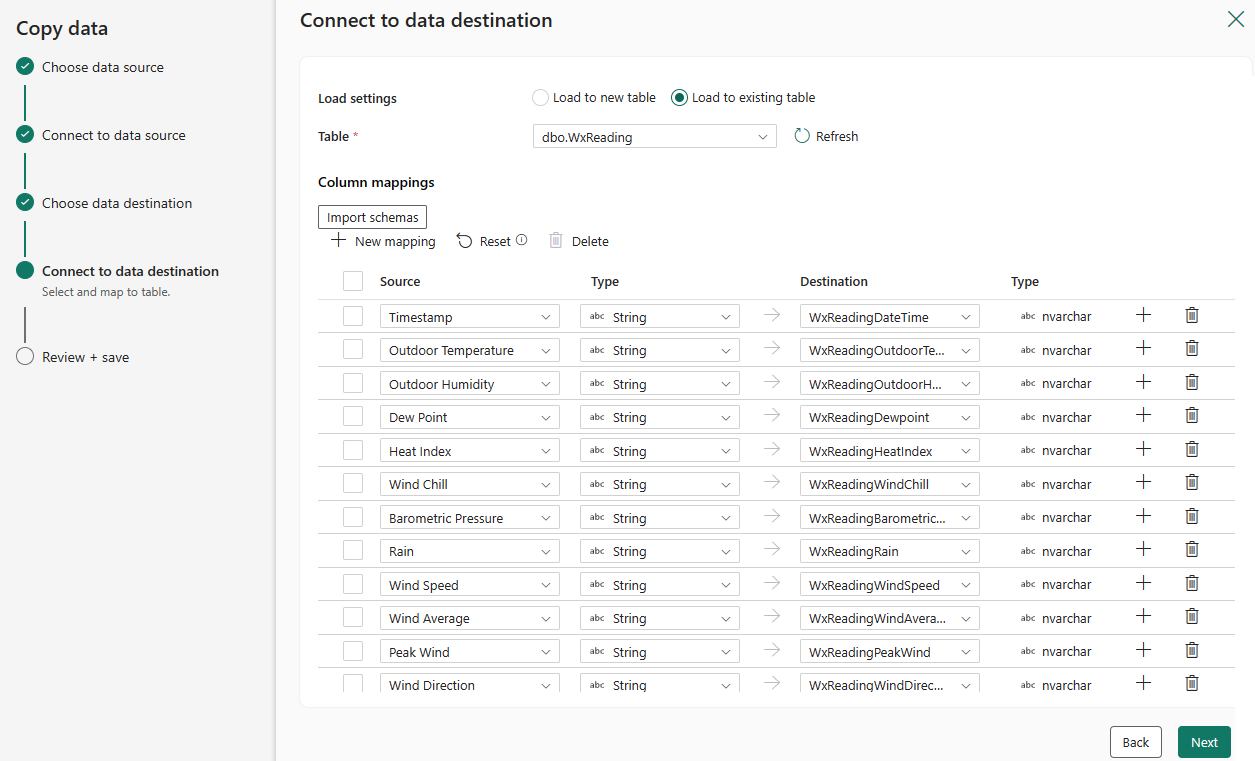
Select an existing table or create a new table.
If a schema mapping does not display, click the “Import schemas” button.
For demo purposes, I created a table named dbo.WxReading beforehand. The columns in the table are named differently from the column names in the CSV file. If you select the “Load to new table” option, the table will be named the name of the source file, “acuriteweather” in this case – and the columns in the new table will be named the same as the columns in source file. I’m not a fan of spaces in column names, which is one of the reasons I created the dbo.WxReading table beforehand.
I’m pretty sure the “auto-mapping-alignment” you see in the image below is due to the fact the table columns were created in the same position as the fields in the CSV file.
Click the Next button to proceed:
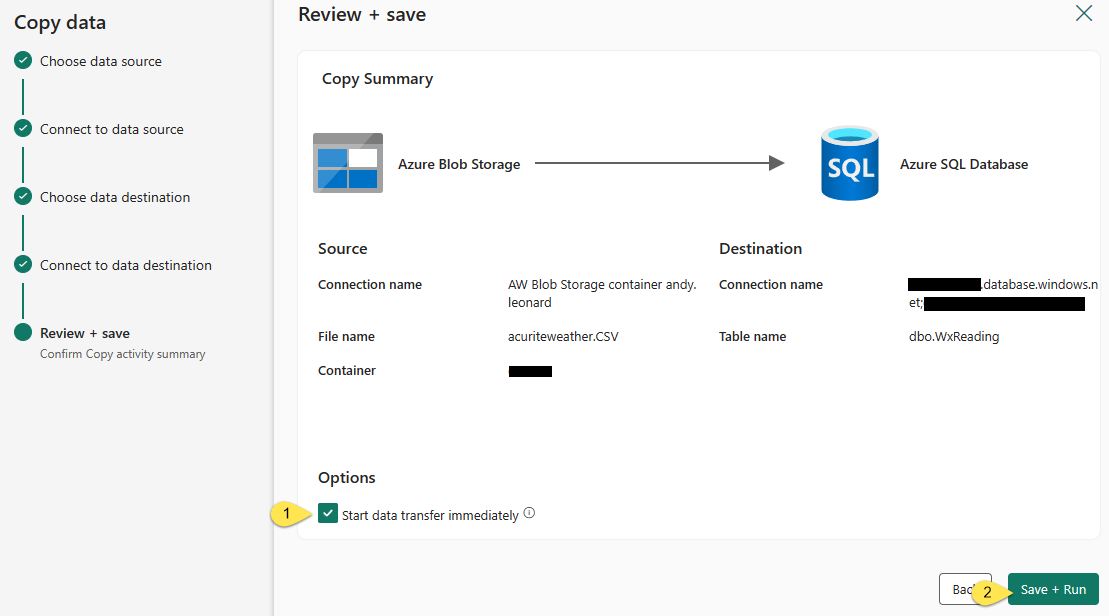
The final step of the Copy Data wizard is “Review + save”. Check Source and destination connection configurations, and then:
- Configure the “Start data transfer immediately” setting
- Click the “Save + Run” button:
If the “Start data transfer immediately” setting on the “Review + save” step of the Copy Data wizard was checked – and if your configuration is valid – the pipeline will display and begin running (…in a few seconds, depending upon your connection speed and how busy Fabric’s Data Factory engine is at the moment…):

If execution succeeds, the Copy activity status and pipeline output should indicate Succeeded statuses:

You may re-execute the pipeline by clicking the Run button.
Conclusion
This post covered one way to configure a basic Microsoft Fabric Data Factory pipeline.
Although Fabric is GA (Generally Available), my experience indicates portions of the platform remain a work in progress.
That’s an observation, not a complaint.
My experience also informs me cloud platforms change daily.
Although regression testing should check all existing functionality, things are occasionally missed.
What worked yesterday may not work today.
What works today may not work tomorrow.
That’s the definition of software engineering (especially in the cloud).
My advice is:
- Do your best
- Let the team know if you experience an issue
- Roll with it
Enjoy!
Comments